You have found www.hamrx8.com
Copyright.... Website created & maintained by GHQP

PLATE ALUMINIUM BED FOR MY CNC ROUTER
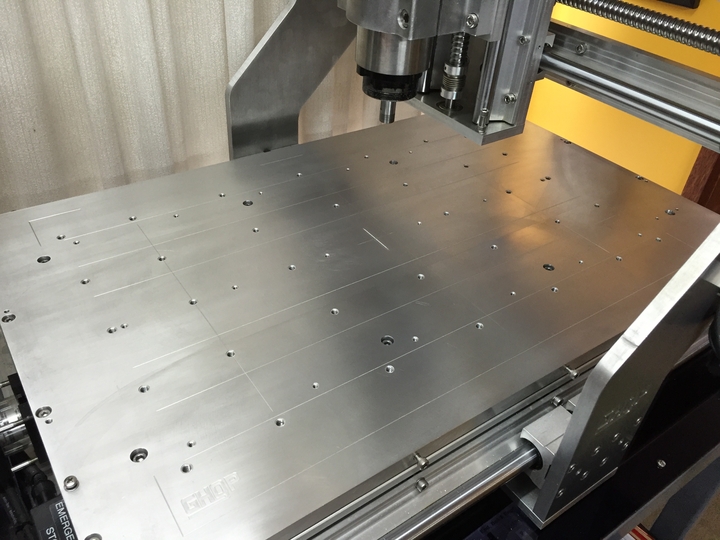
Originally when I built the CNC Router I made up the bed using multiple lengths of 90mm wide Slotted Extruded Aluminium, however I was never completely happy with its surface flatness and rigidity. For a few years I had the intention to replace the original bed with a solid piece of surface finished plate aluminium and a few weeks ago I finally got around to doing it.
The only part of the project I couldn't do myself was surfacing the plate, I took this to a local machine shop and had it done on a big mill using a large fly cutter. The Plate itself is 16mm thick and to increase its rigidity even more and to stabilize it I secured two ribs along its Y-Axis. The secret is to only secure the ribs once and never remove them ever.
I found it easy to set and align the plate so that the Z-Axis variation is within 0.02mm, a little more than that at the extremities, but I rarely have jobs that extend that far. Overall I am extremely pleased with the result and it was all worth the effort.
Please note that all the information and downloads provided on this page are intended for personal use only.
If you intend to use any of this information for commercial purposes please contact me for authority before doing so.
If you intend to use any of this information for commercial purposes please contact me for authority before doing so.
Page Created March 2016
DOWNLOADS
Dimensioned Drawings (.svg files) - All Machined Parts. Exported from Vectric Aspire. (zip file 15KB)
3D CAM Simulations (.jpg) - All Machined Parts. Exported from Vectric Aspire (zip file 124KB)
Full set of still photos (.jpg) - Those used for making the video. (zip file 8.4MB)
Scalable Vector Graphics (.SVG) is an XML-based vector image format for two-dimensional graphics with support for interactivity and animation. The SVG specification is an open standard developed by the World Wide Web Consortium (W3C) since 1999.
You can download a free SVG editor/viewer: "Inkscape SVG Editor" https://inkscape.org.
You can download a free SVG editor/viewer: "Inkscape SVG Editor" https://inkscape.org.
Vectric Aspire .crv3D files (zip 481KB)
This video was edited using still images and video that I took throughout the development and assembly process.
Click the image to play the YouTube Video
Click the YouTube Logo to go to my Channel
Click the image to play the YouTube Video
Click the YouTube Logo to go to my Channel
Image Collection
Update to the Gantry Ball Nut Mounting
I may add some notes soon
An explanation of what the various initial drilled and threaded holes are for. Click the image to enlarge.


