
You have found www.hamrx8.com
Copyright.... Website created & maintained by GHQP

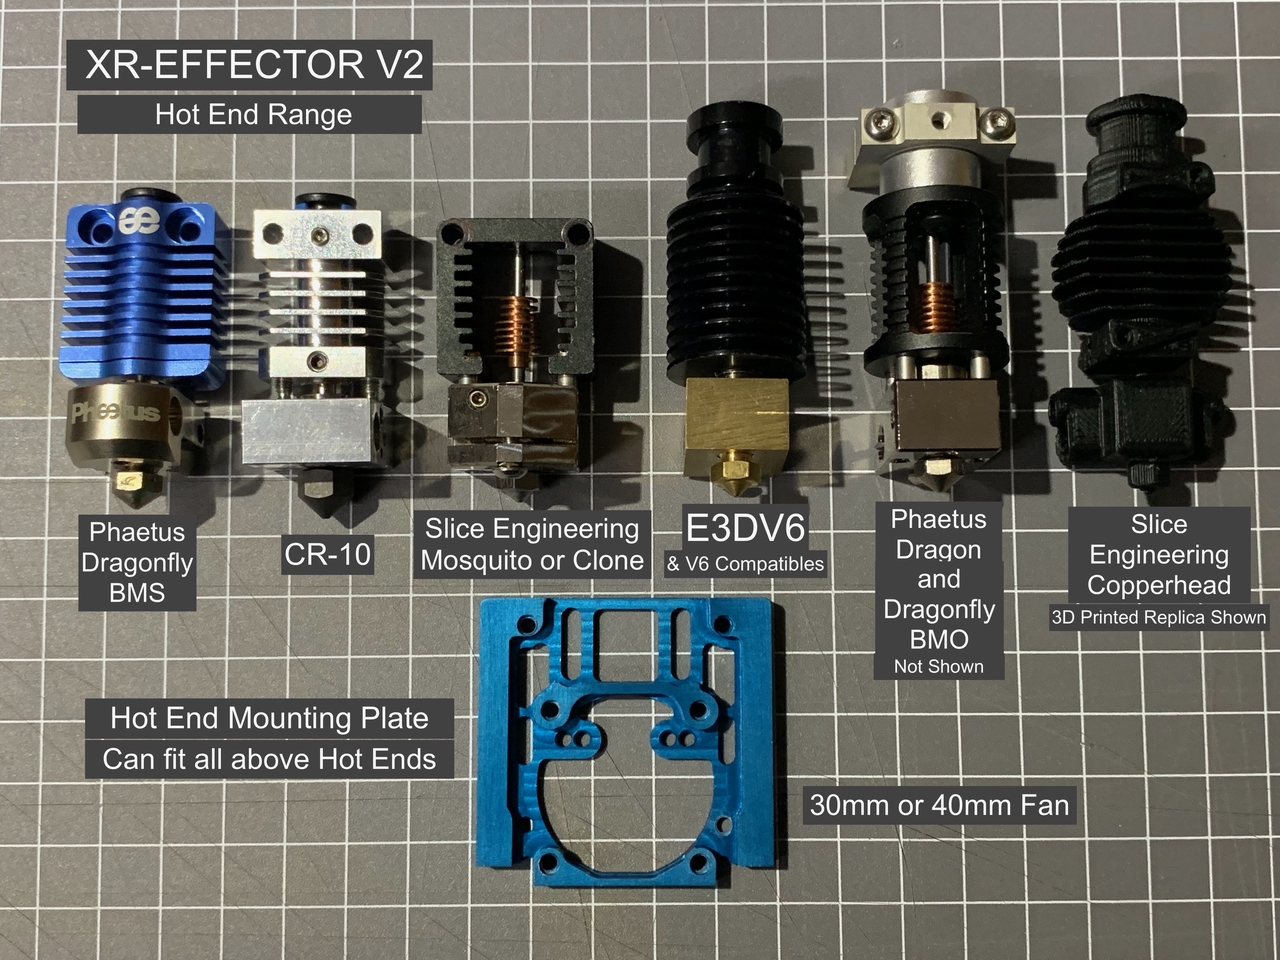
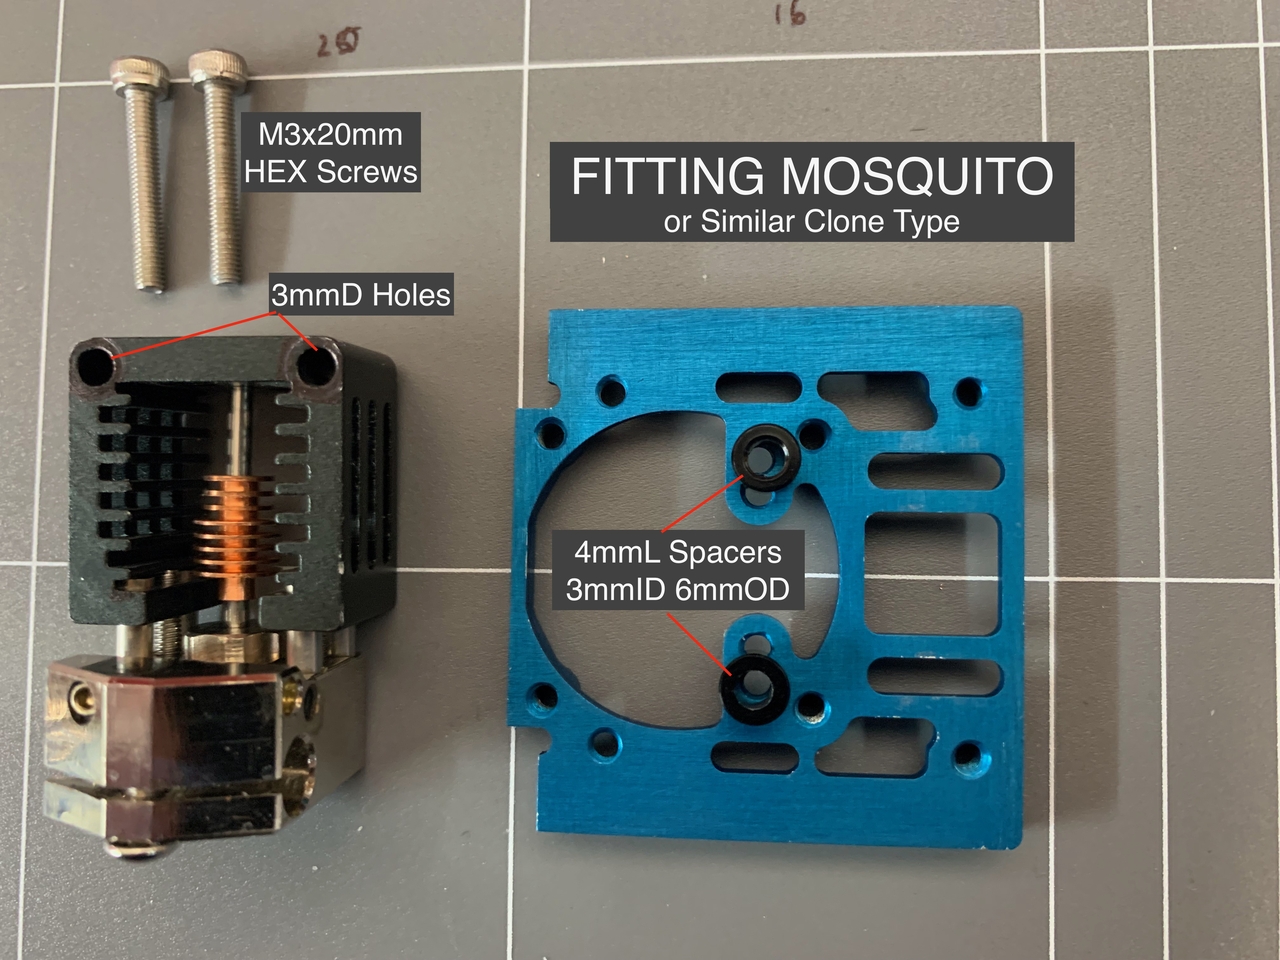
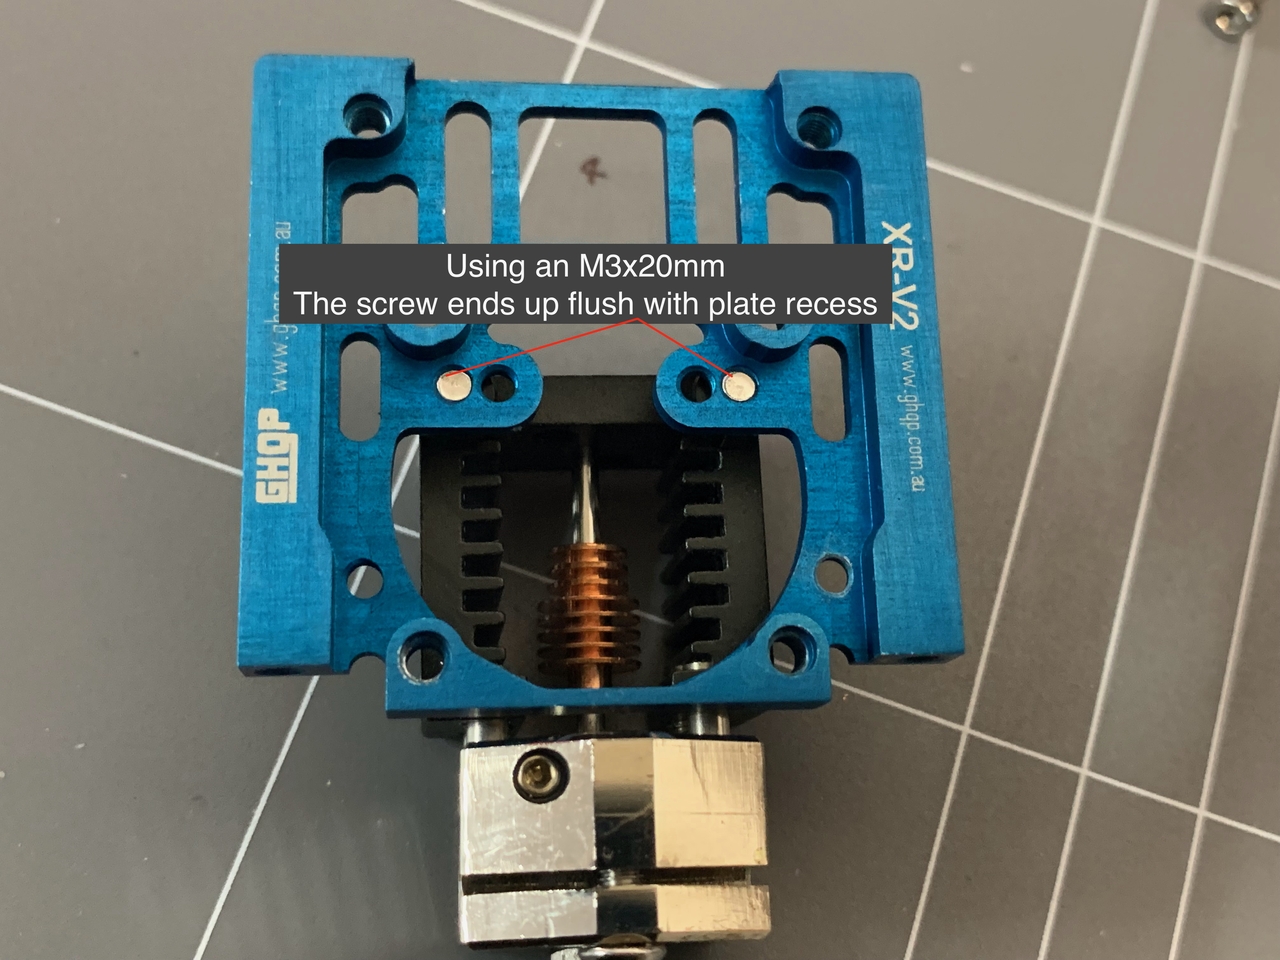
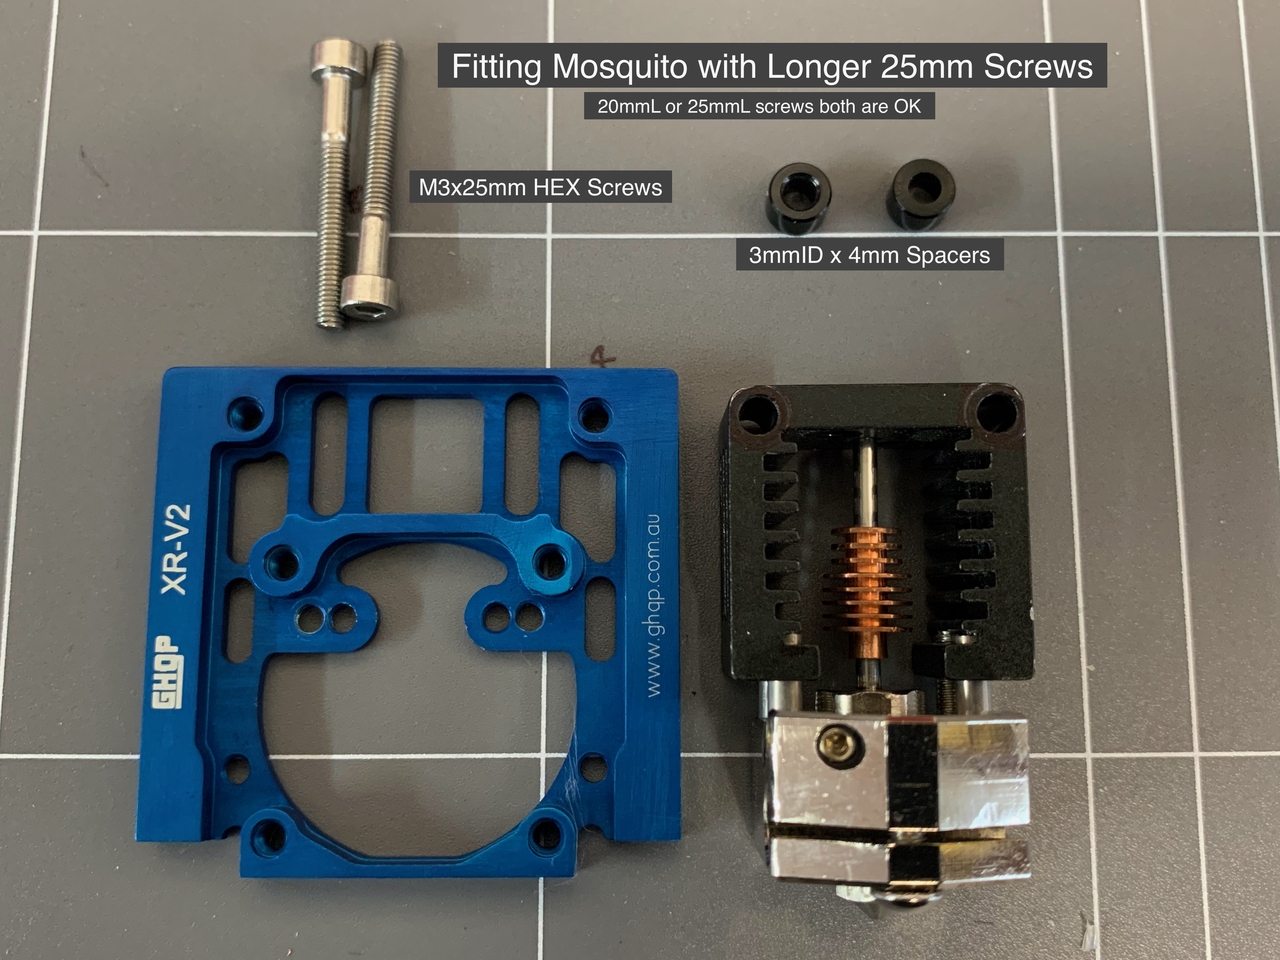
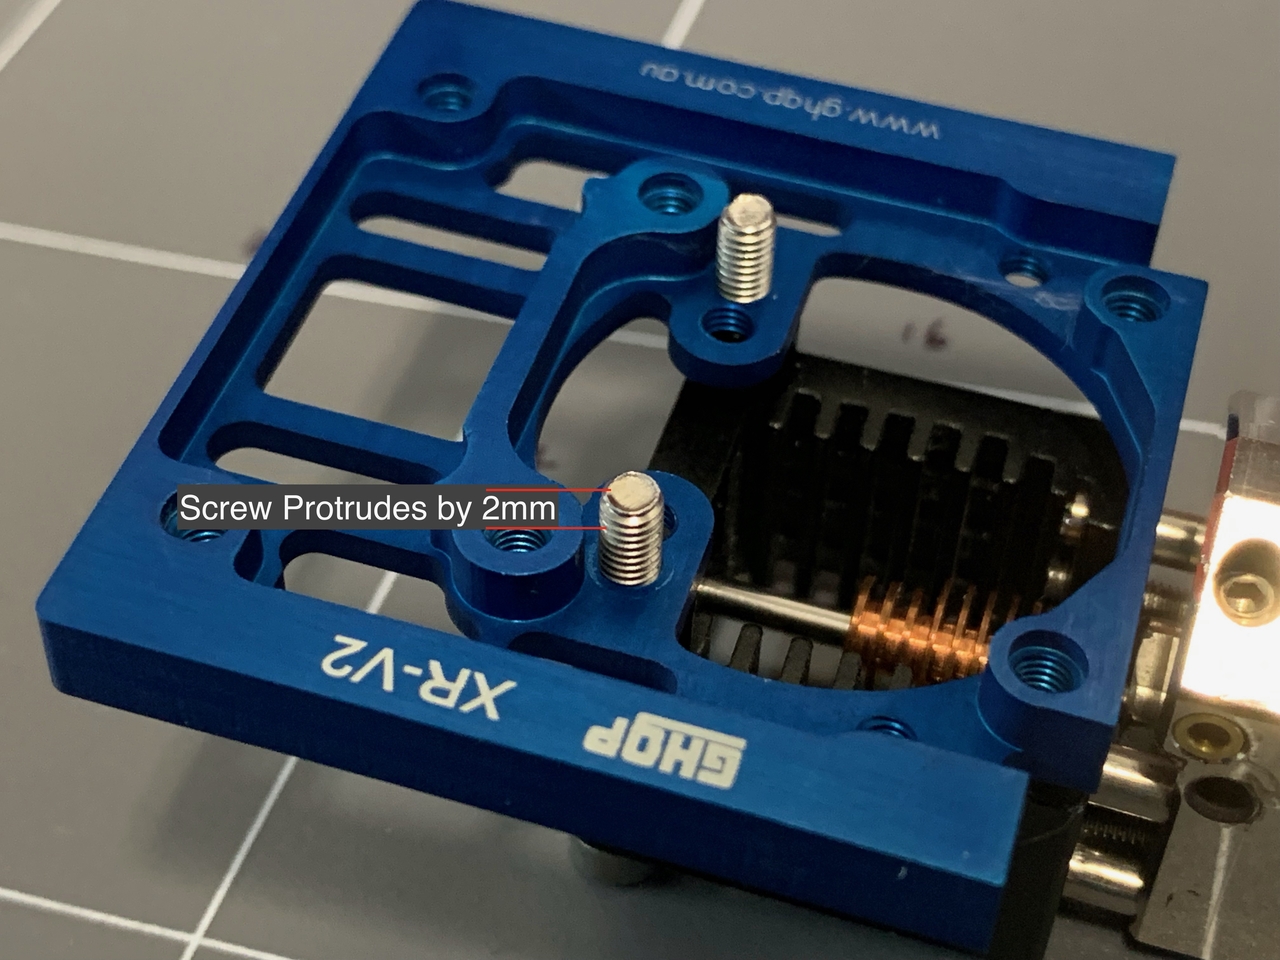
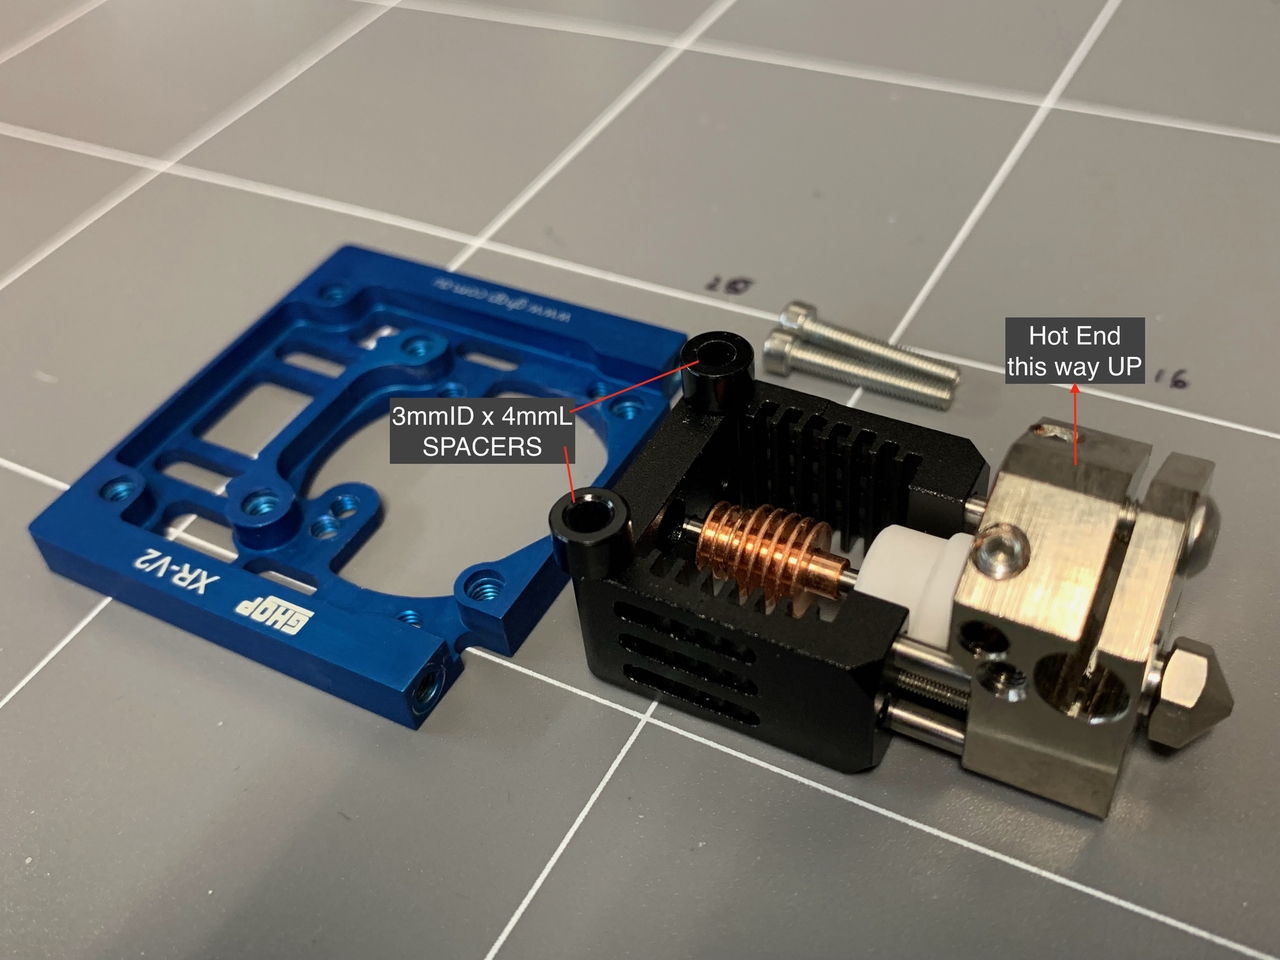
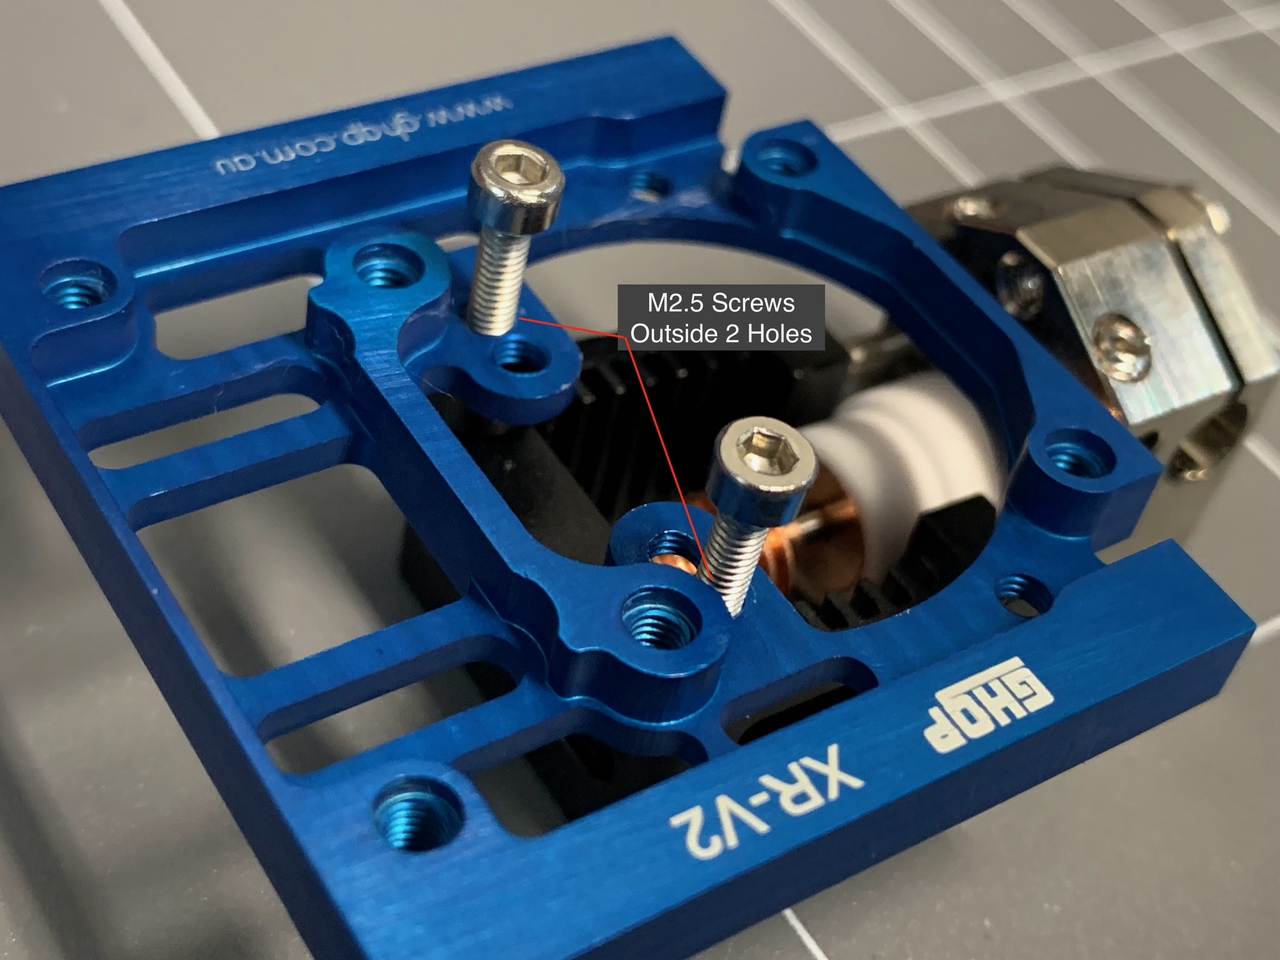
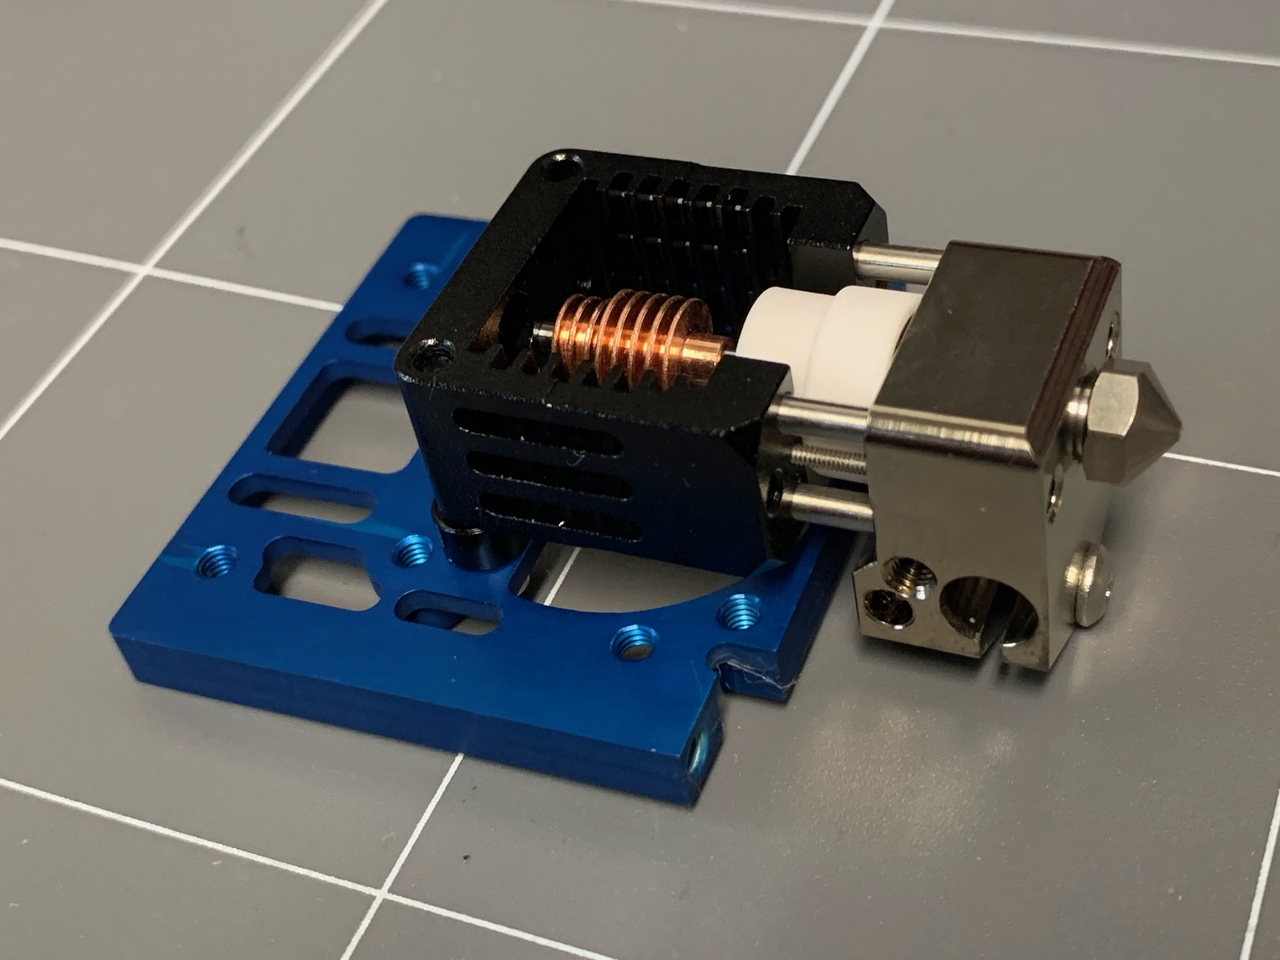
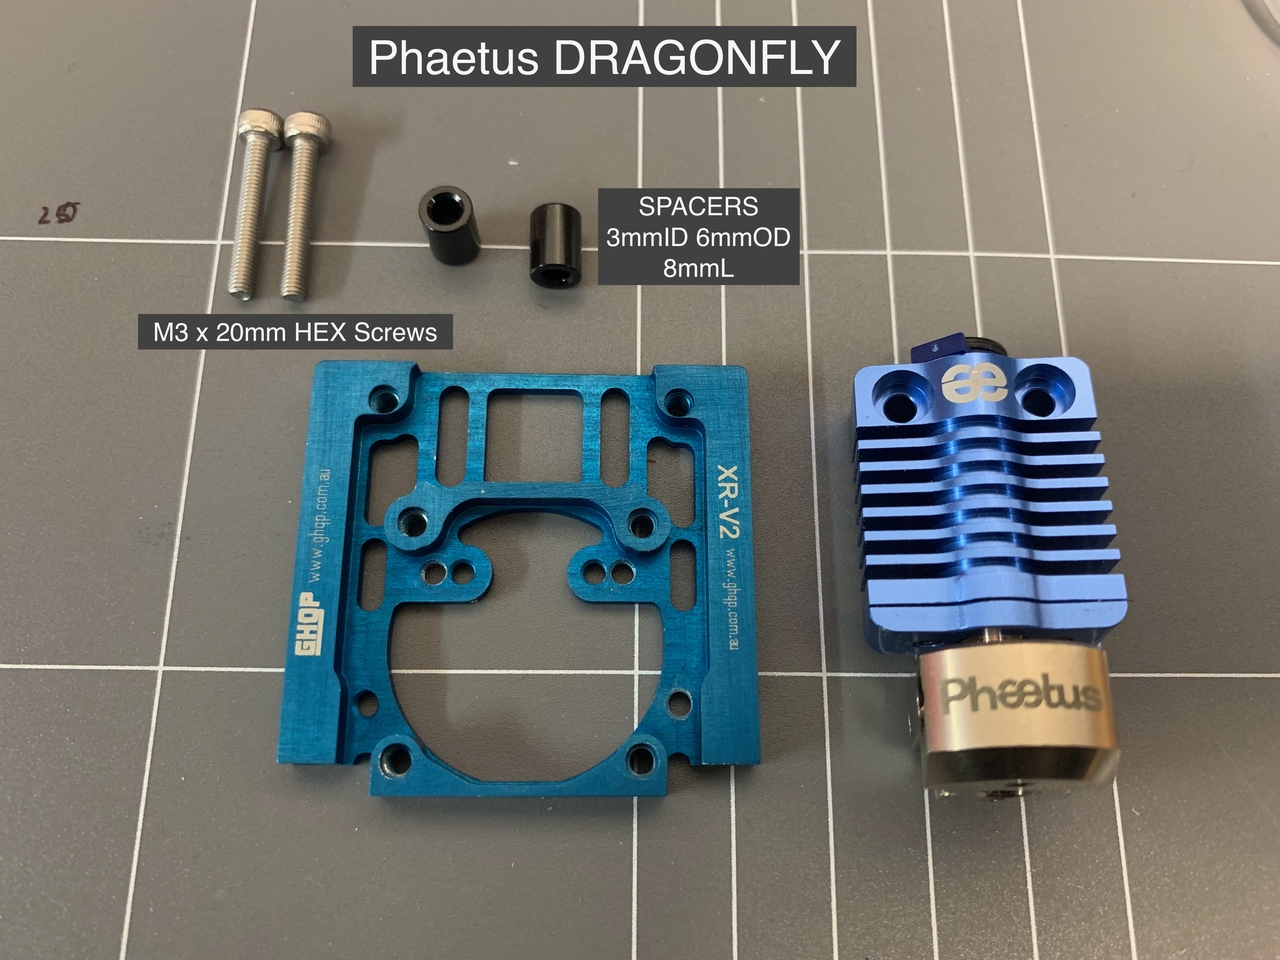
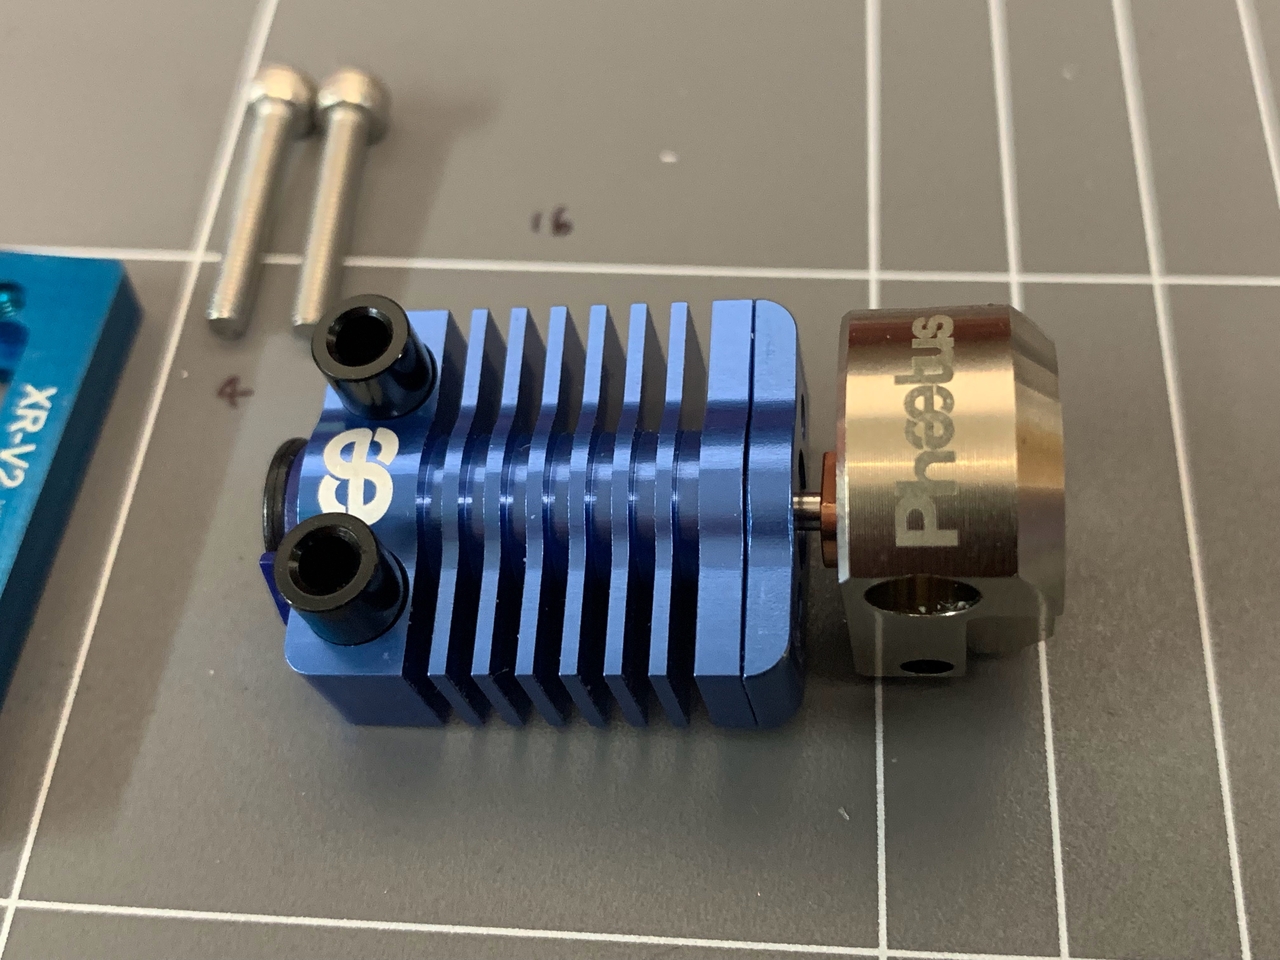
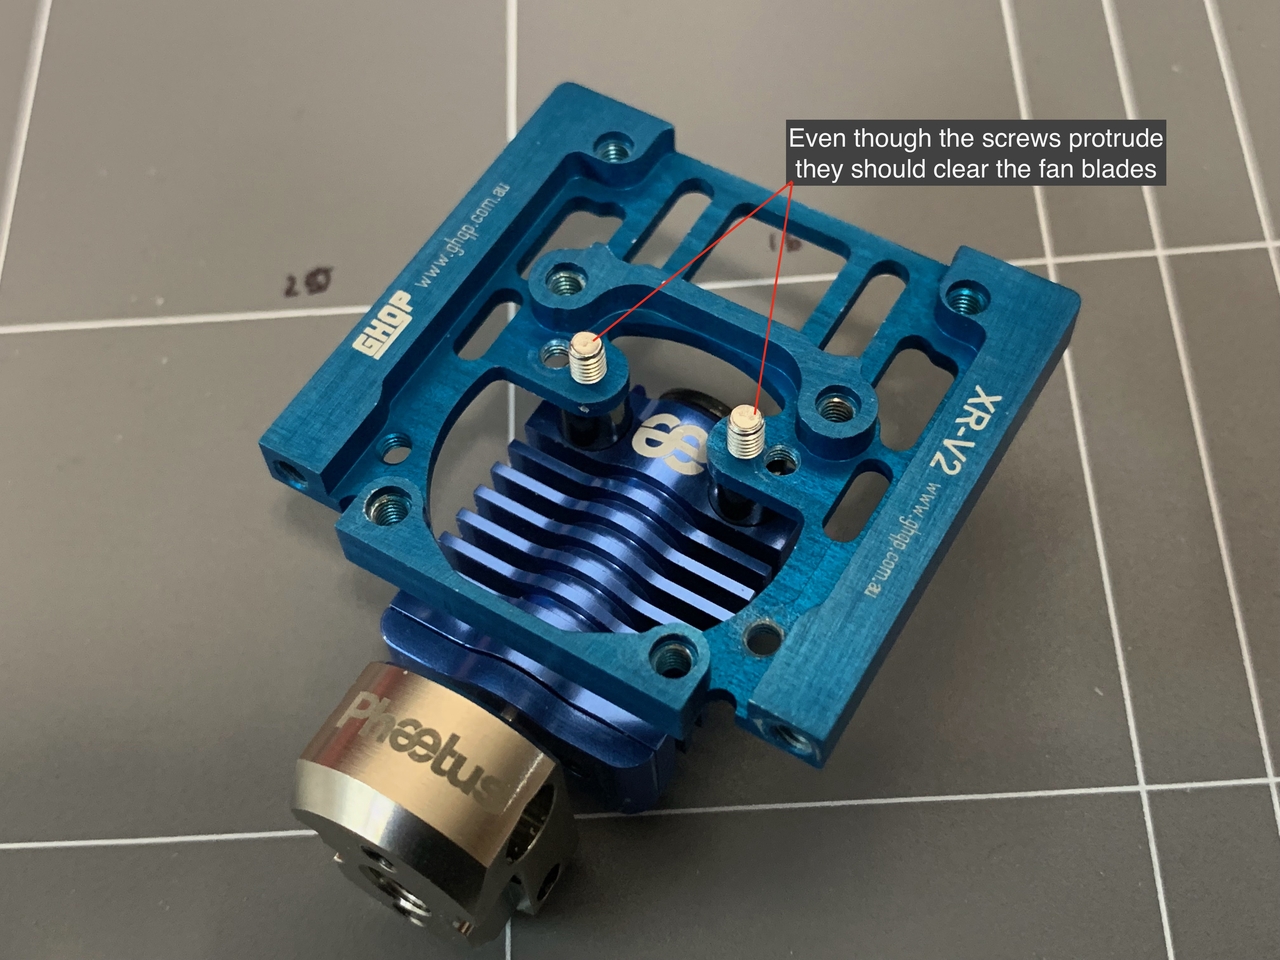
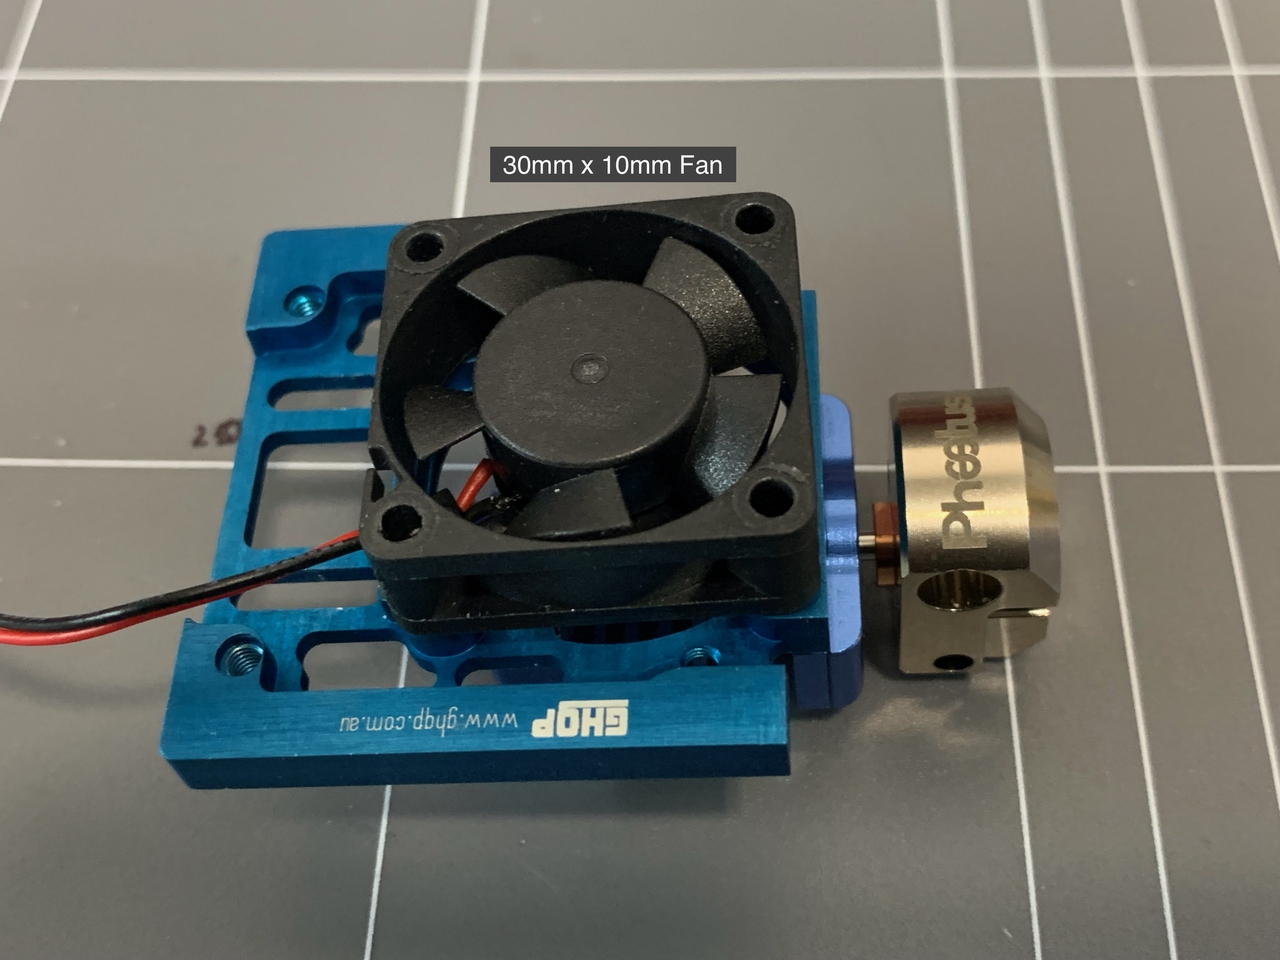
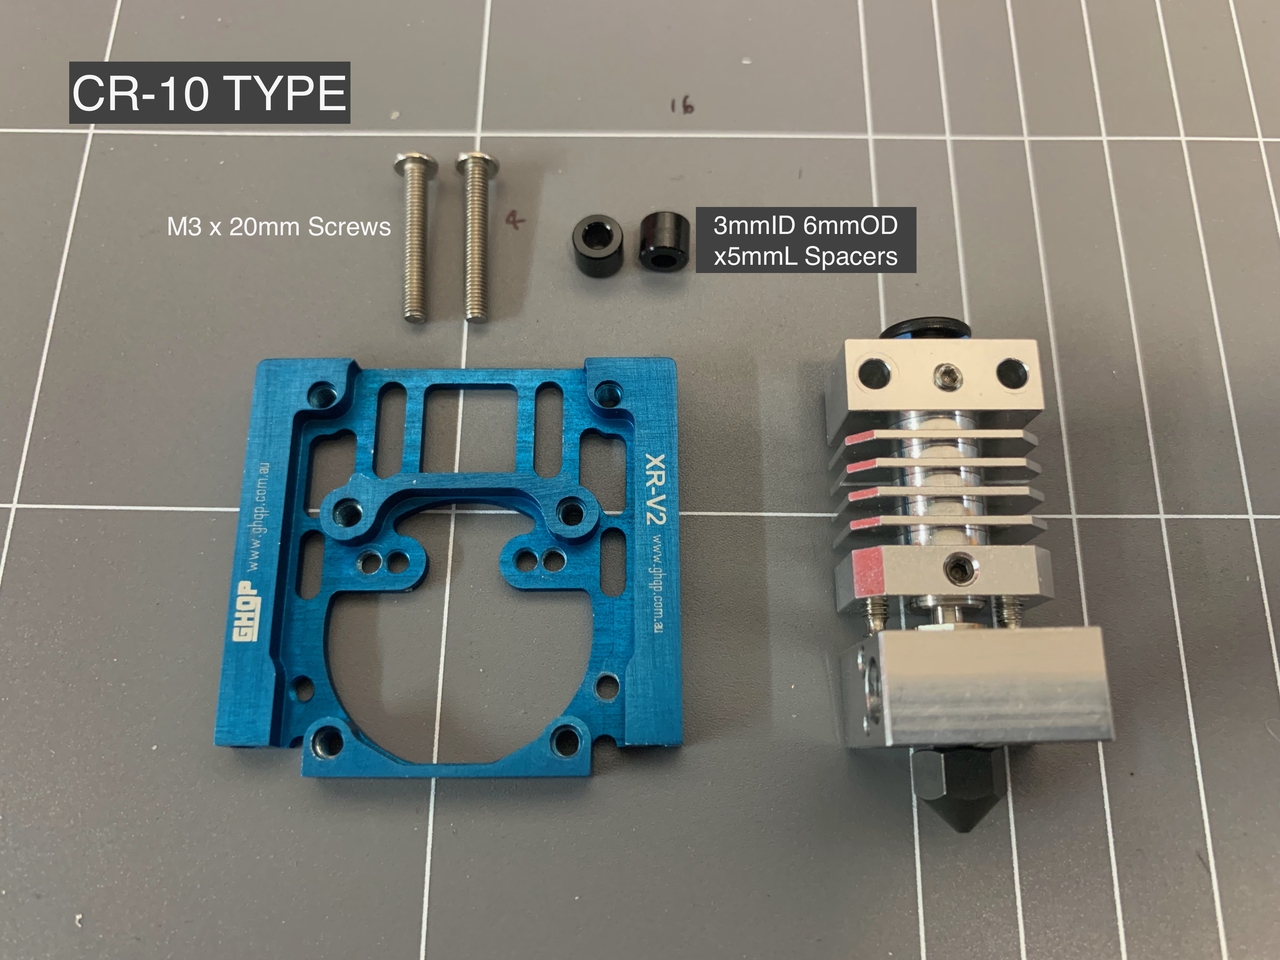
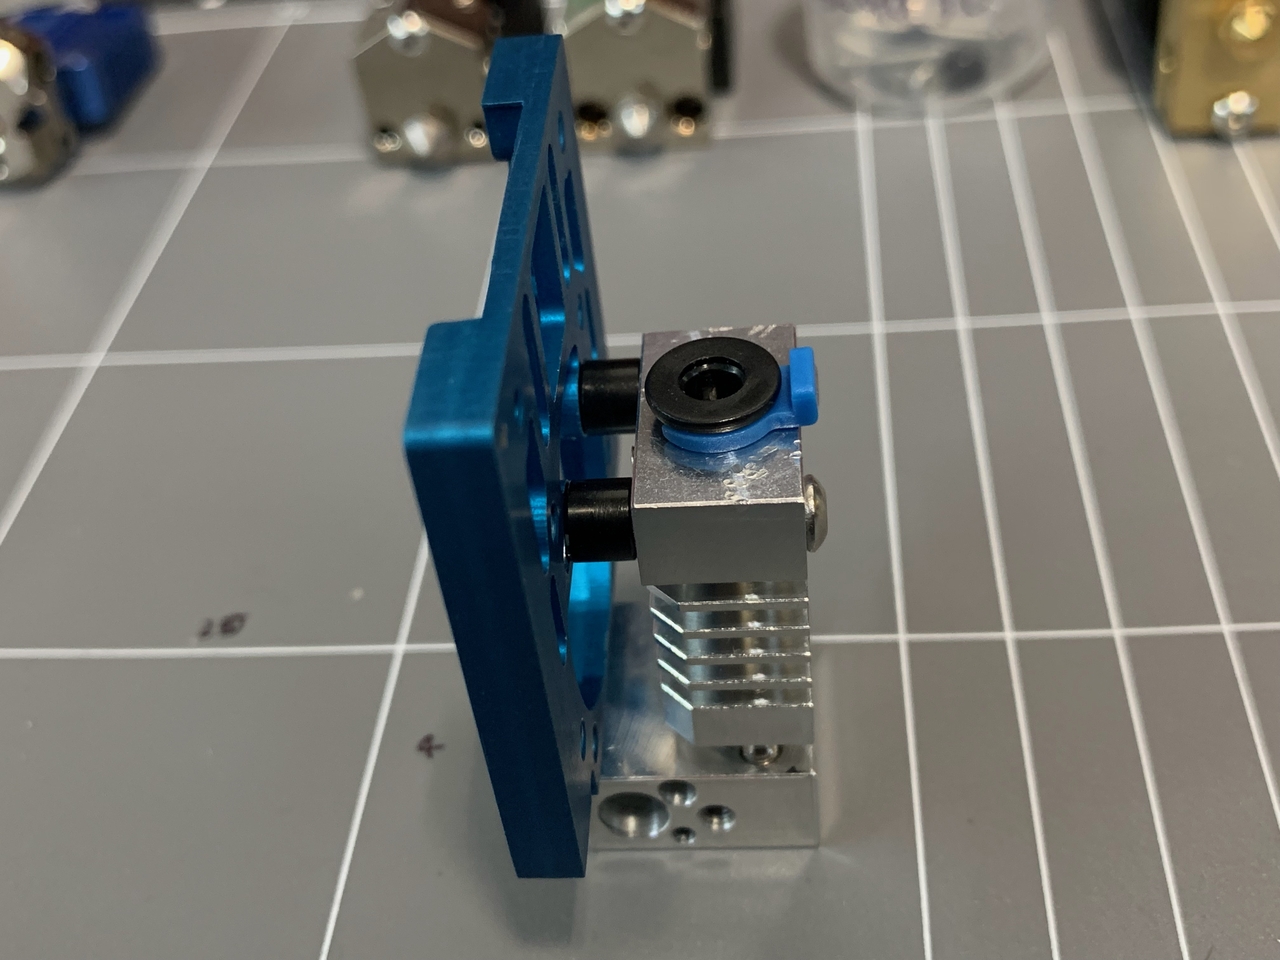
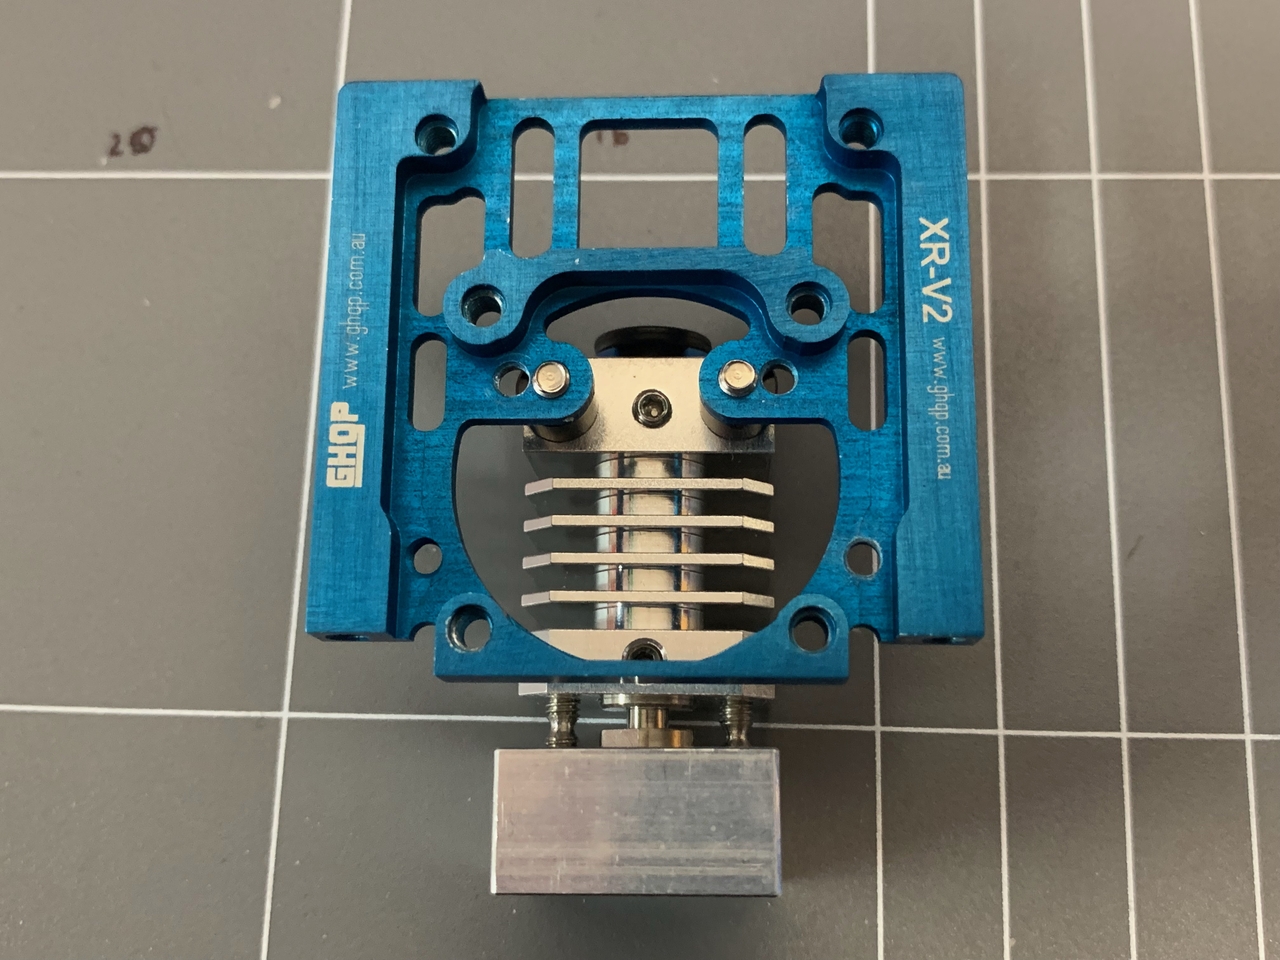
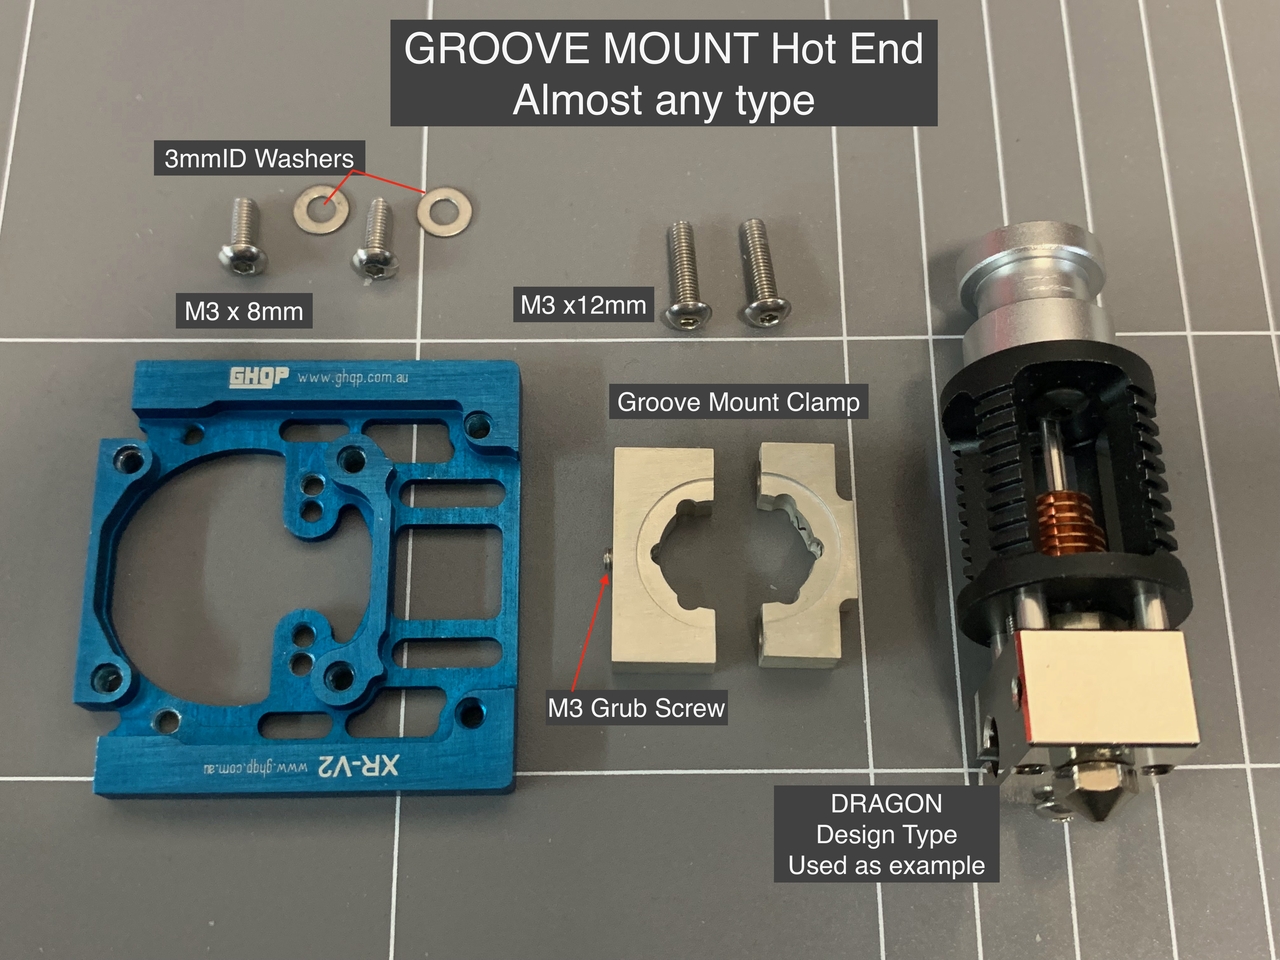
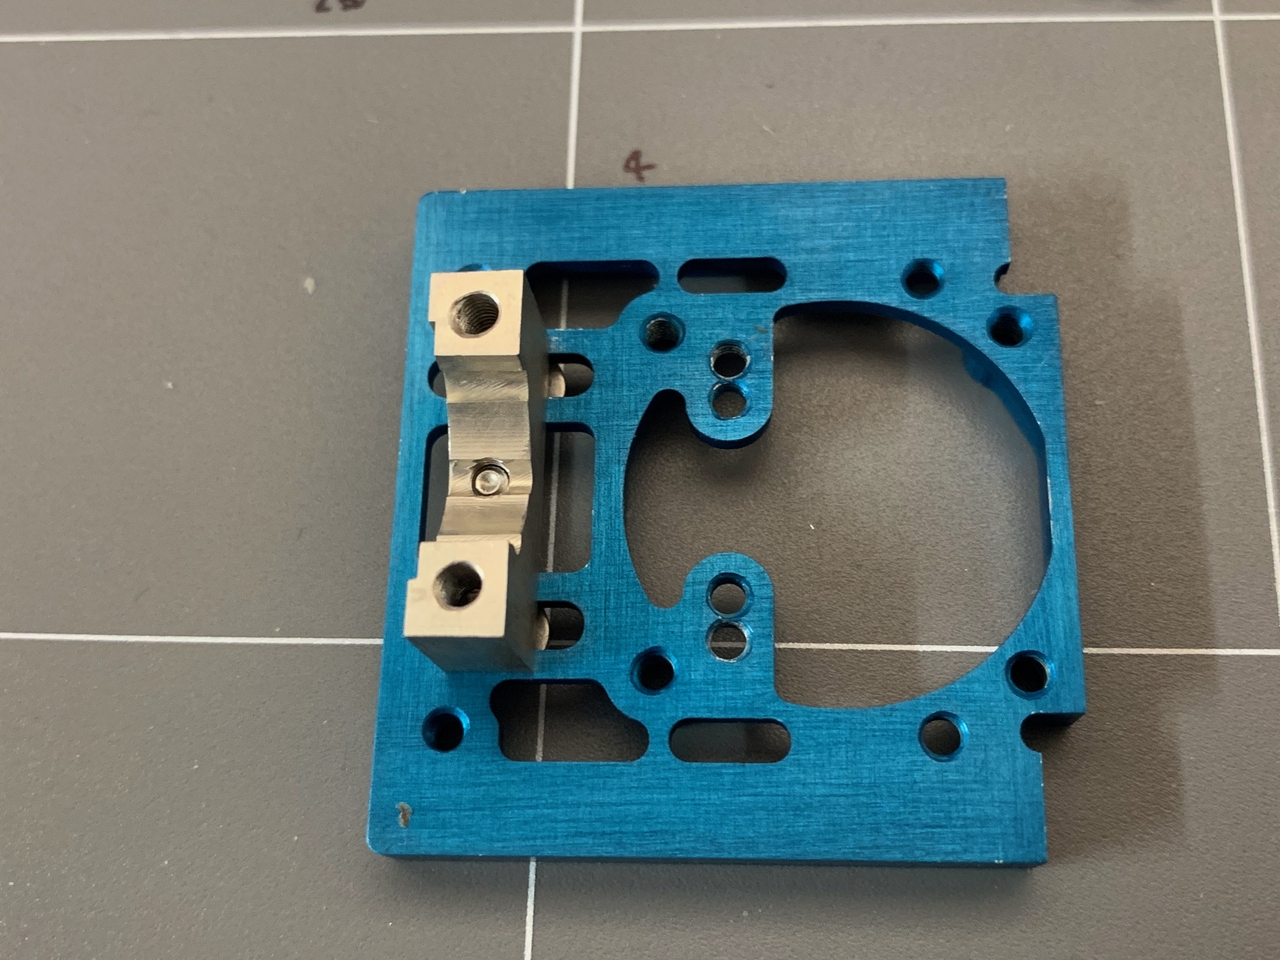
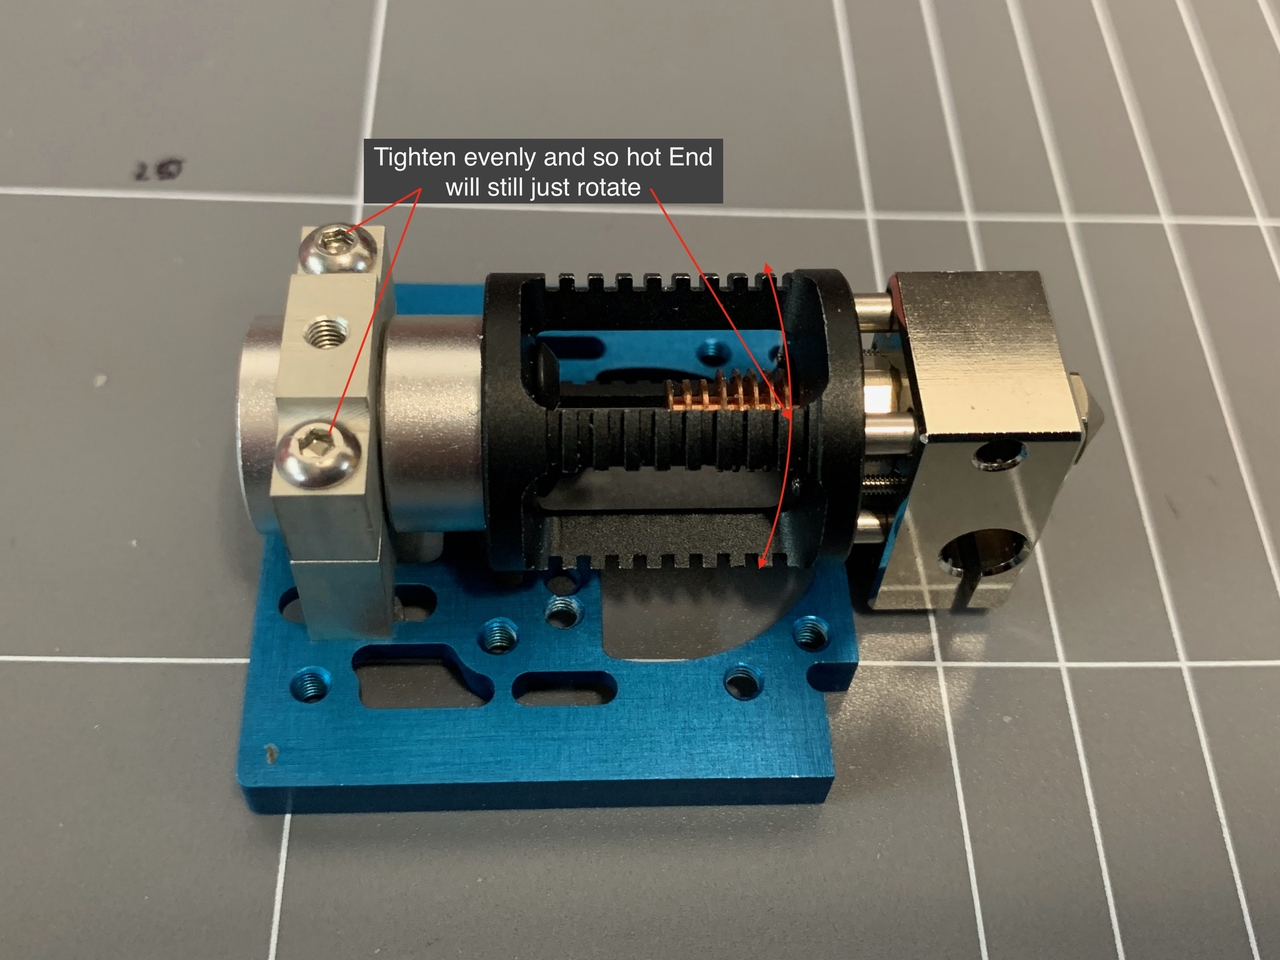
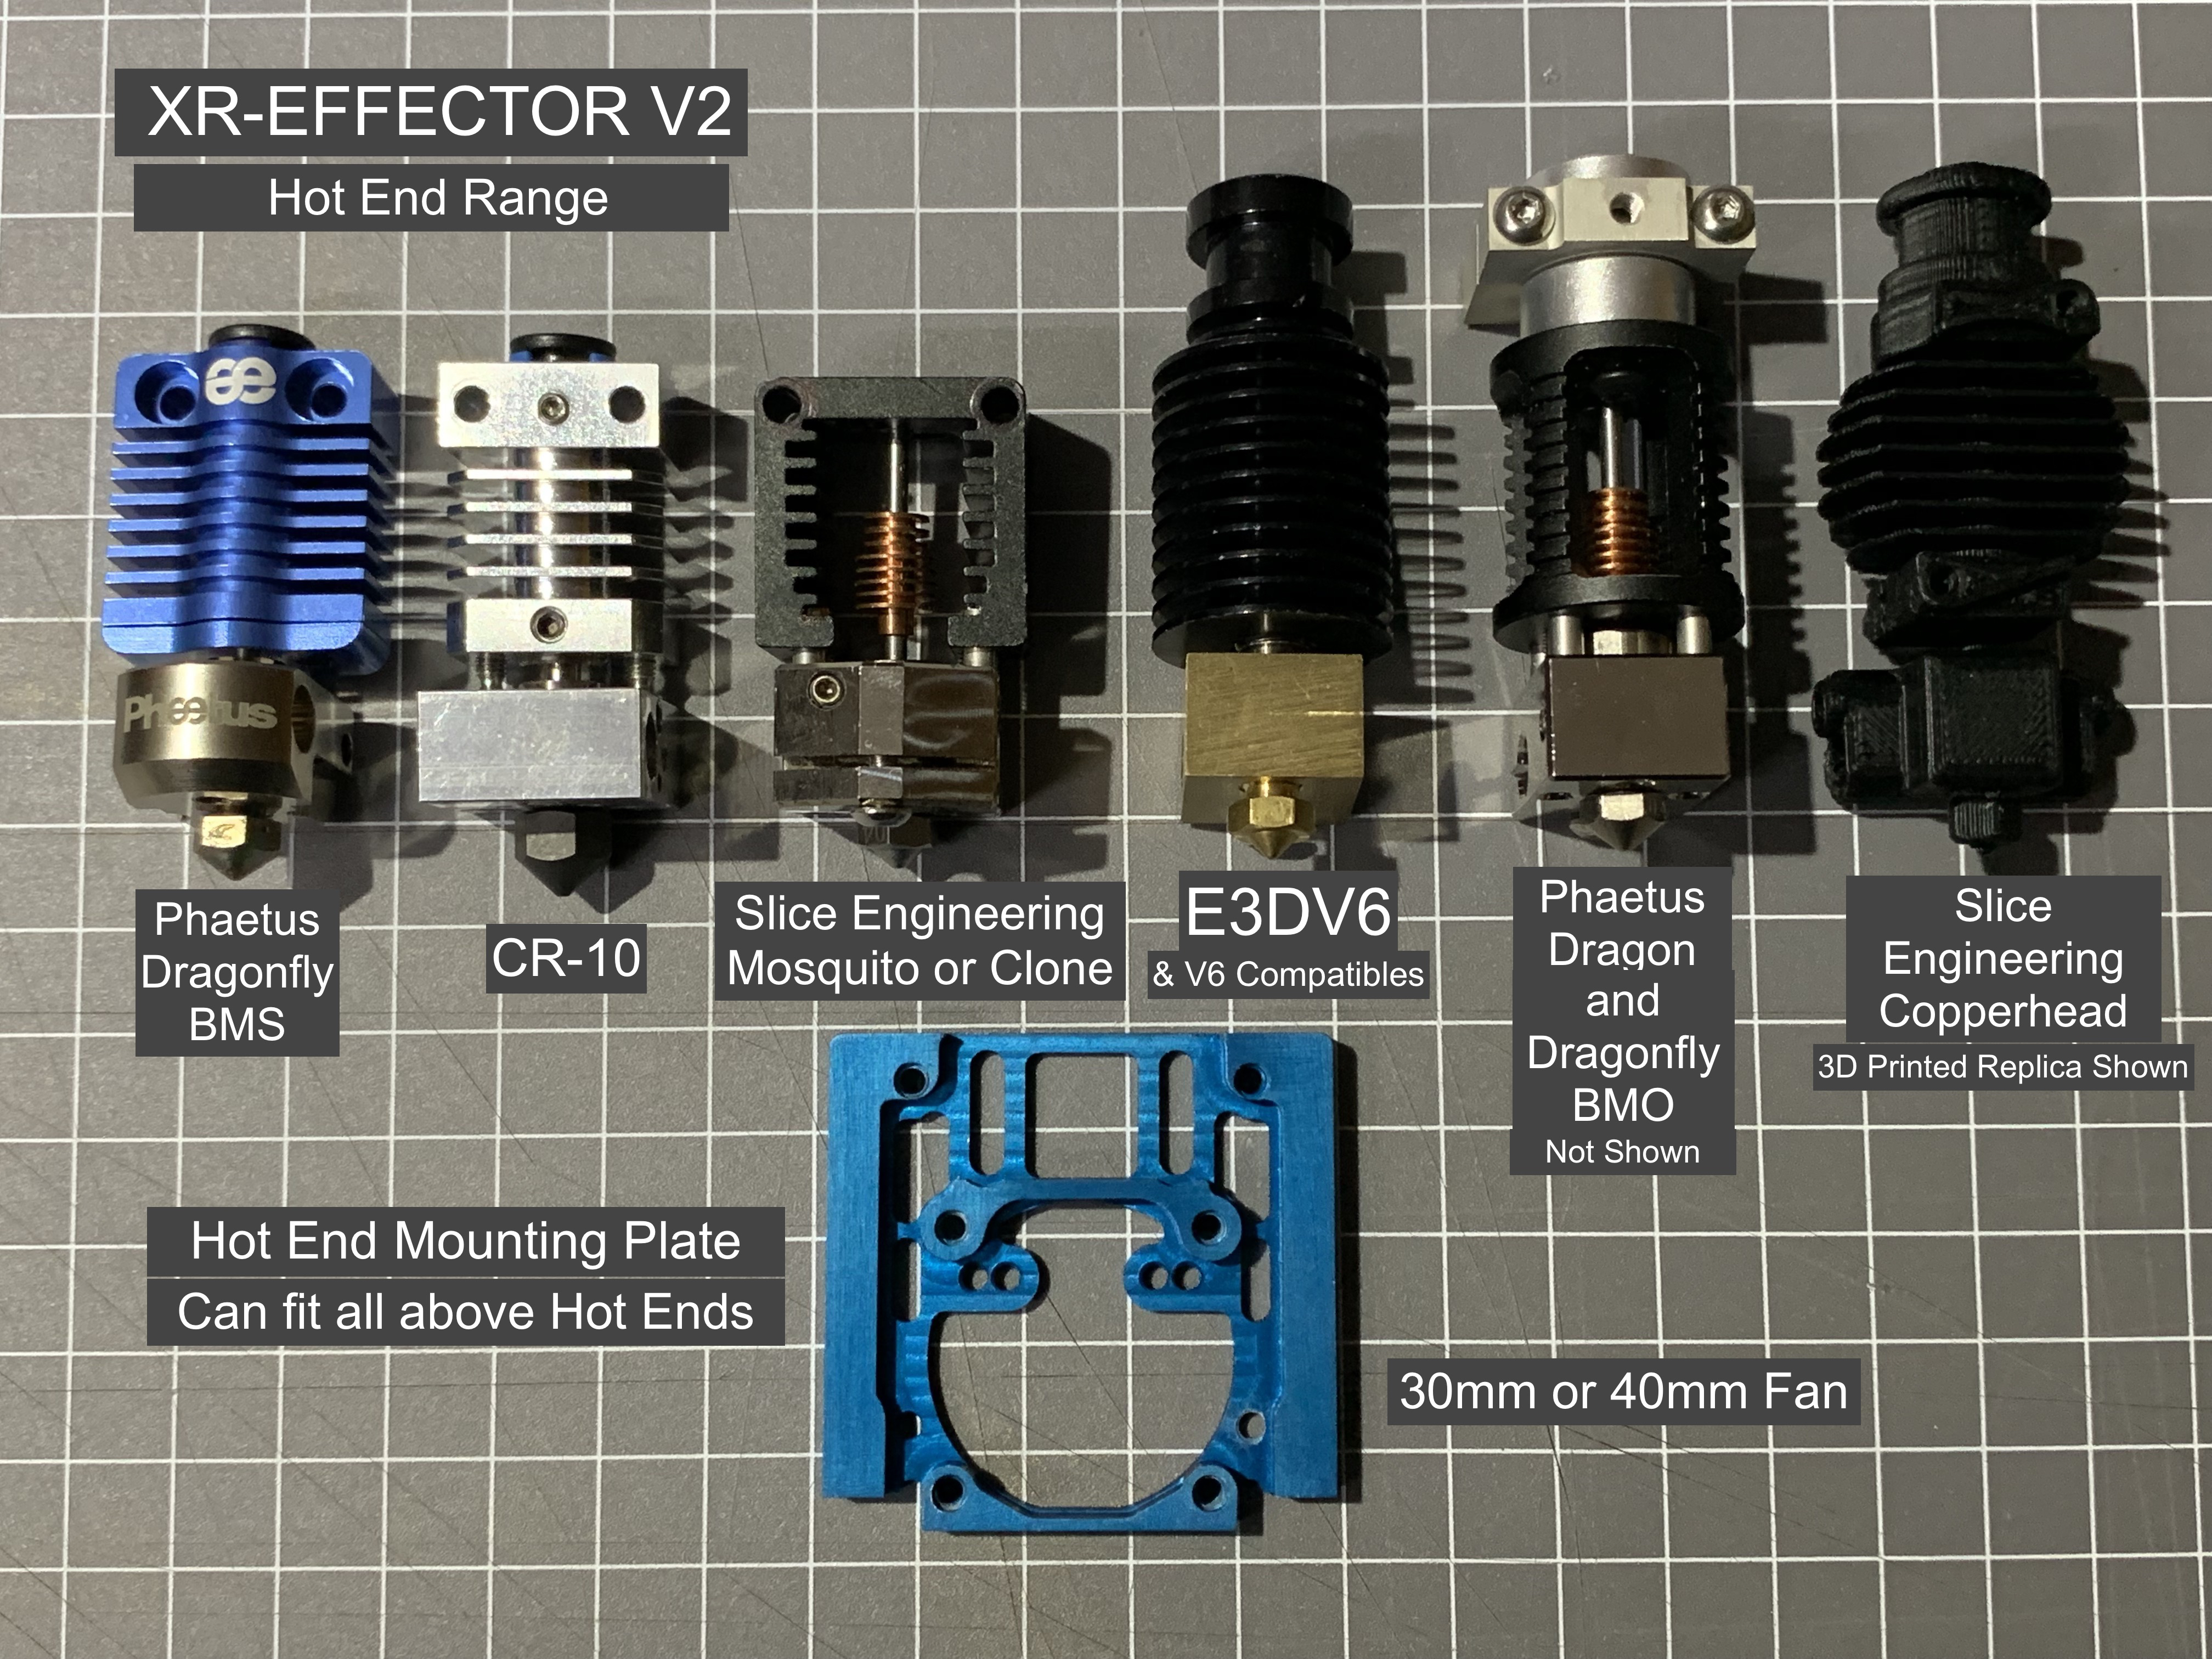
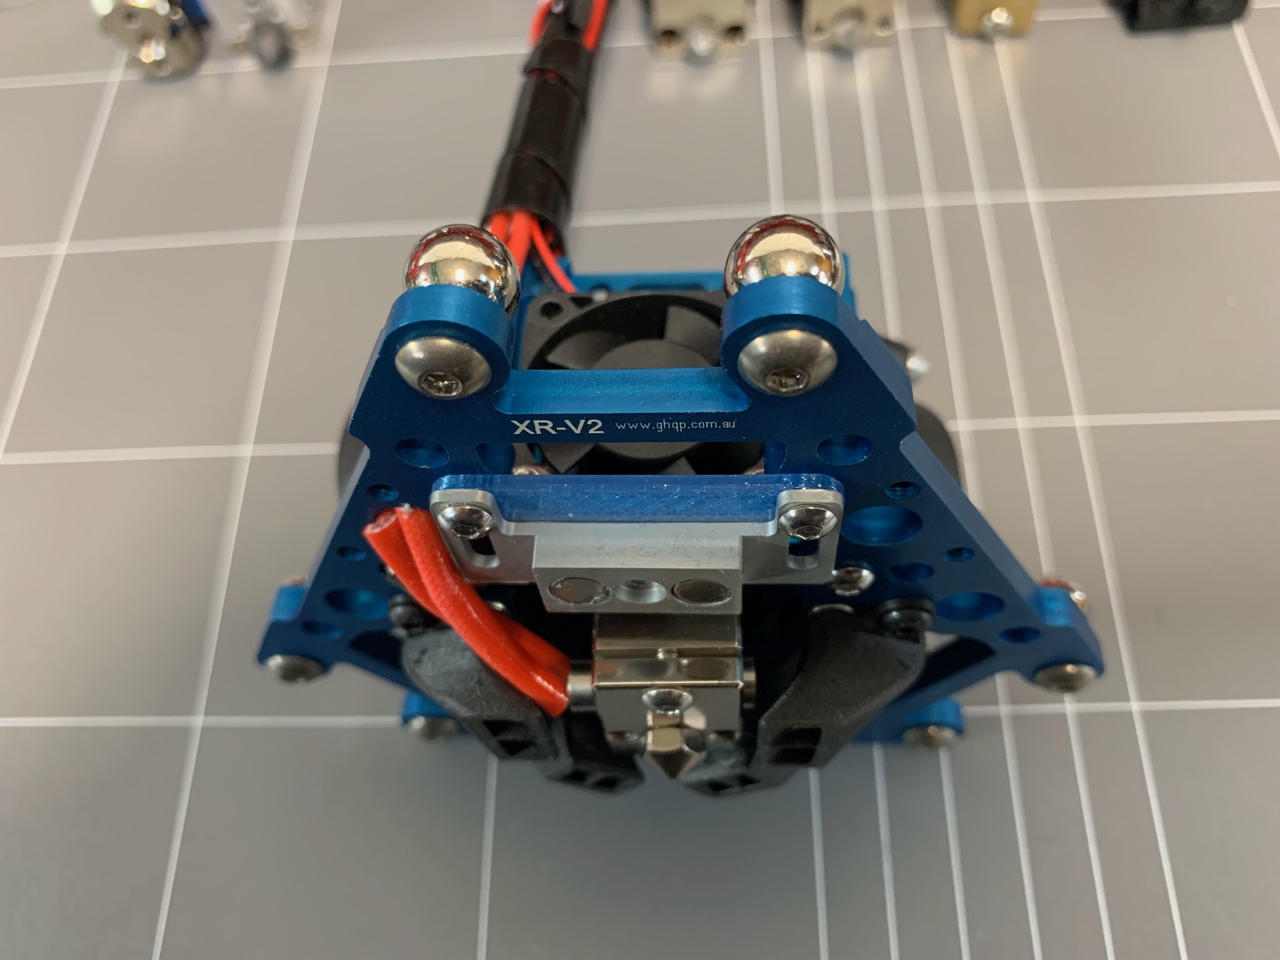
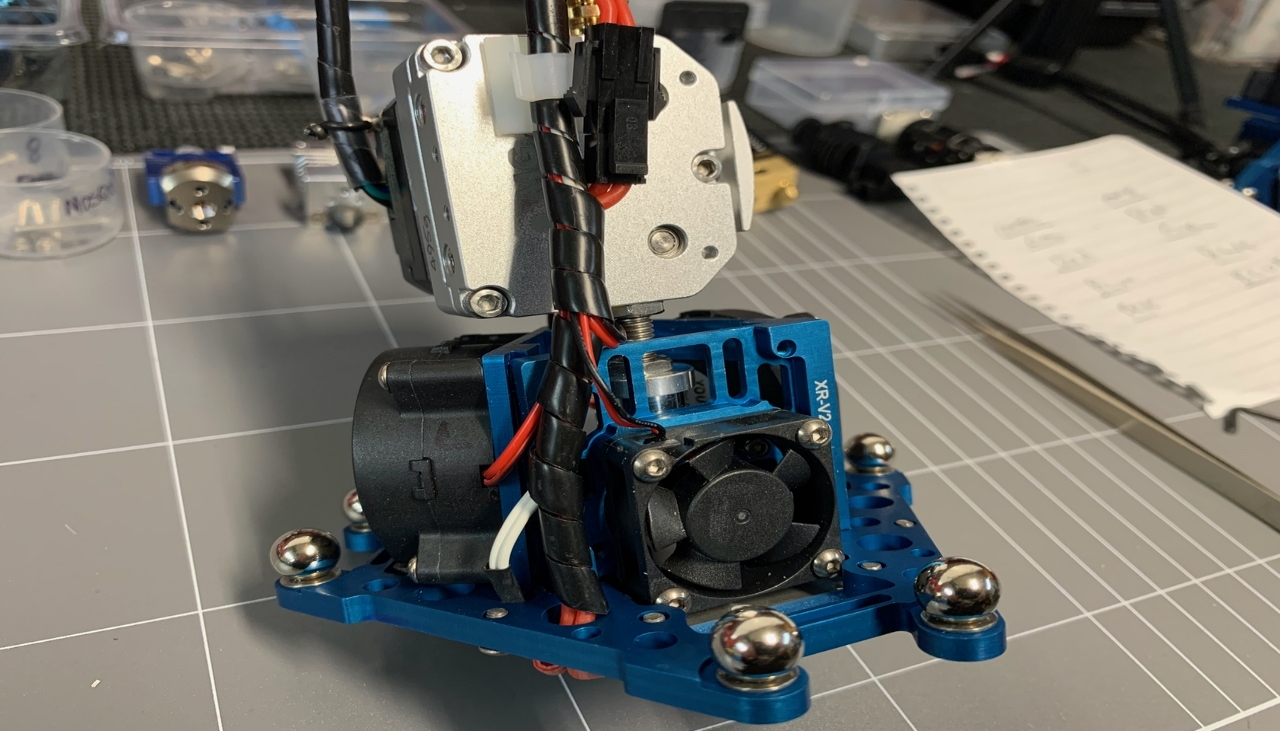
The XR-Effector is an update to my previous V9. Now the one effector can accommodate such Hot Ends as Mosquito, CR10 and Dragonfly BMS but also a range of Groove Mount Hotends such as an E3DV6, Phaetus Dragon, Slice Engineering Copperhead plus other similar types. This latest design enables with one single mounting plate not only a Mosquito or Clone type Hot End to be fitted but now a range of other Hot End makes and types.

Please note that all the information and downloads provided on this page are intended for personal use only.
If you intend to use any of this information for commercial purposes please contact me for authority before doing so.
If you intend to use any of this information for commercial purposes please contact me for authority before doing so.
Page Created
Date 23/11/2021
Updated 05/02/2024
Date 23/11/2021
Updated 05/02/2024
DOWNLOADS
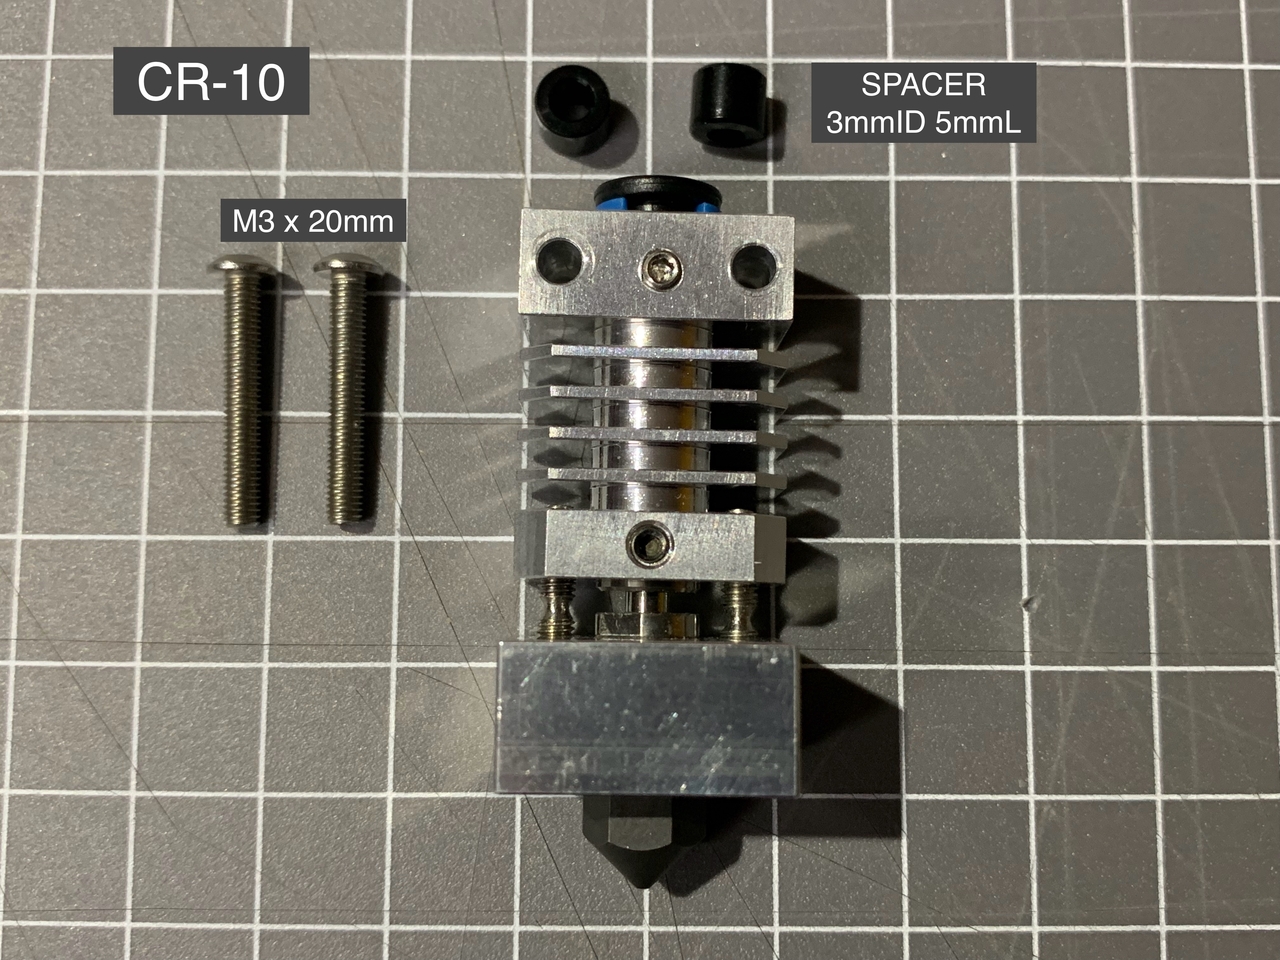
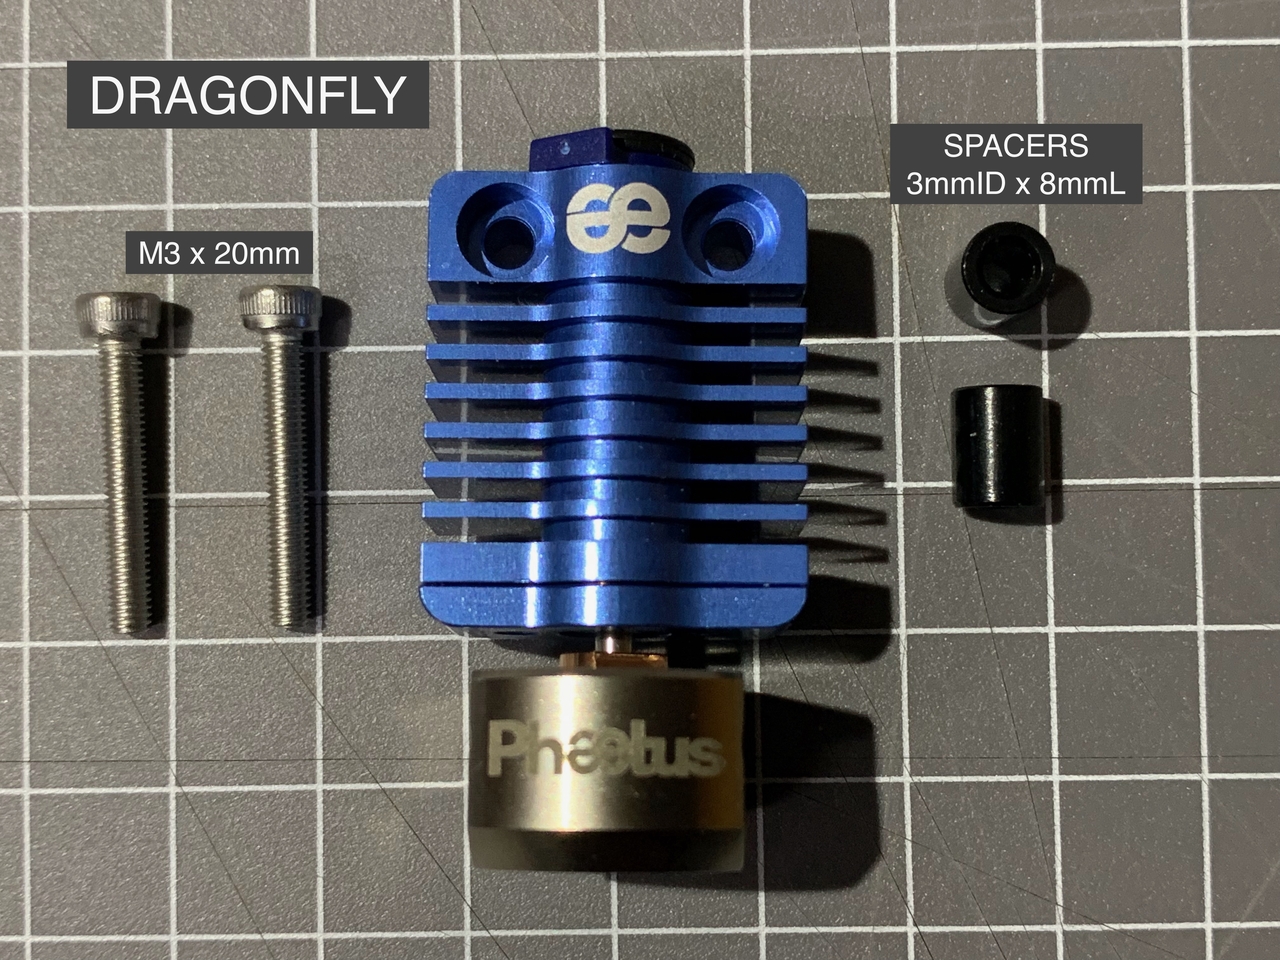
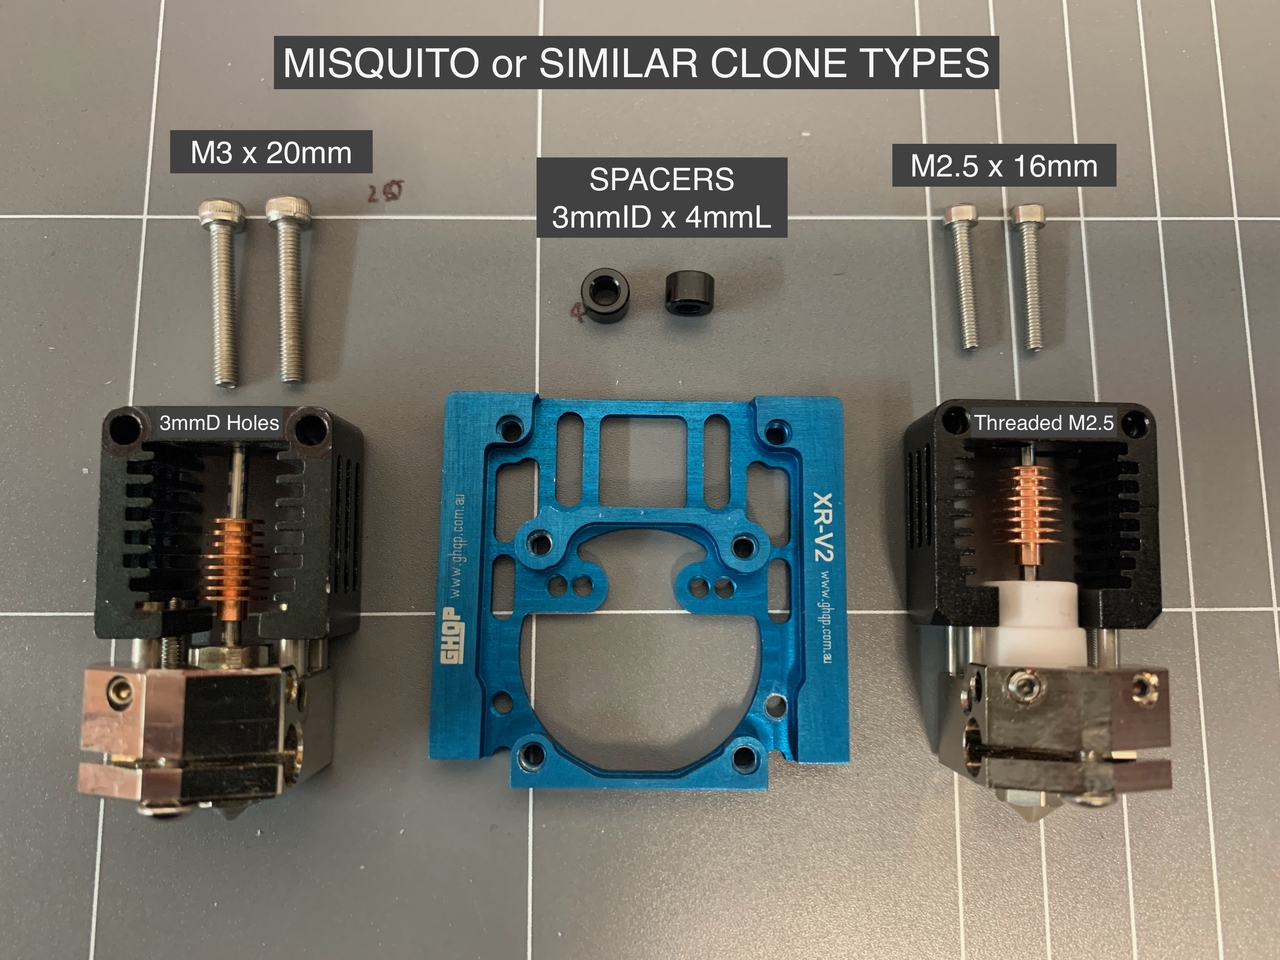
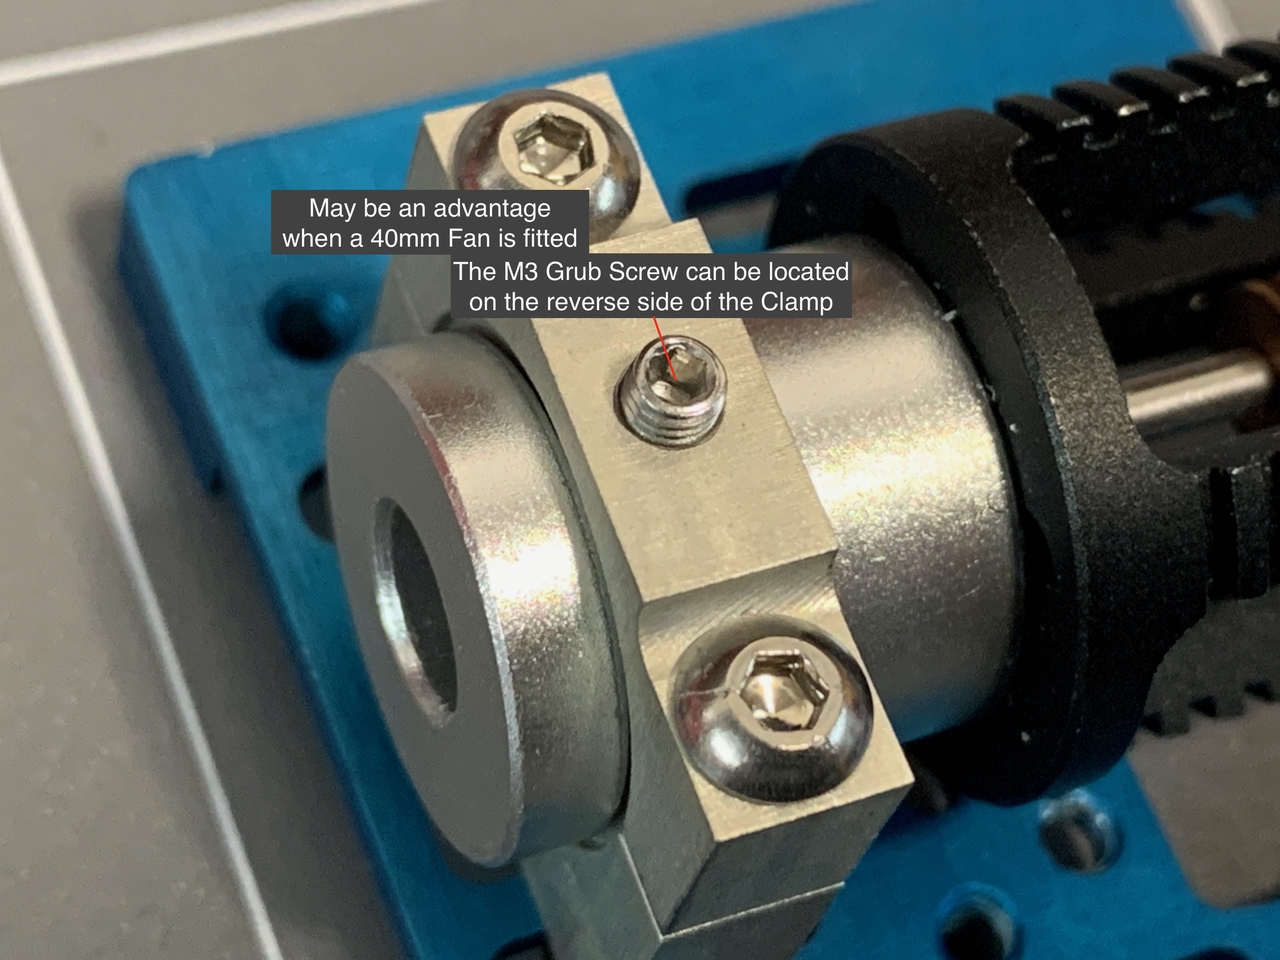
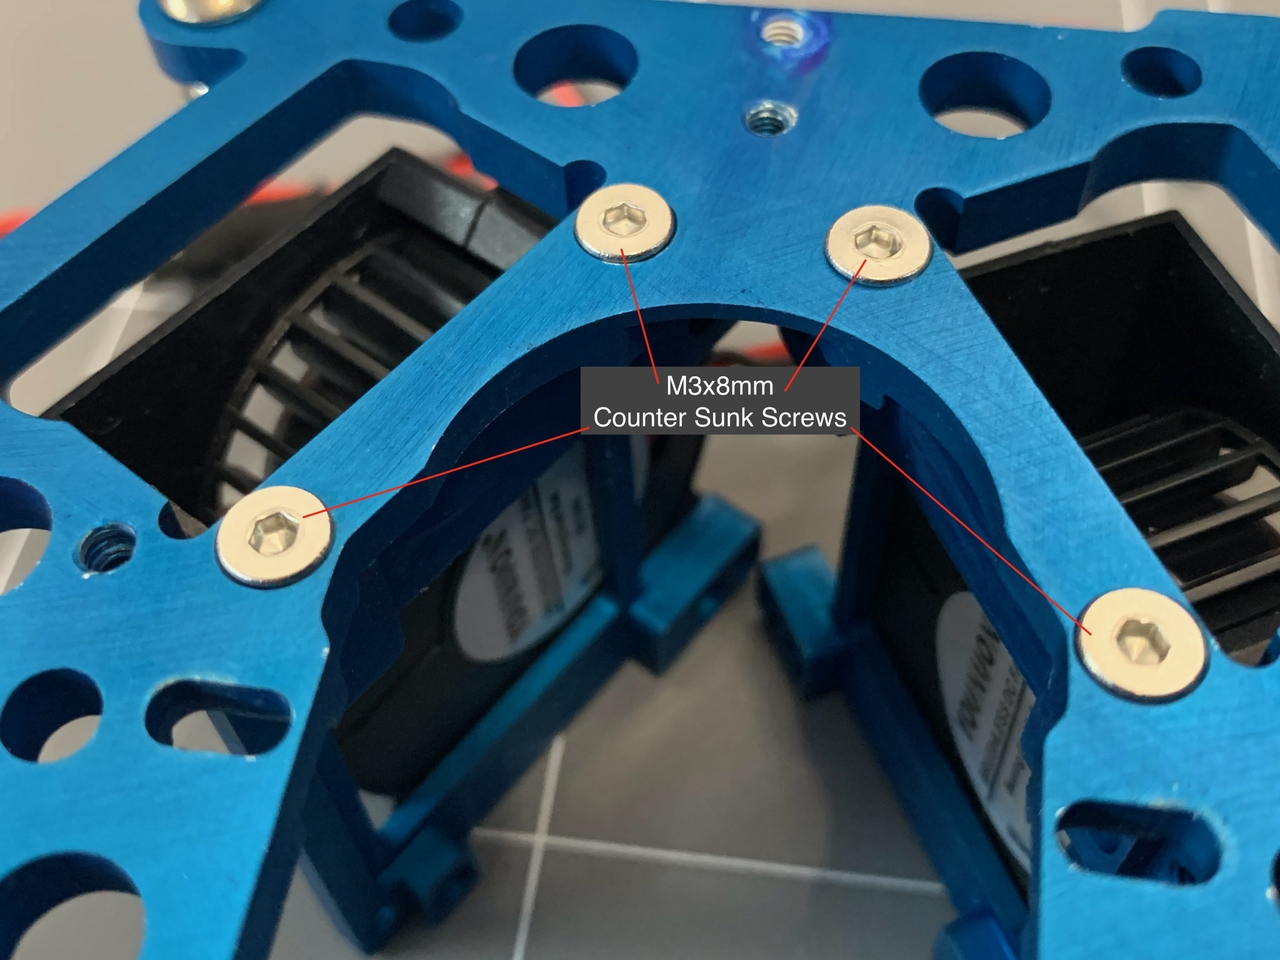
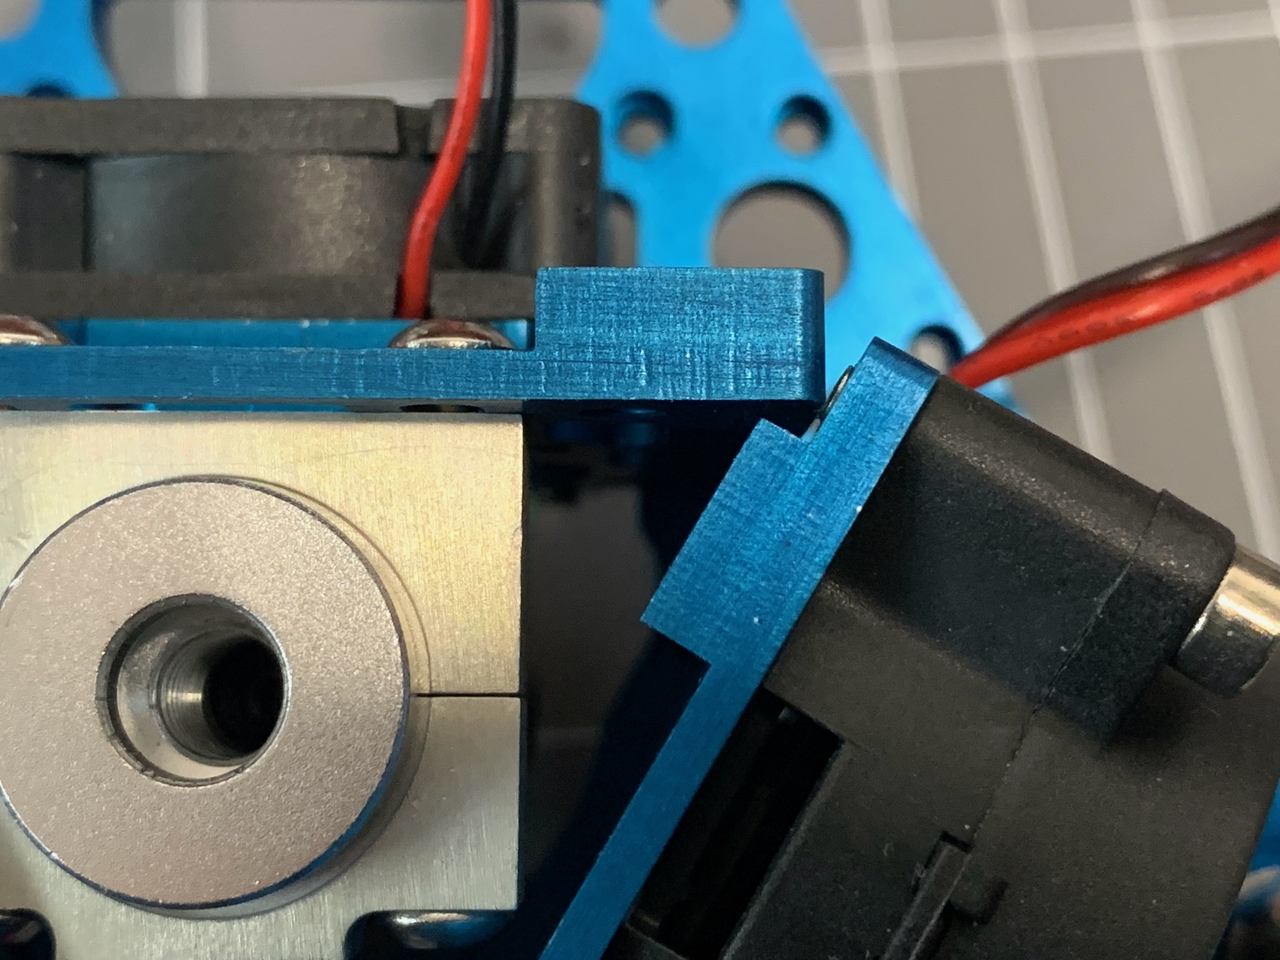
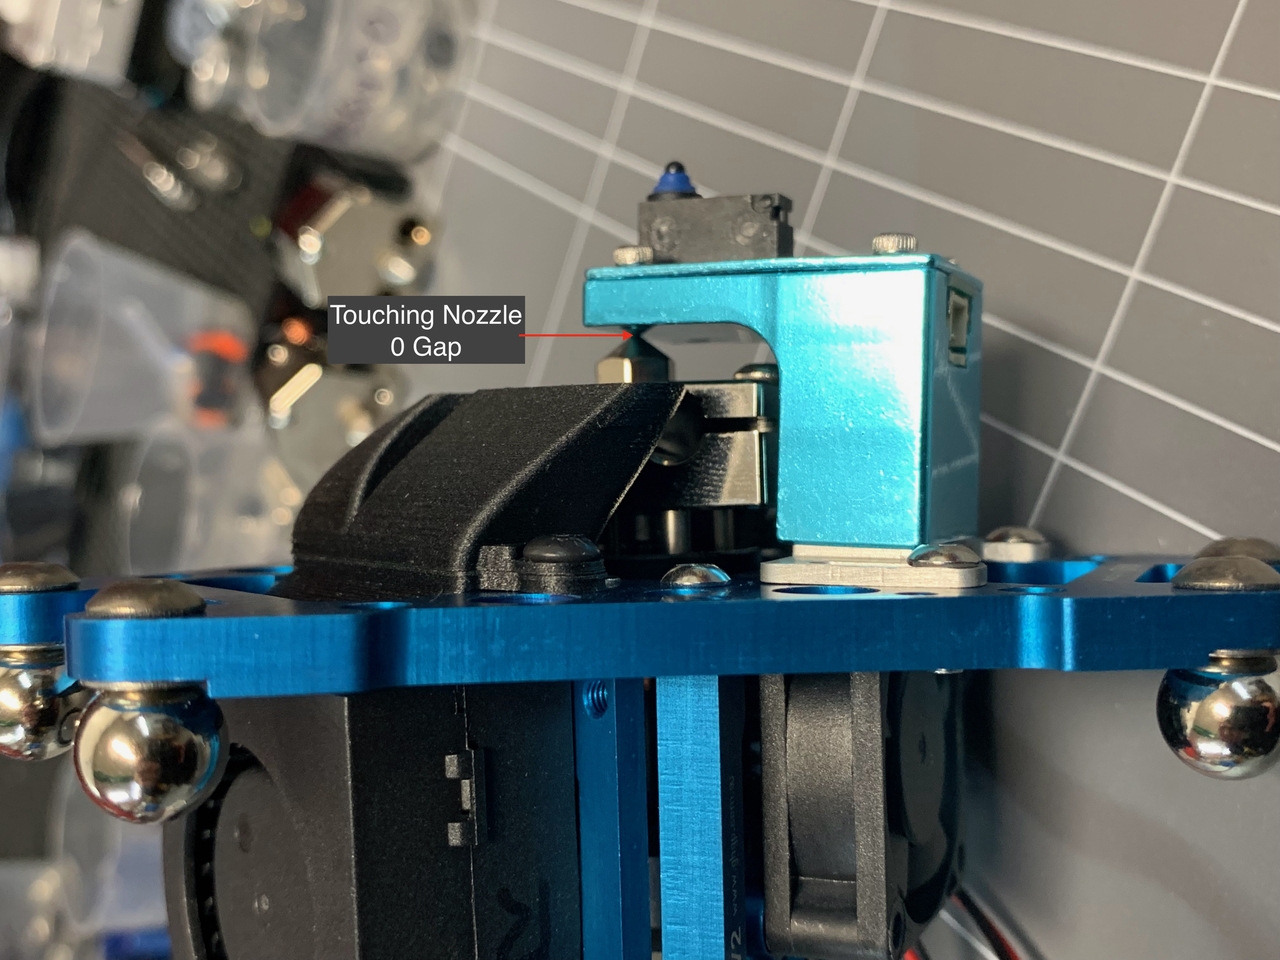
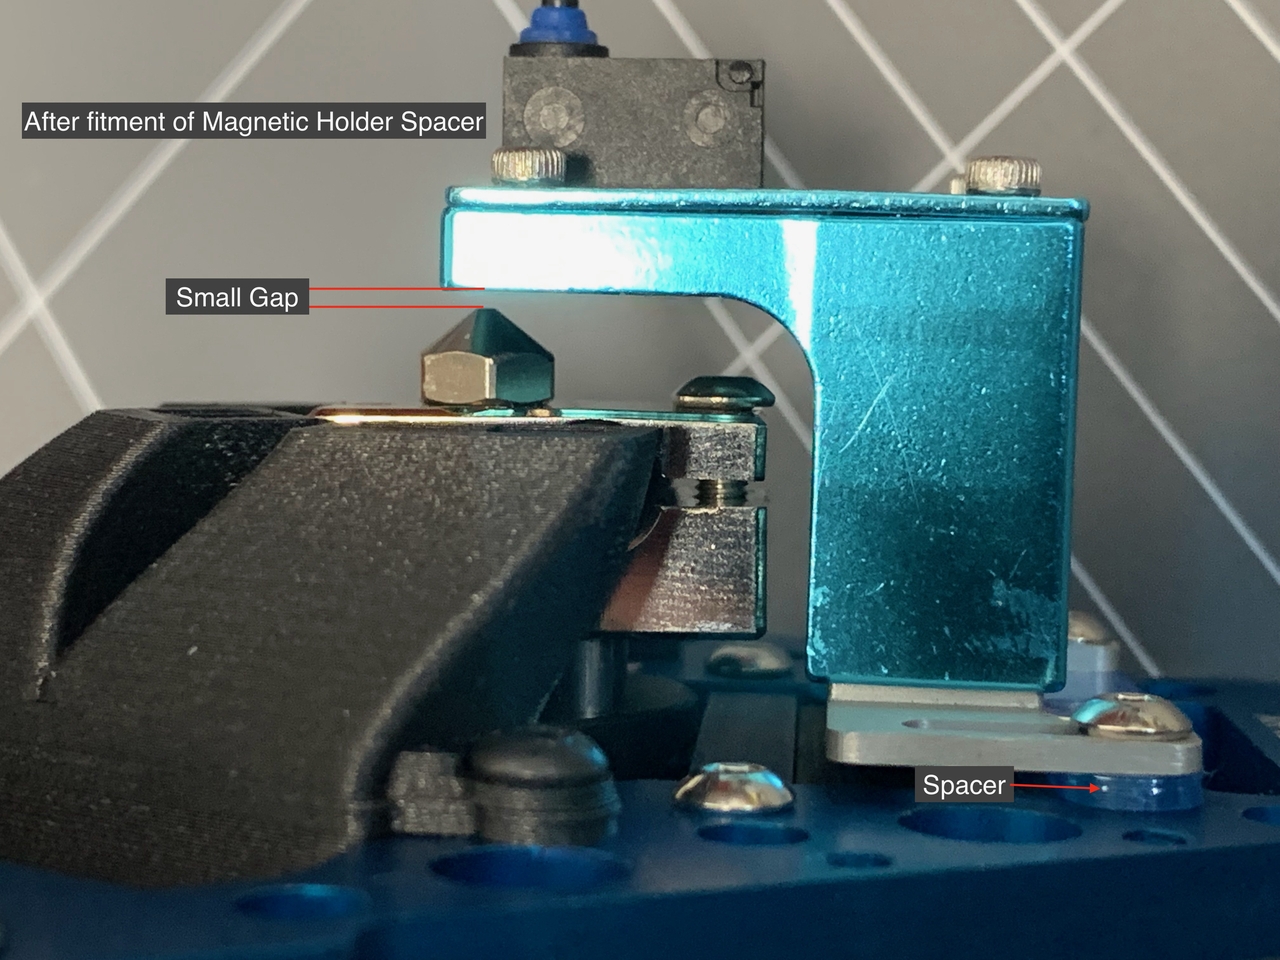
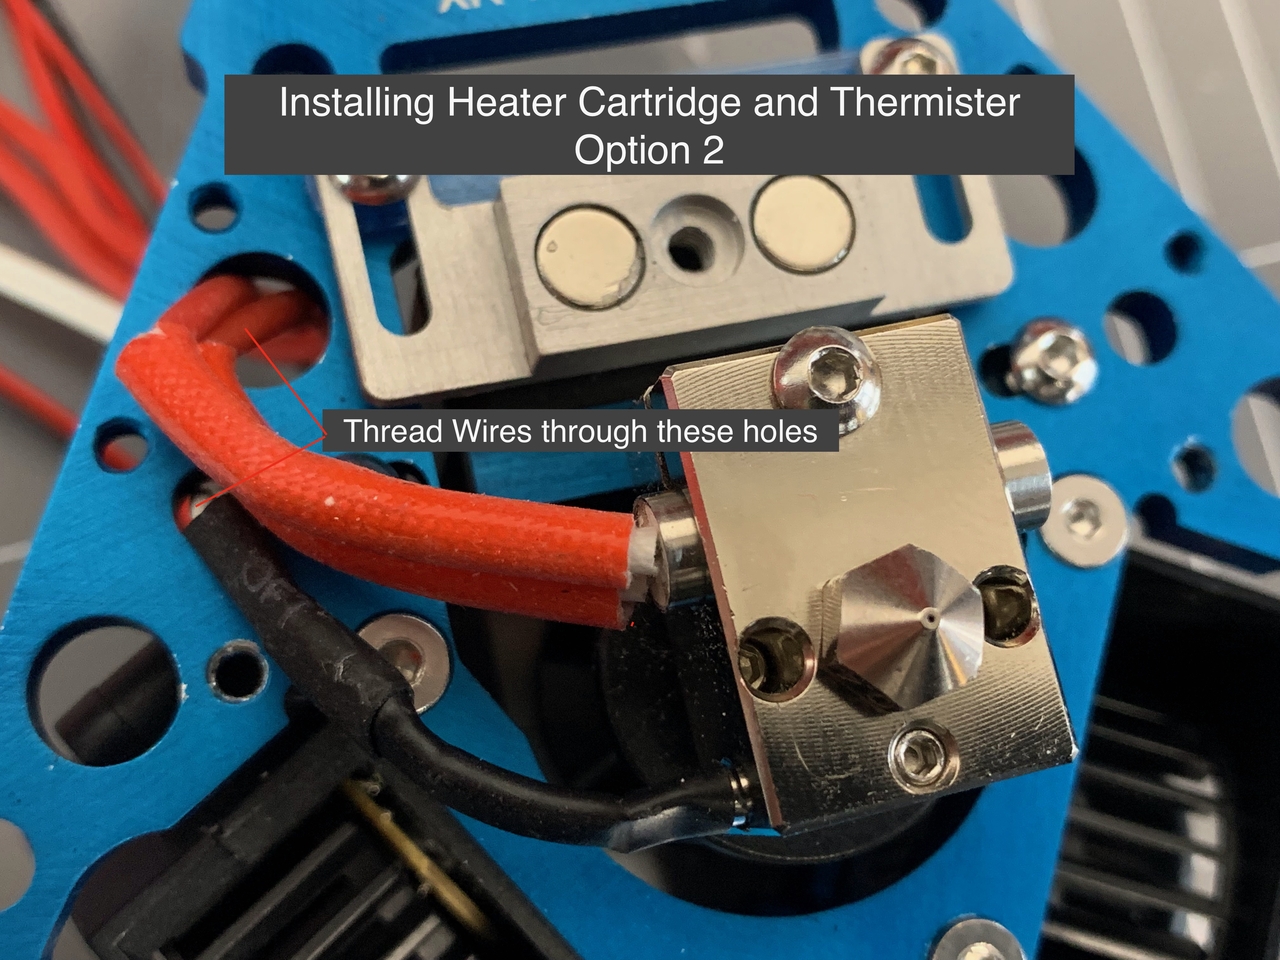
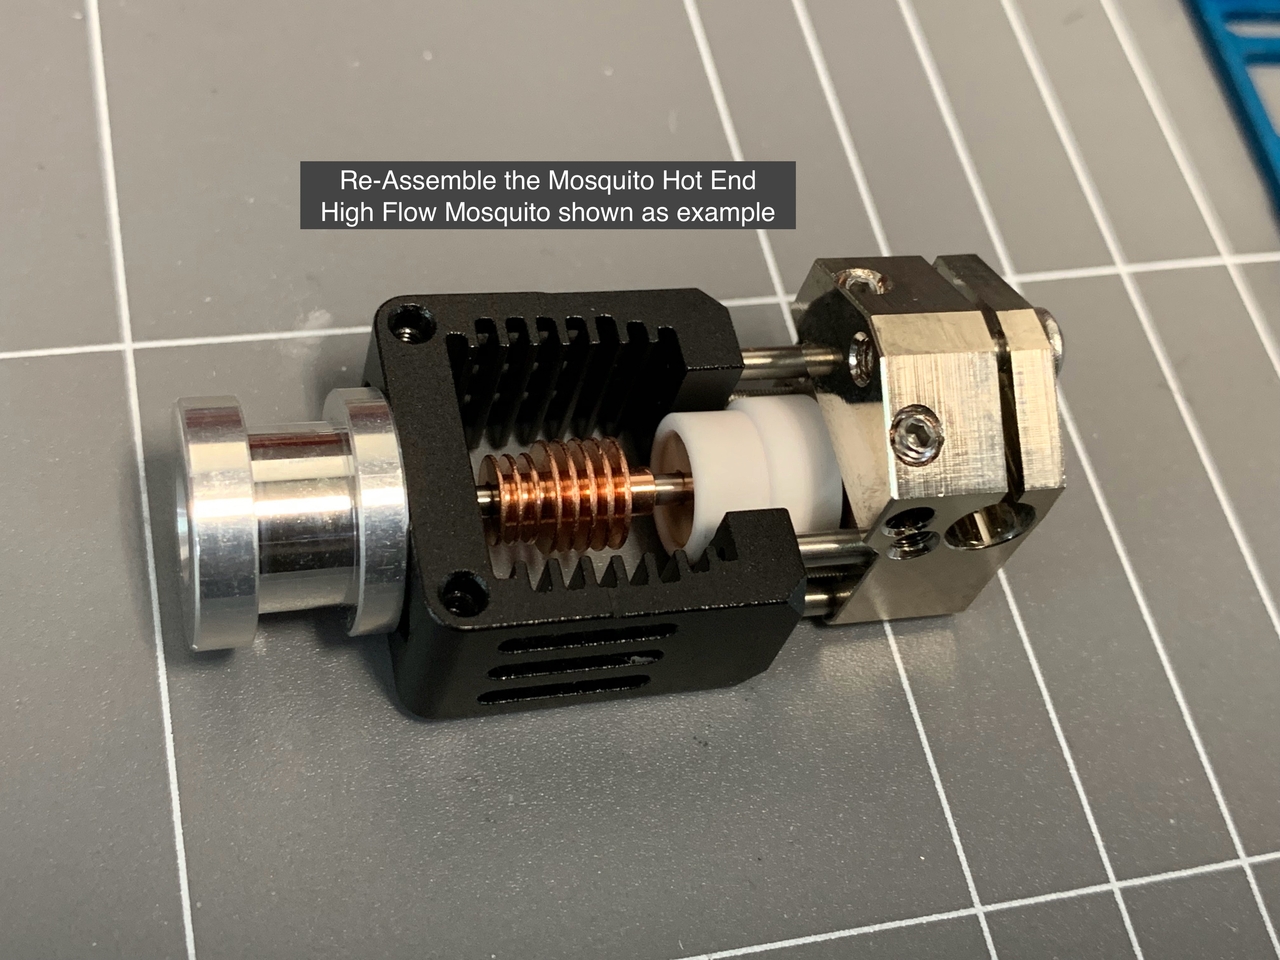
Fitting Hot Ends Image Set - Screw Mount
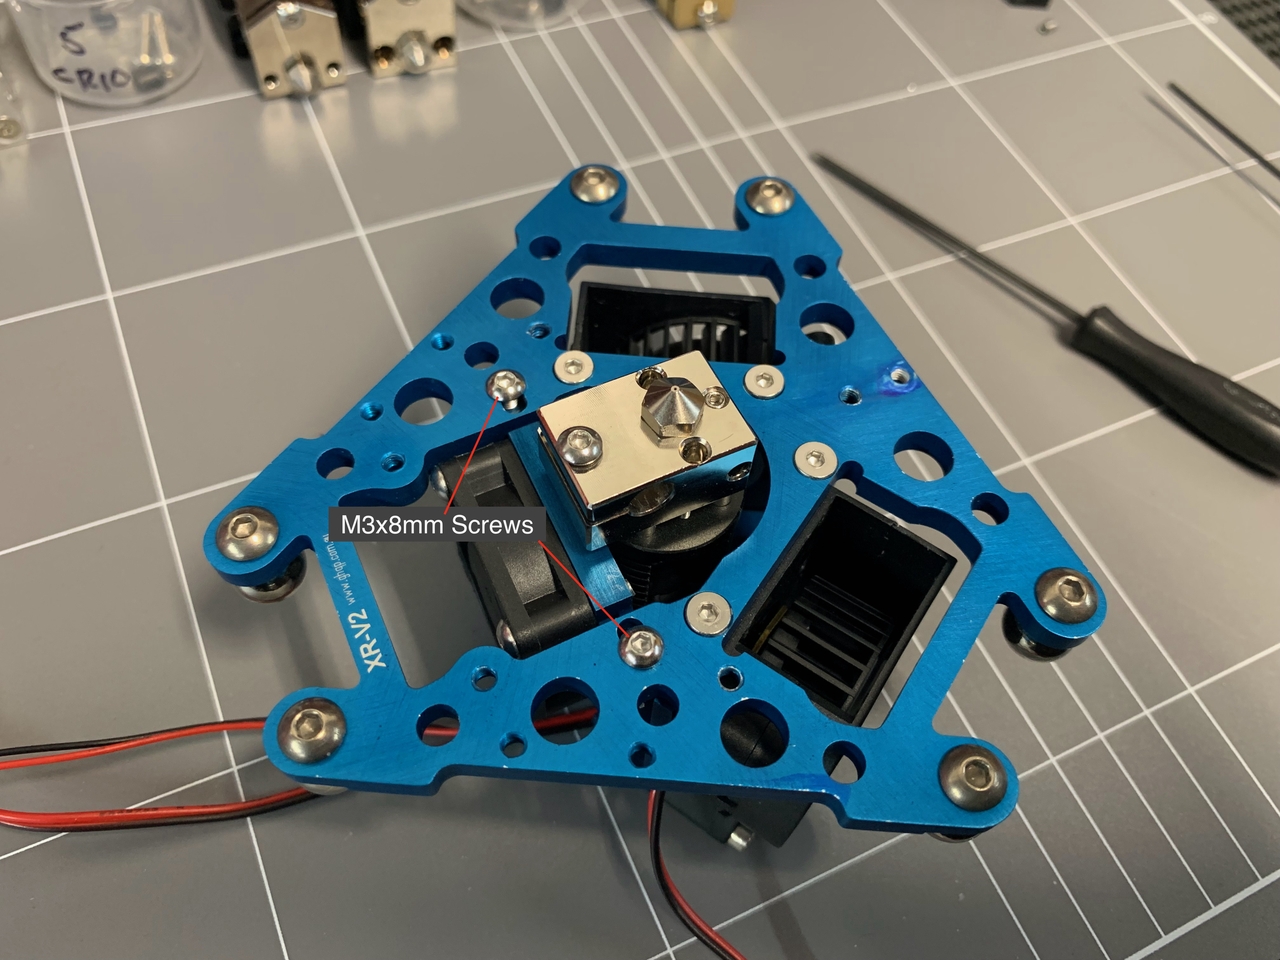
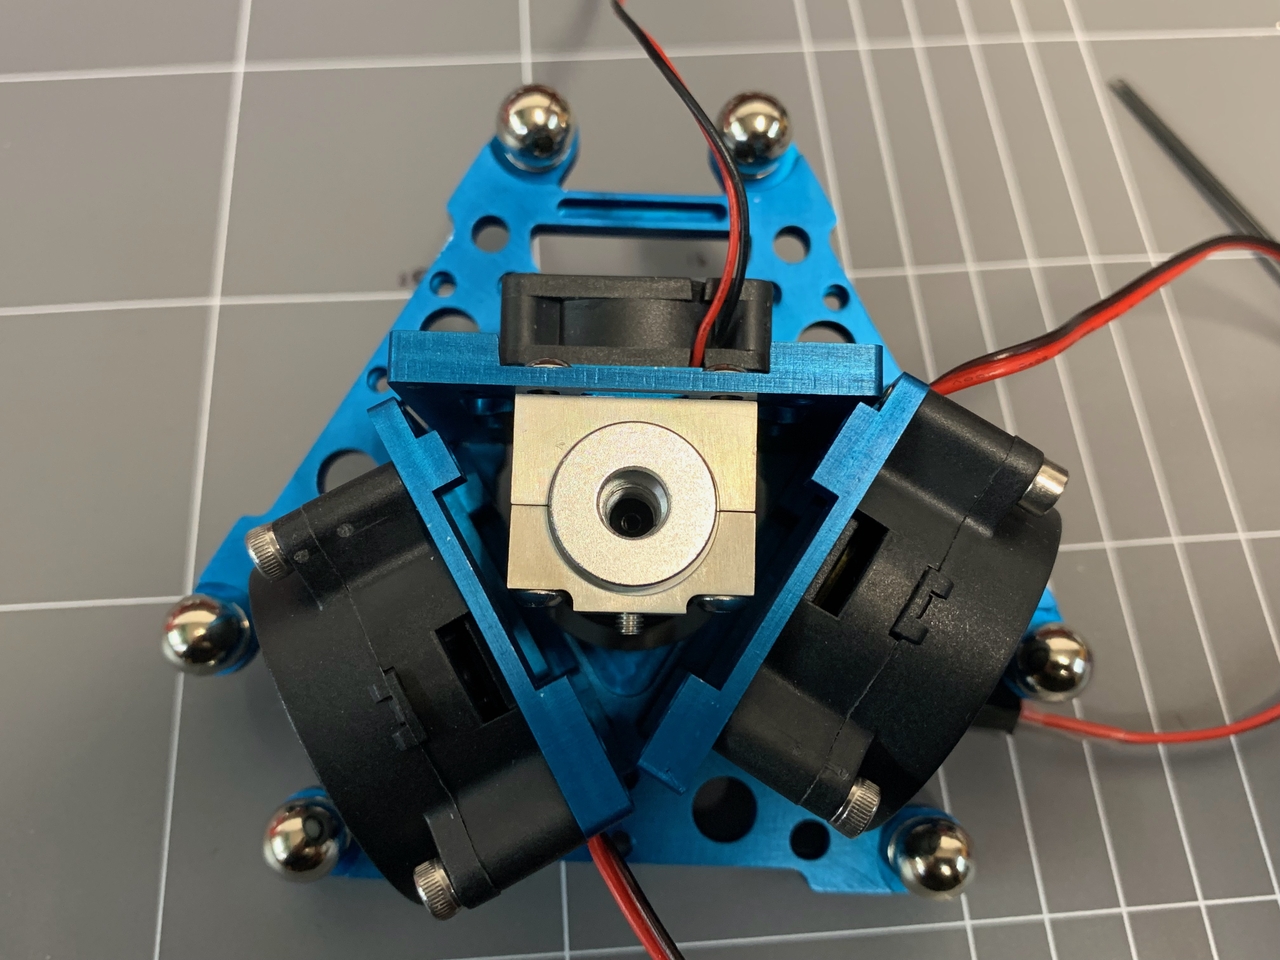
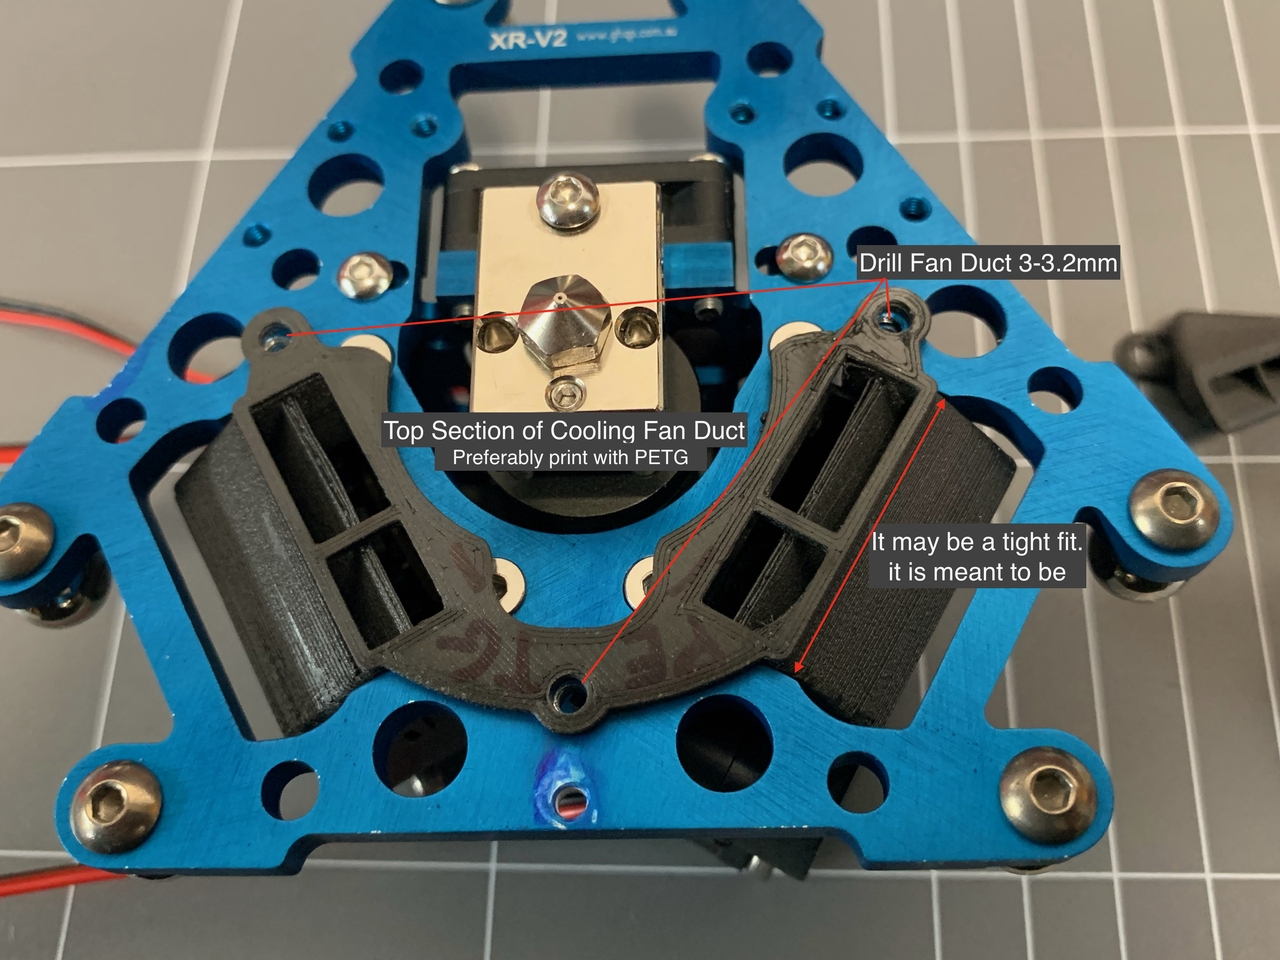
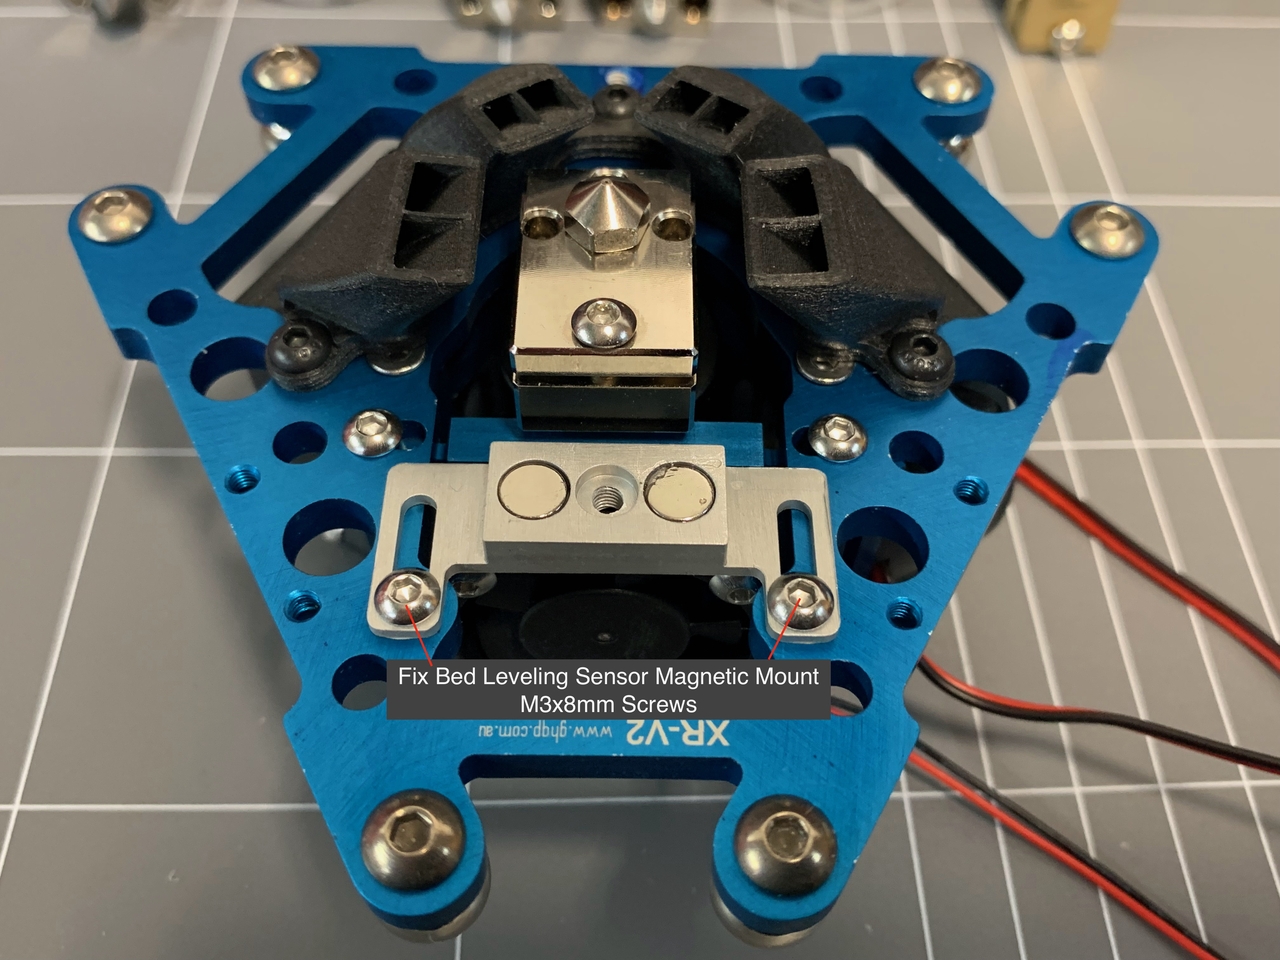
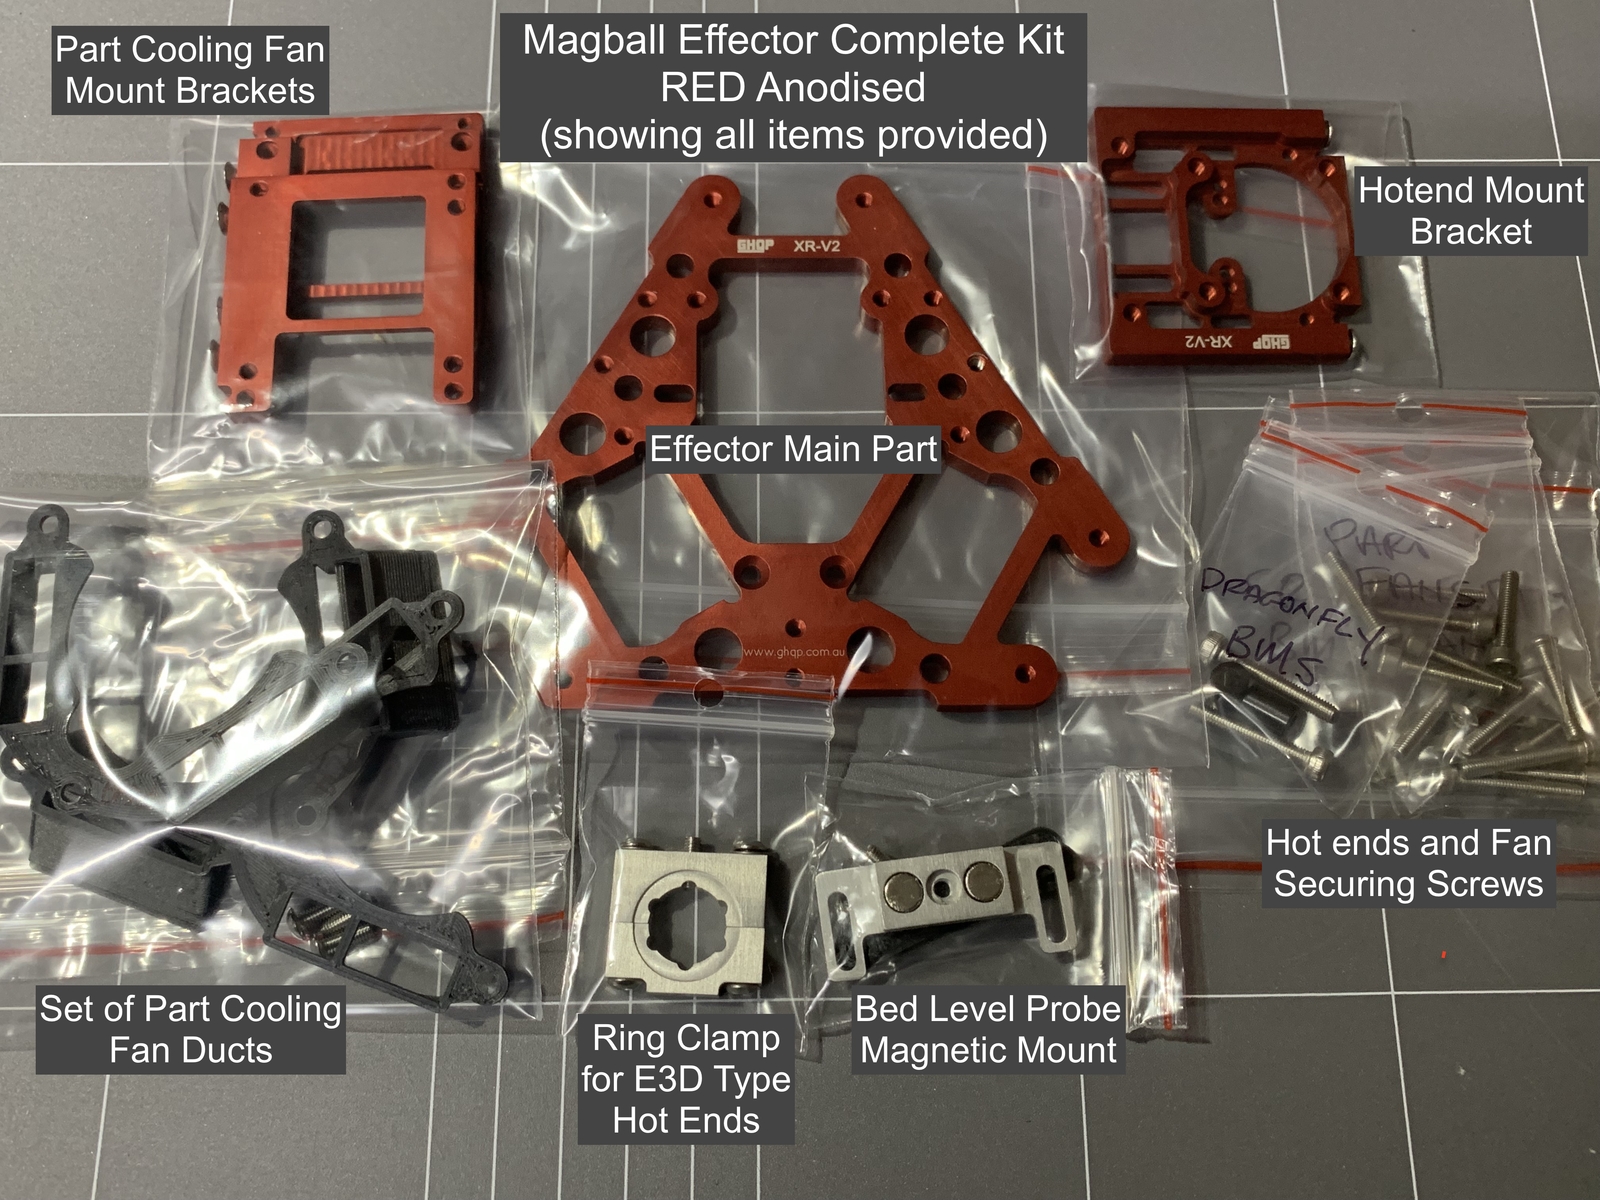
XR-EFFECTOR V2
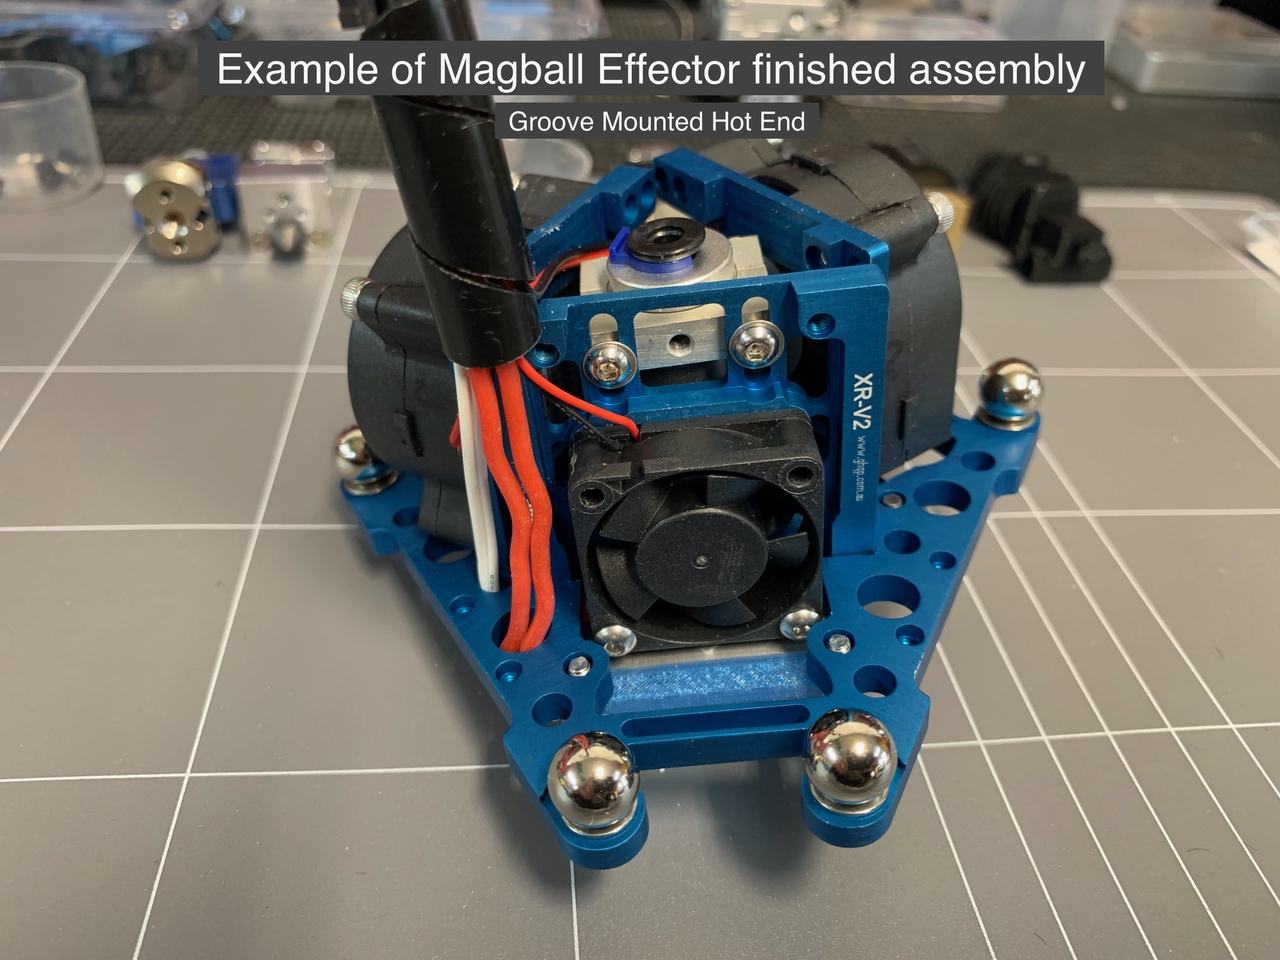
Example Images of Hot End Fitting.
Click an Image for a larger view
Click an Image for a larger view
 |
 |
 |
 |
 |
 |
 |
 |
 |
 |
 |
 |
 |
 |
 |
 |
 |
 |
 |
 |
 |
 |
 |
 |
 |
 |
 |
 |
 |
 |
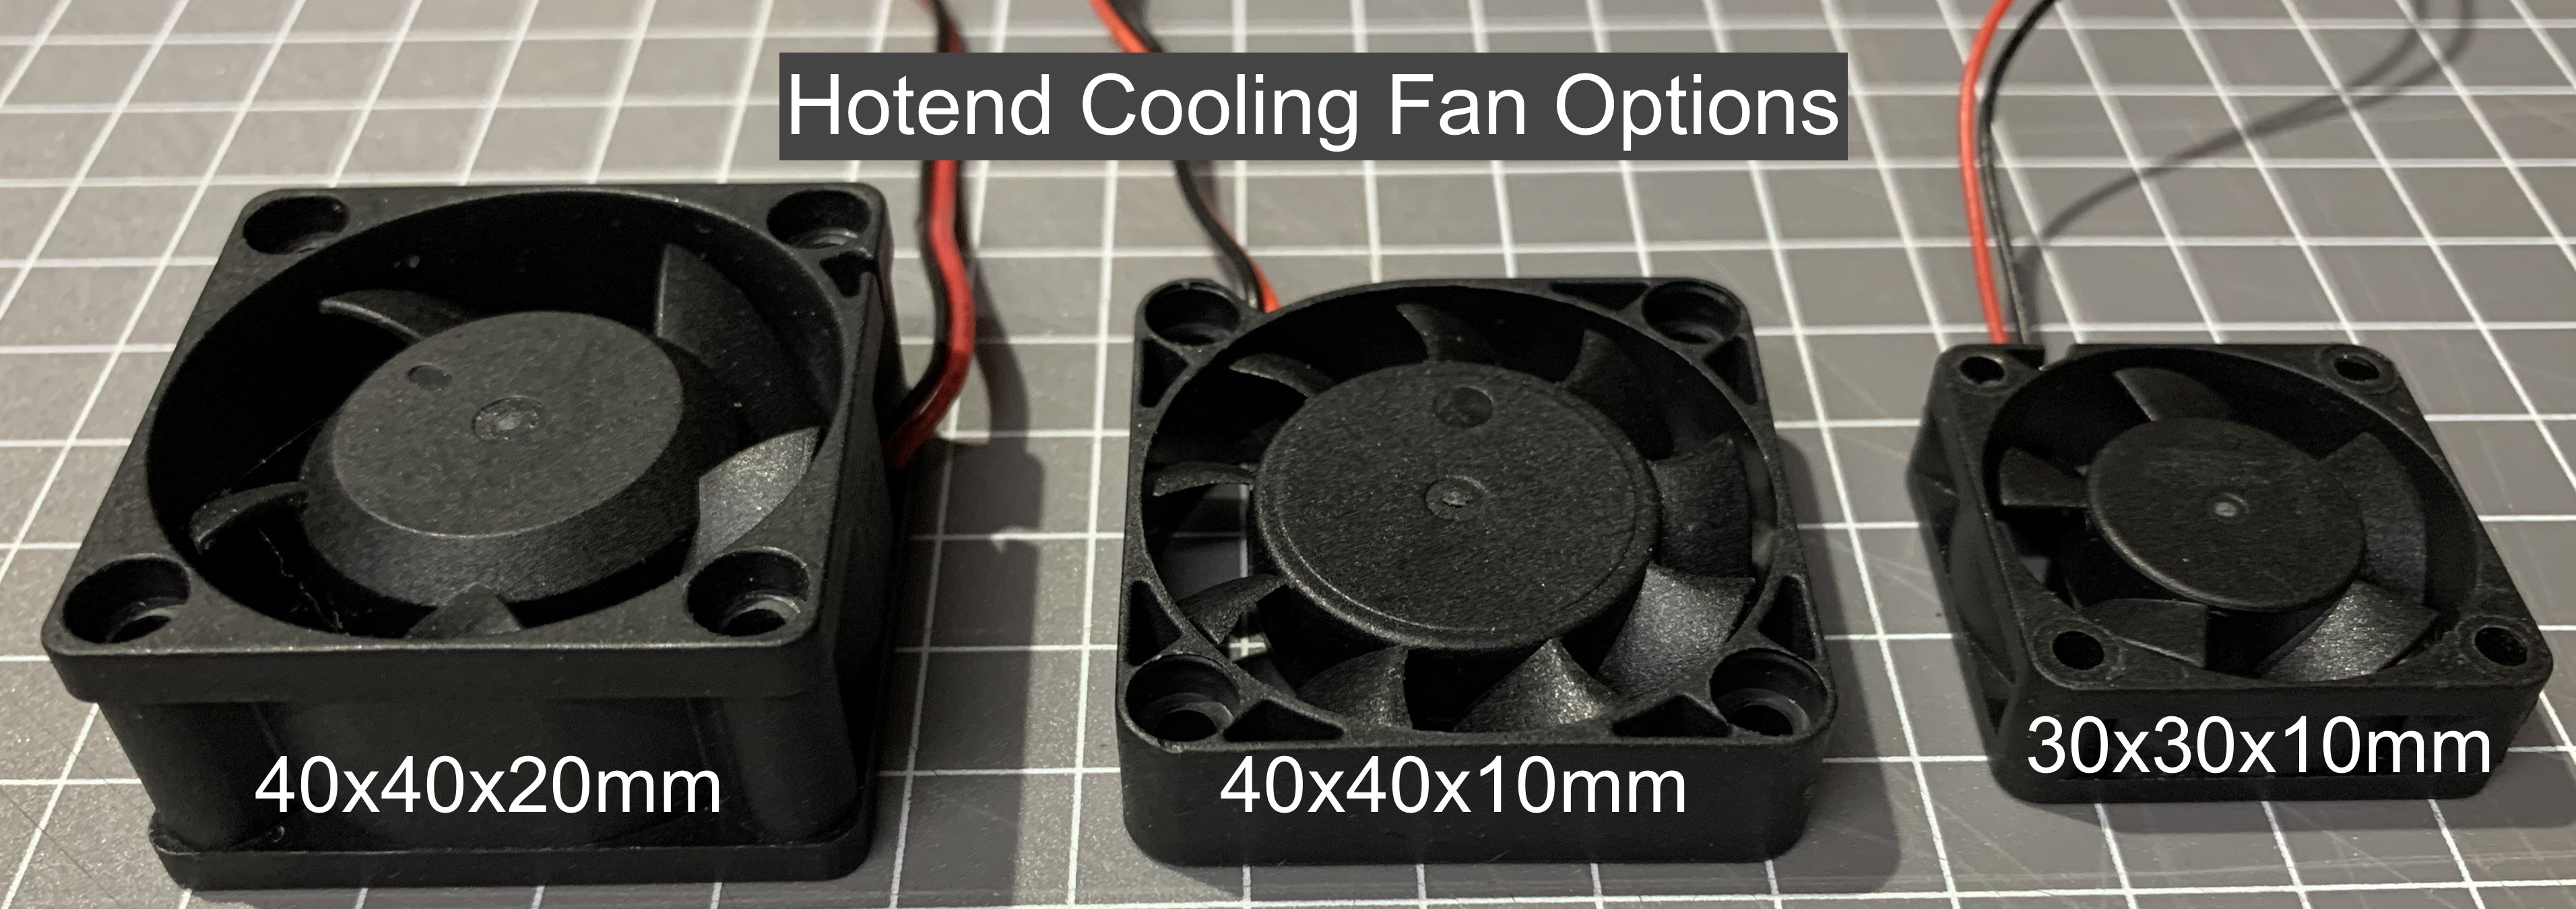
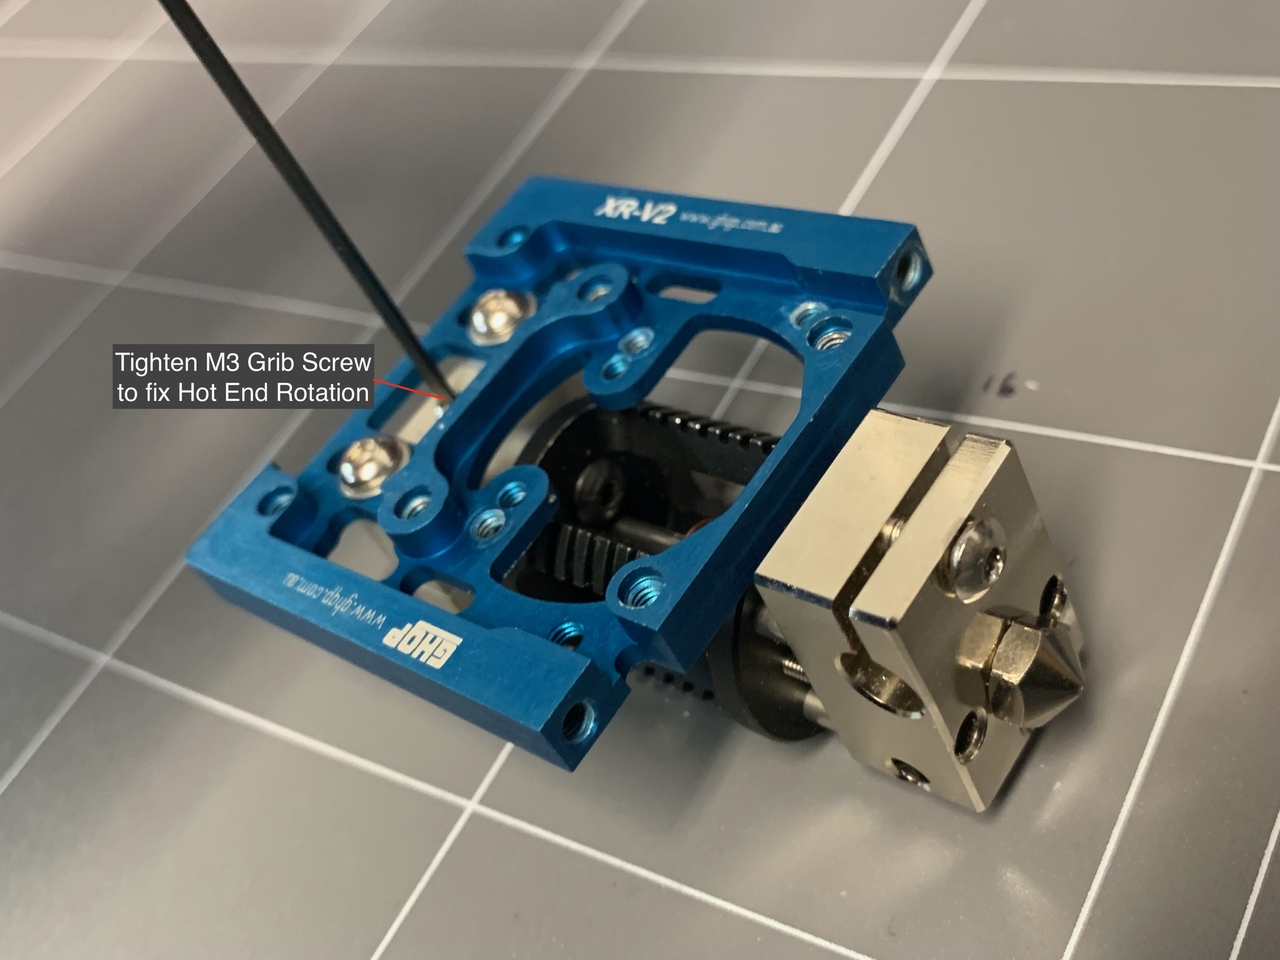
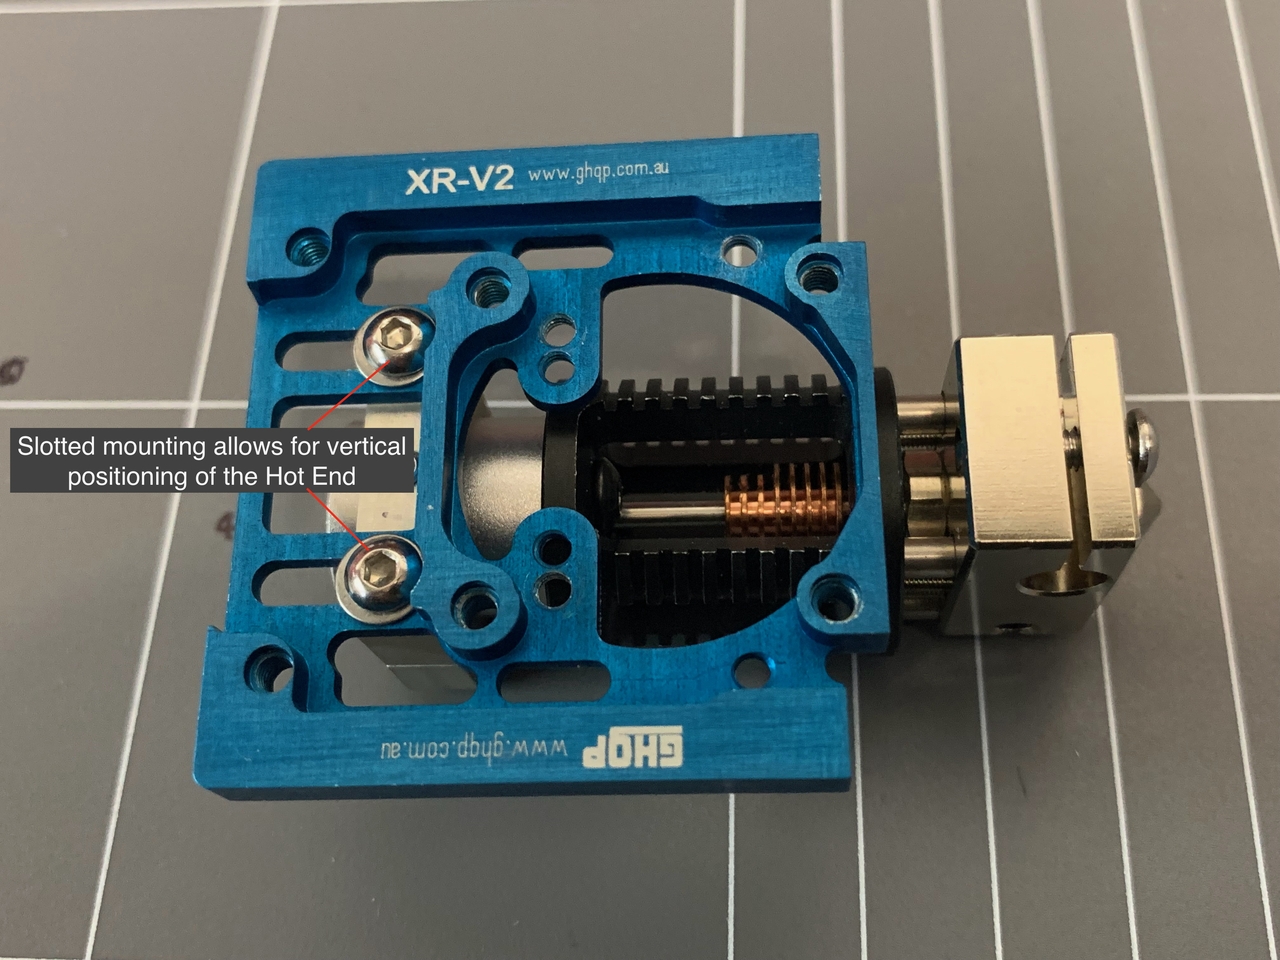
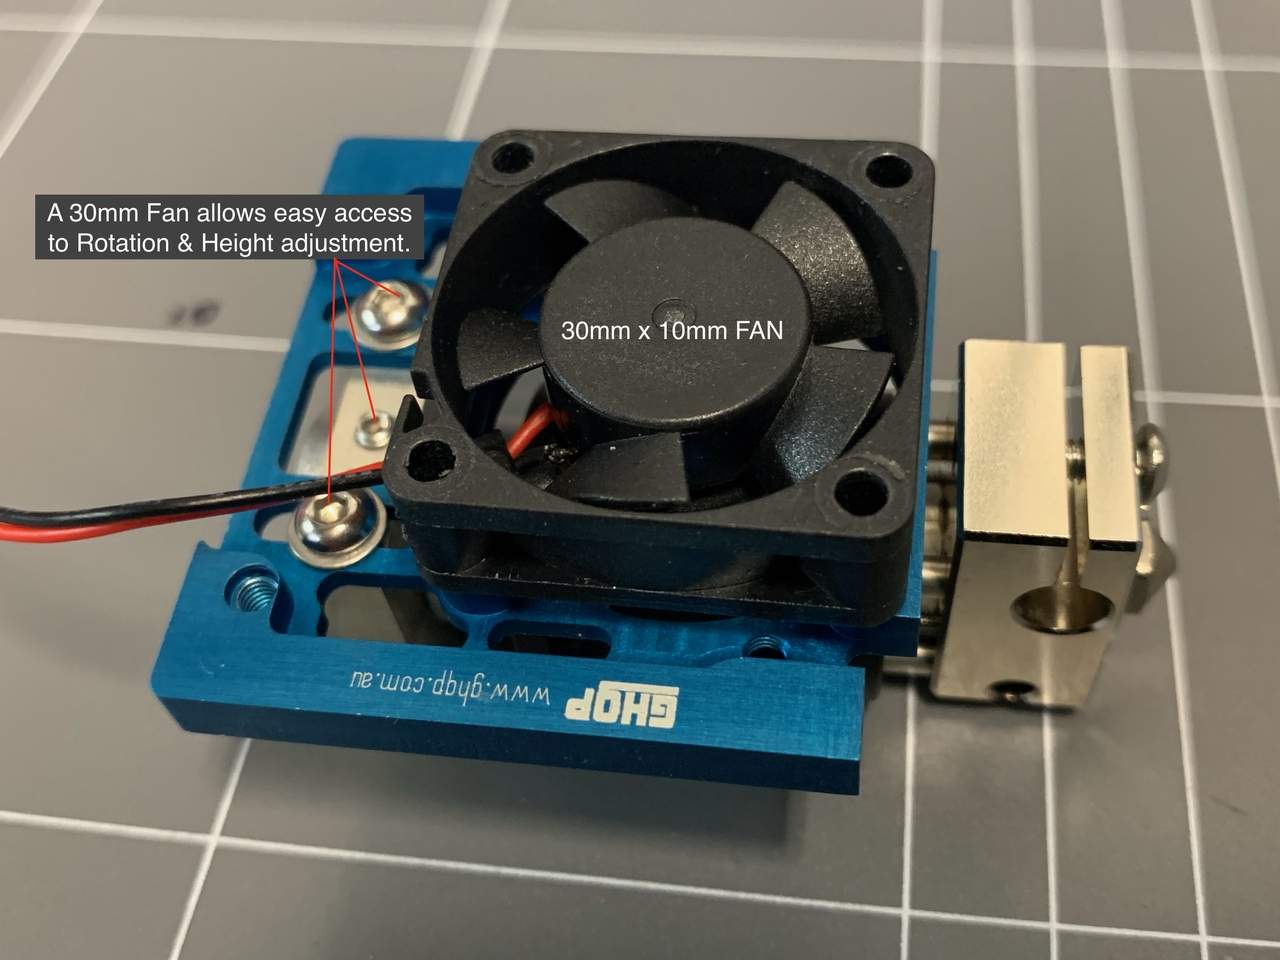
XR-EFFECTOR V2 is an update that provides for one single mounting plate for all compatible Hot Ends
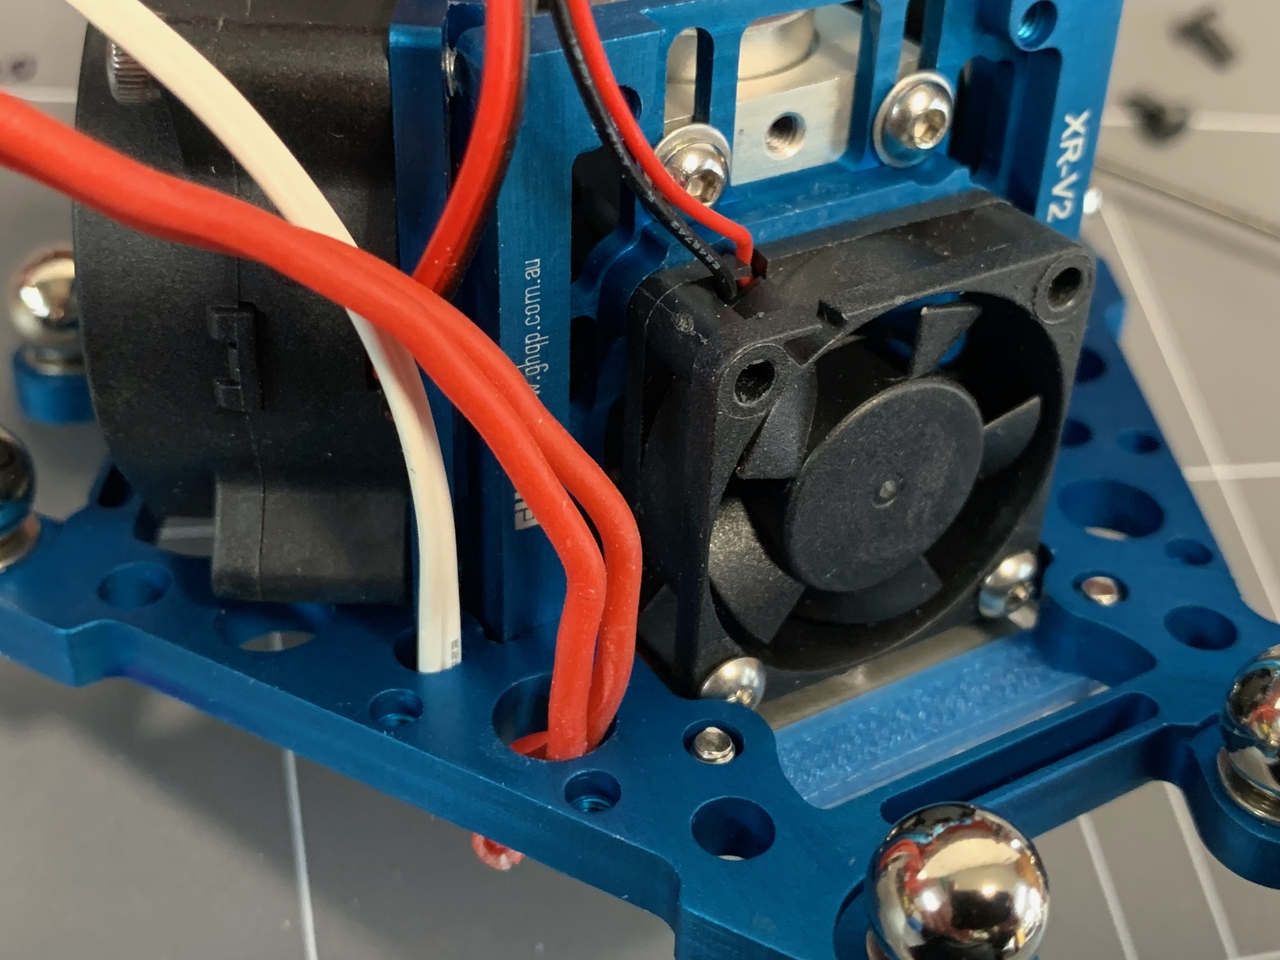
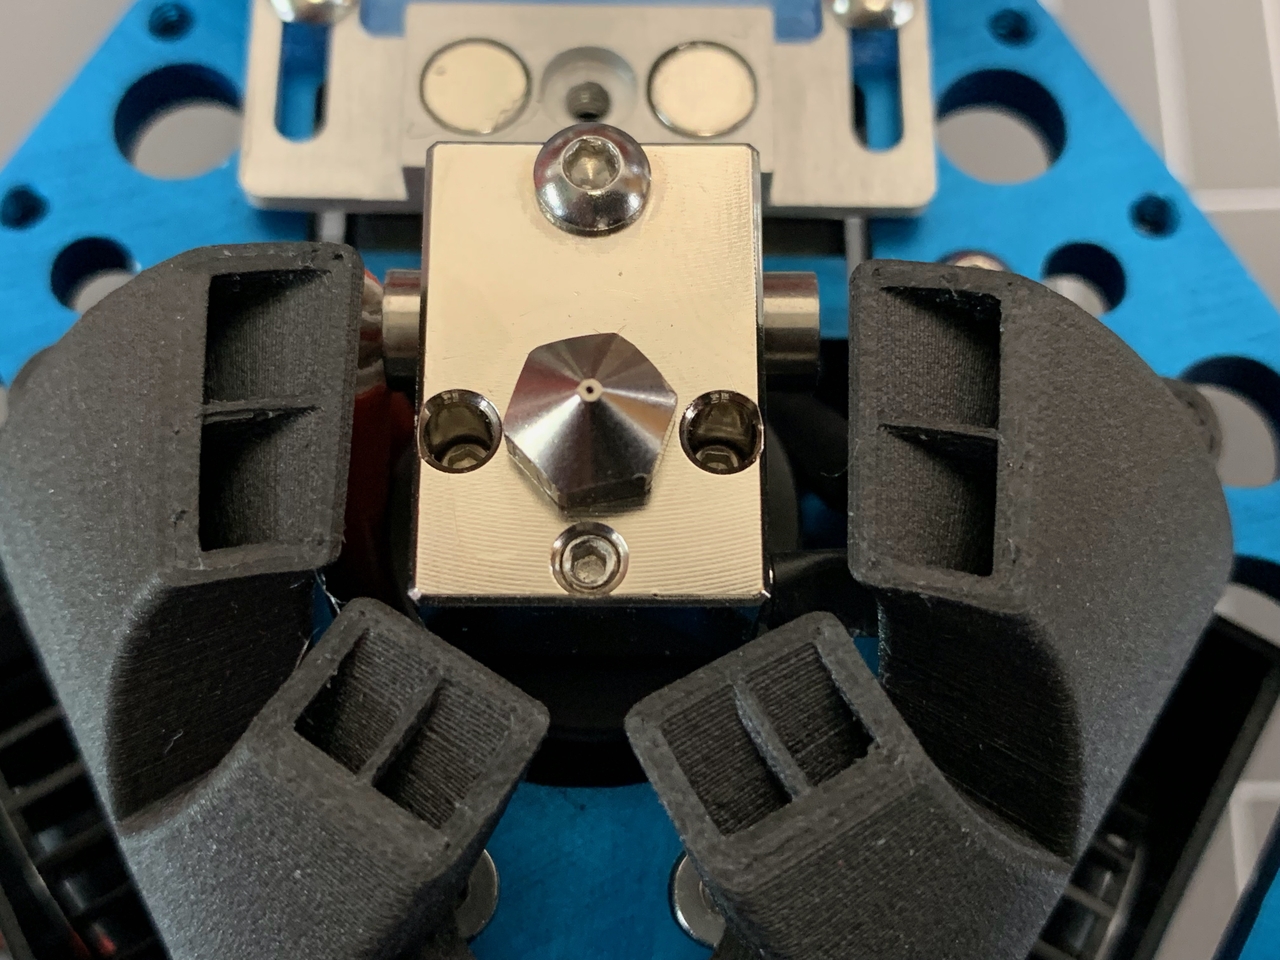
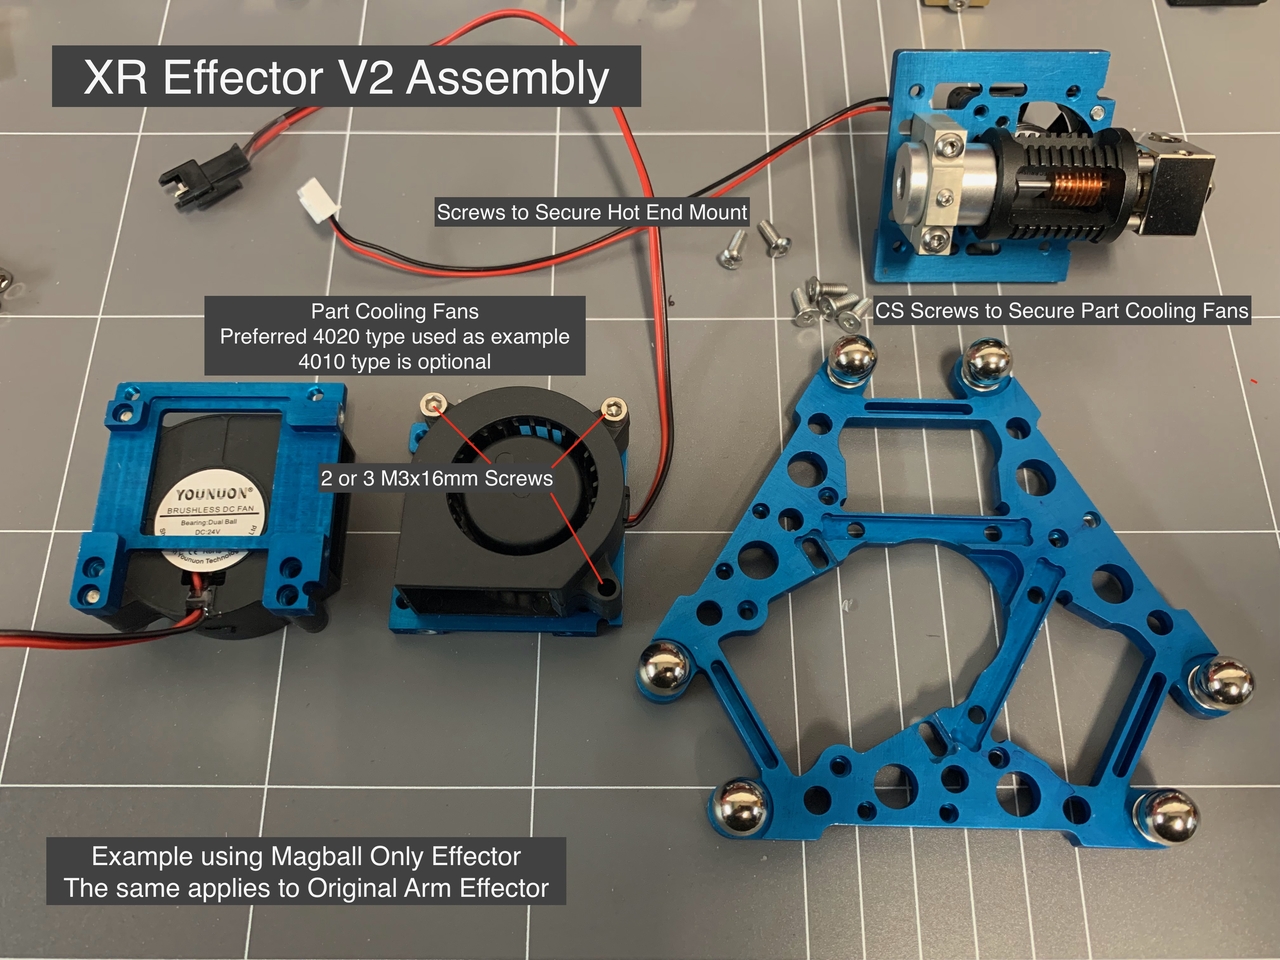
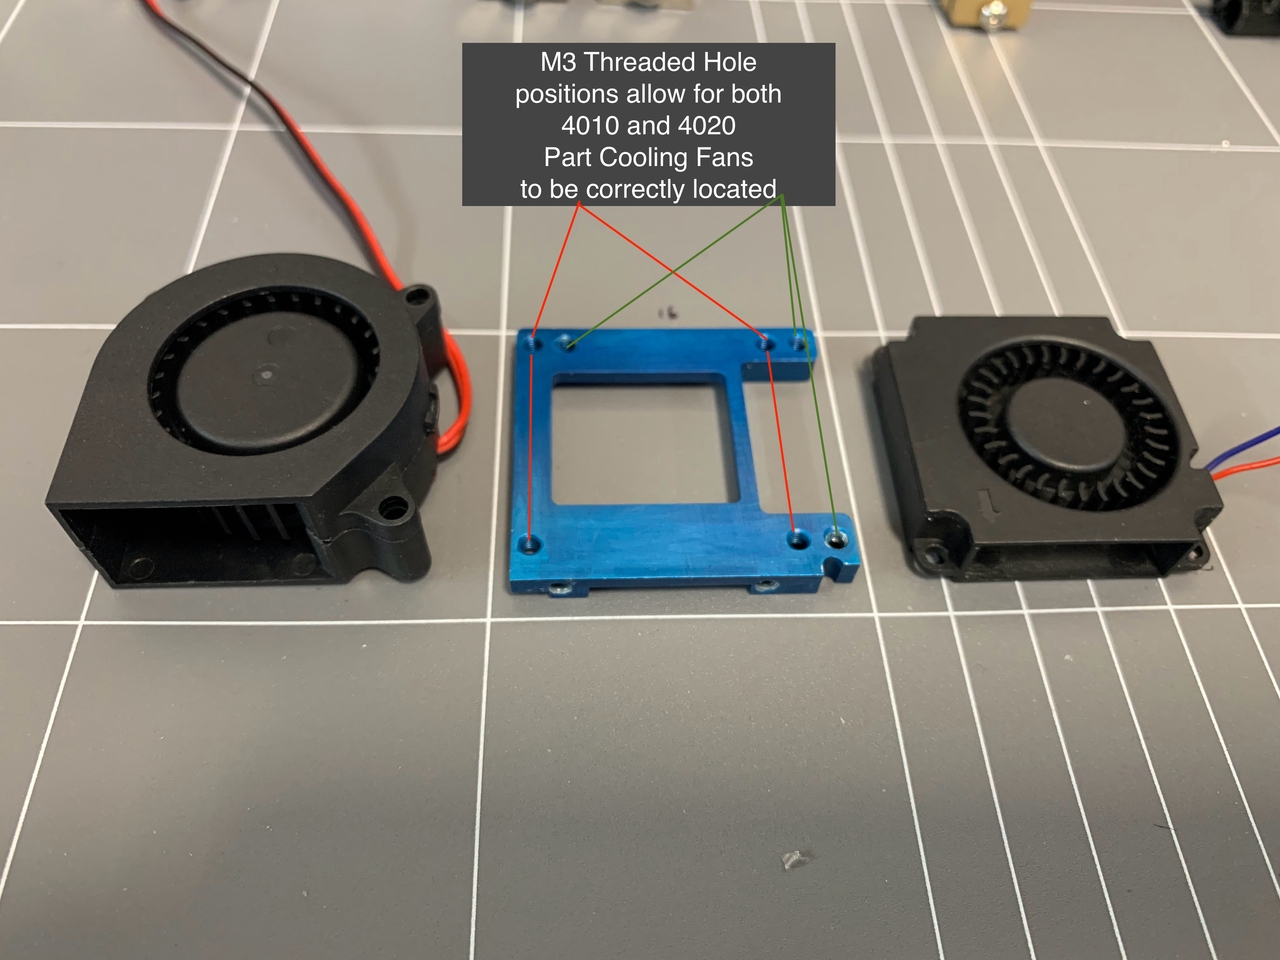
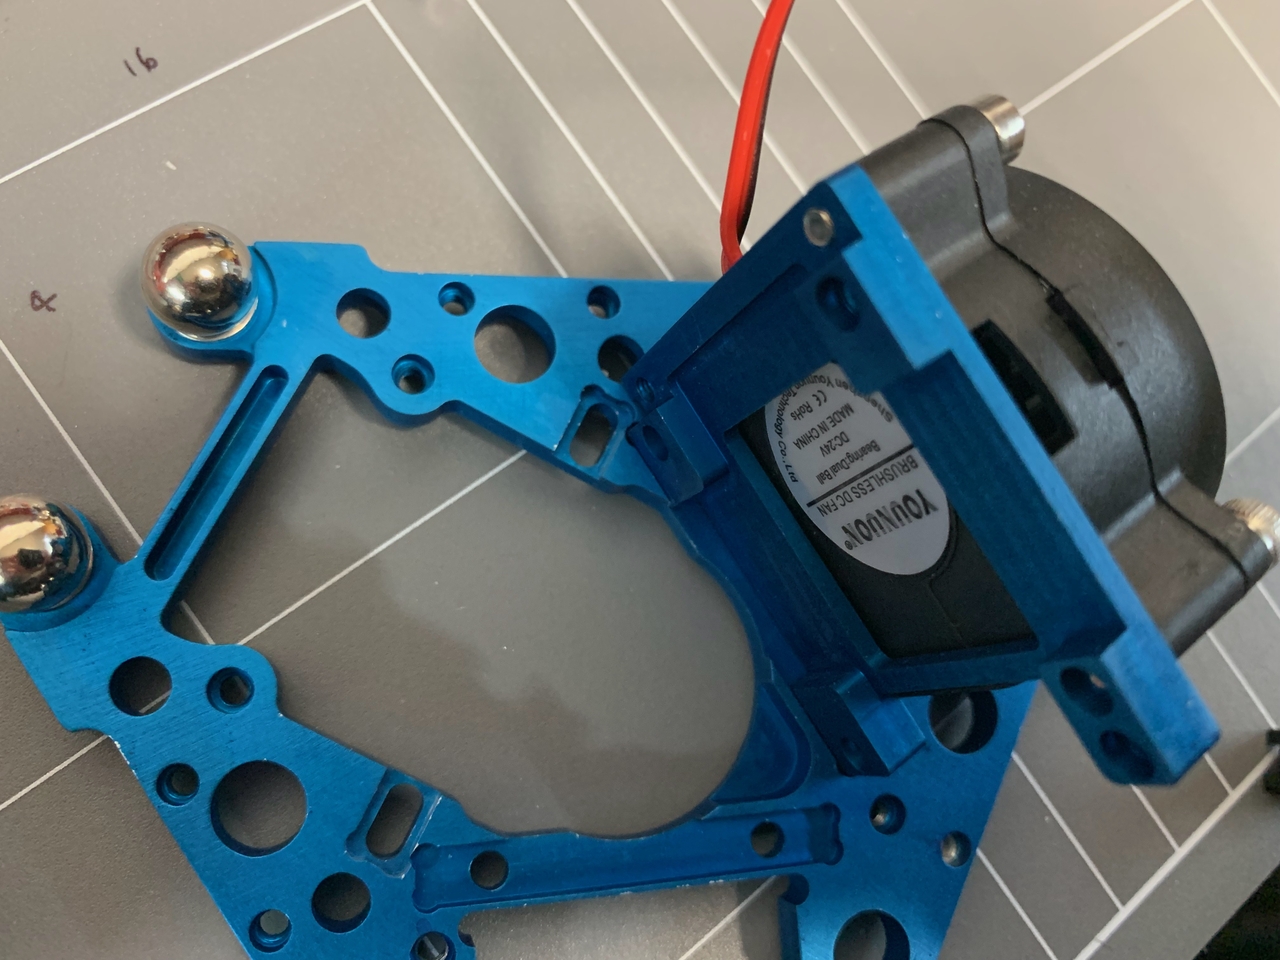
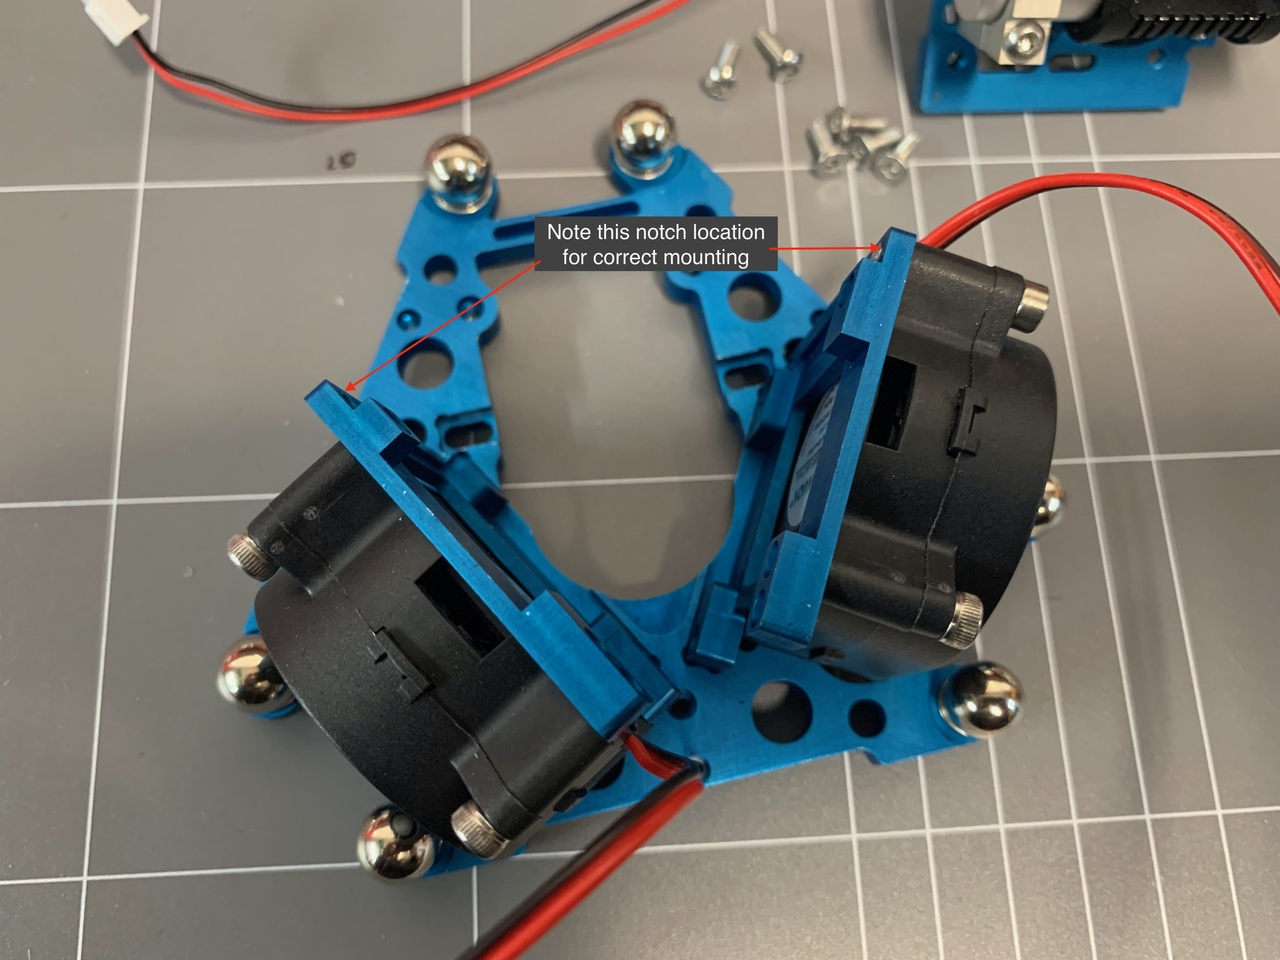
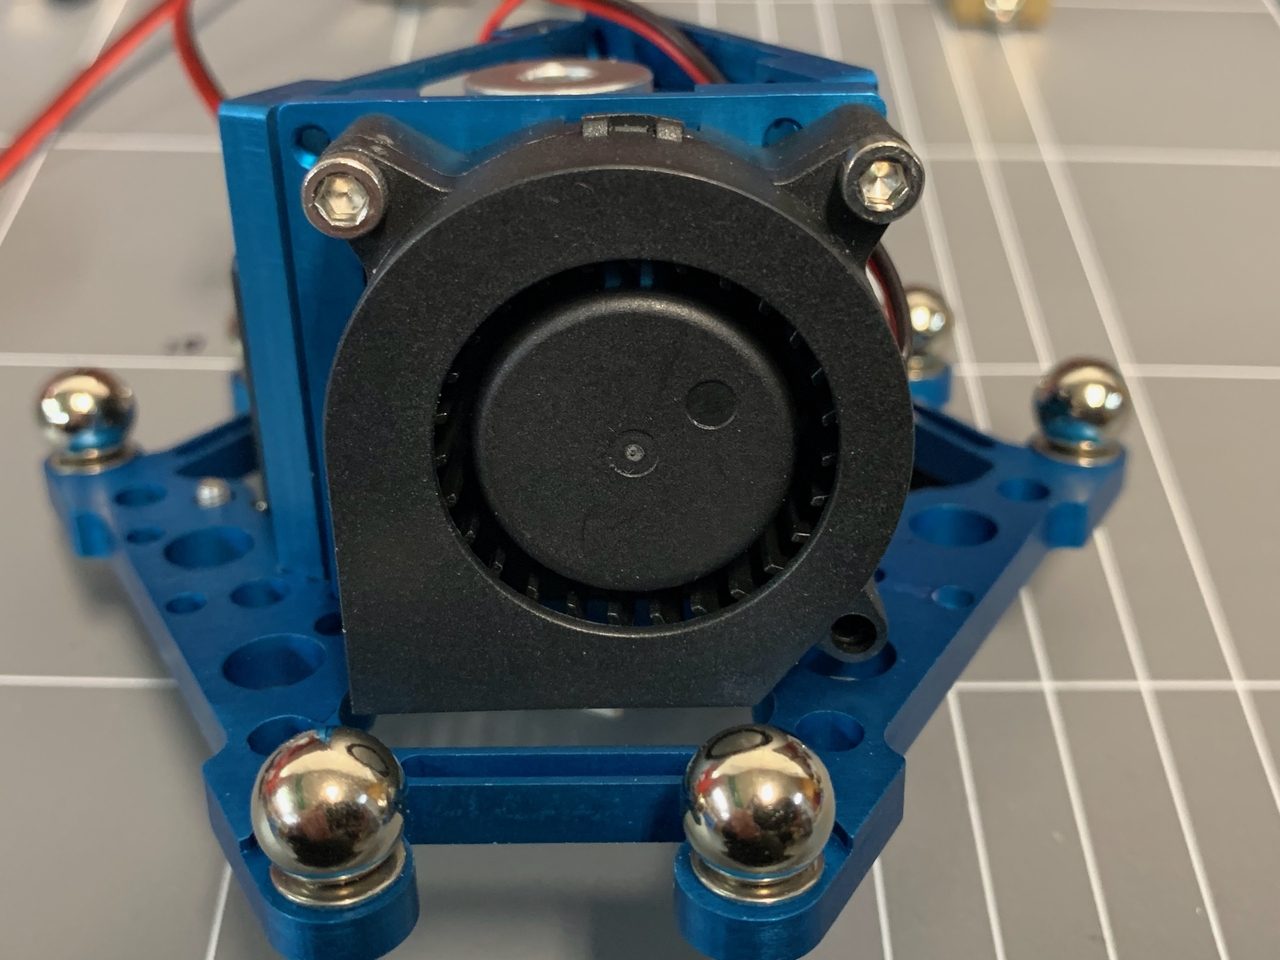
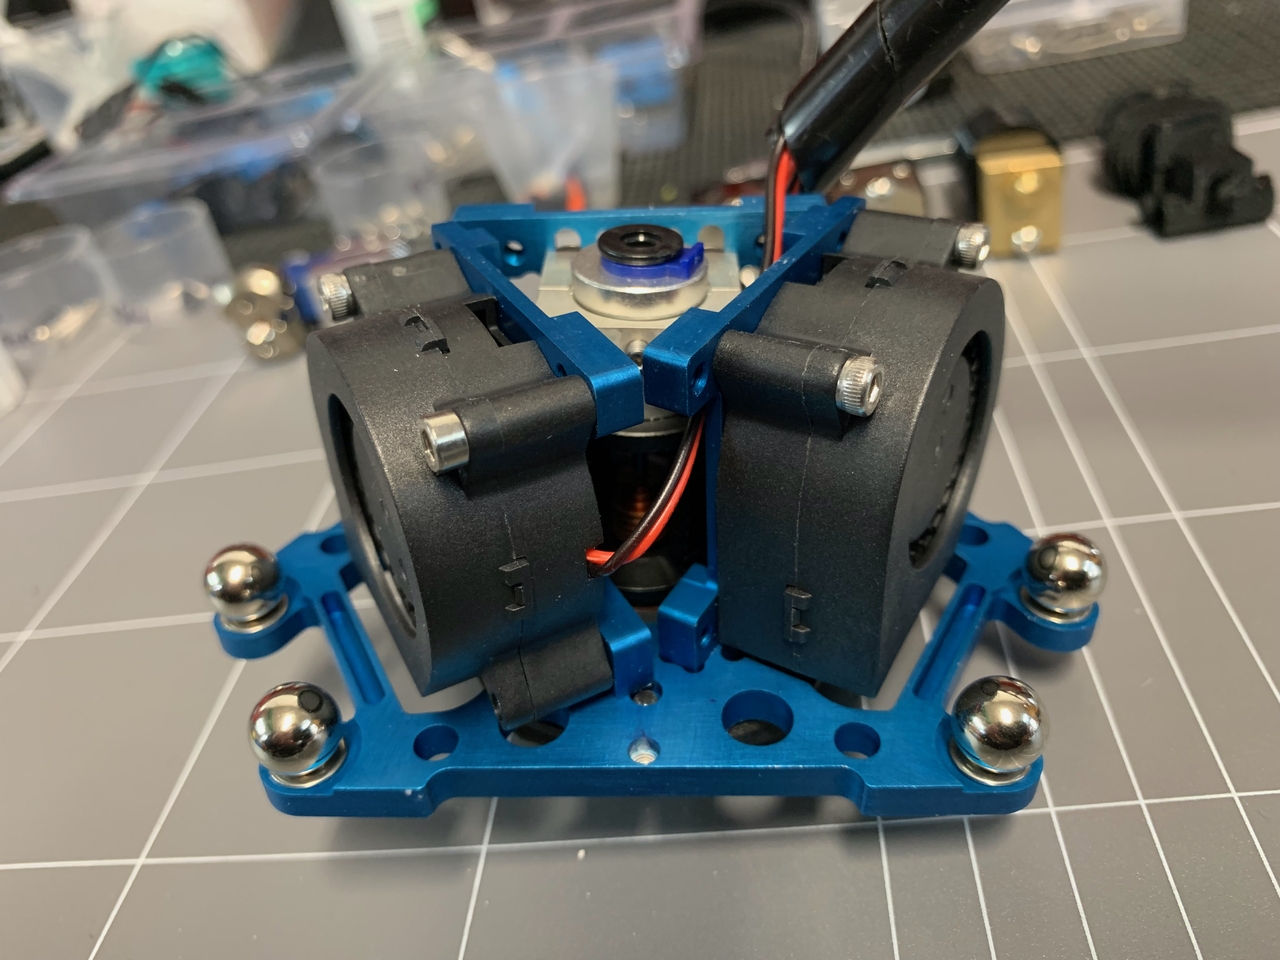
Effector Assembly Image Set
Fitting Hot Ends Image Set - Groove Mount
The following download .zip files contain a complete set of all above plus additional images, the images also include text comments and Instructions.
 |
 |
 |
 |
 |
 |
 |
 |
 |
 |
 |
 |
 |
 |
 |
 |
 |
 |
 |
 |
 |
 |
 |
 |
Example Images of Effector Assembly.
Click an Image for a larger view
Click an Image for a larger view
 |
 |
 |
 |
 |
 |
 |
 |
 |
 |
 |
 |
 |
 |
 |
 |
 |
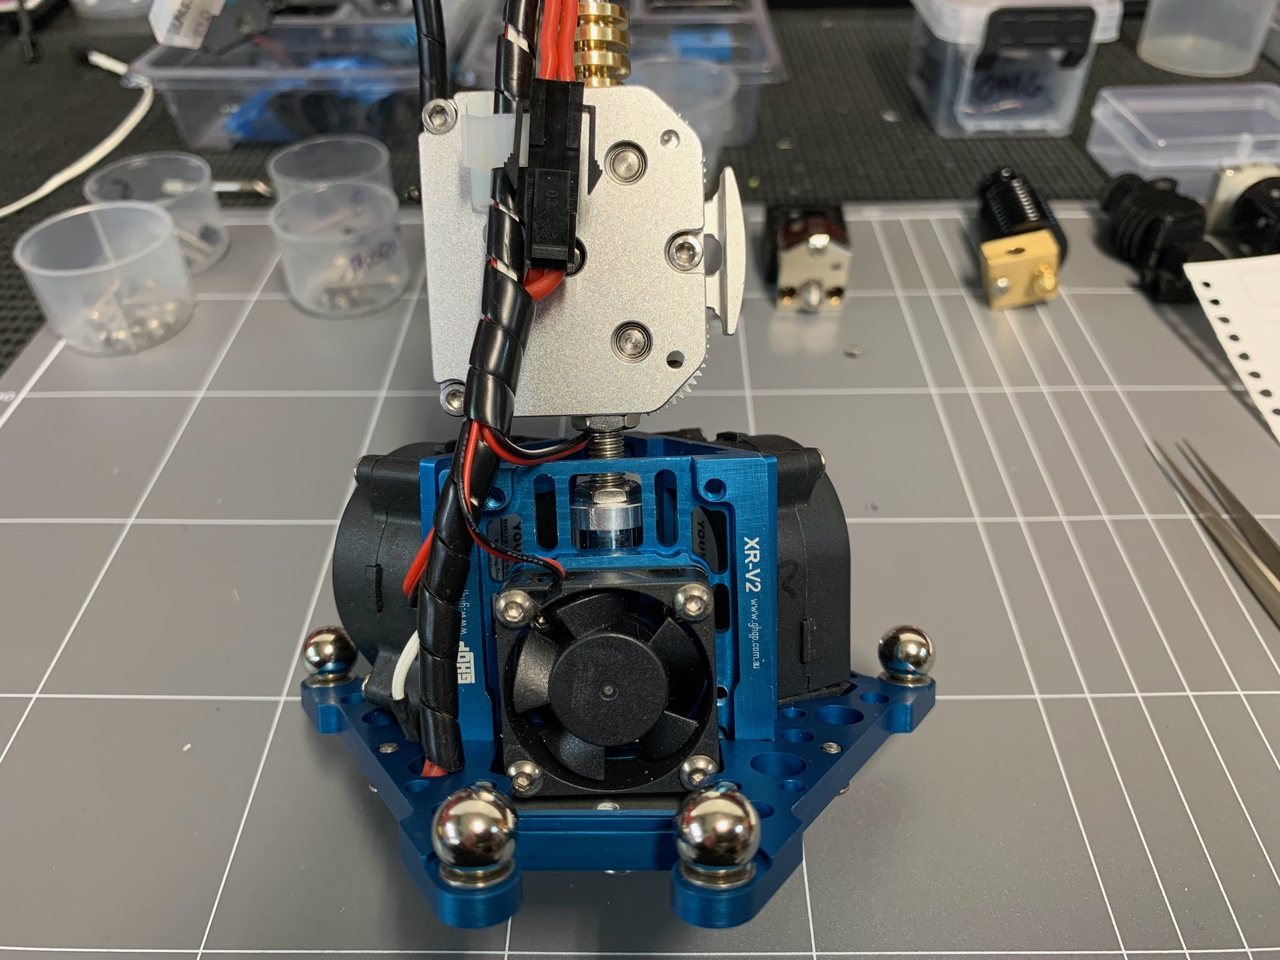 |
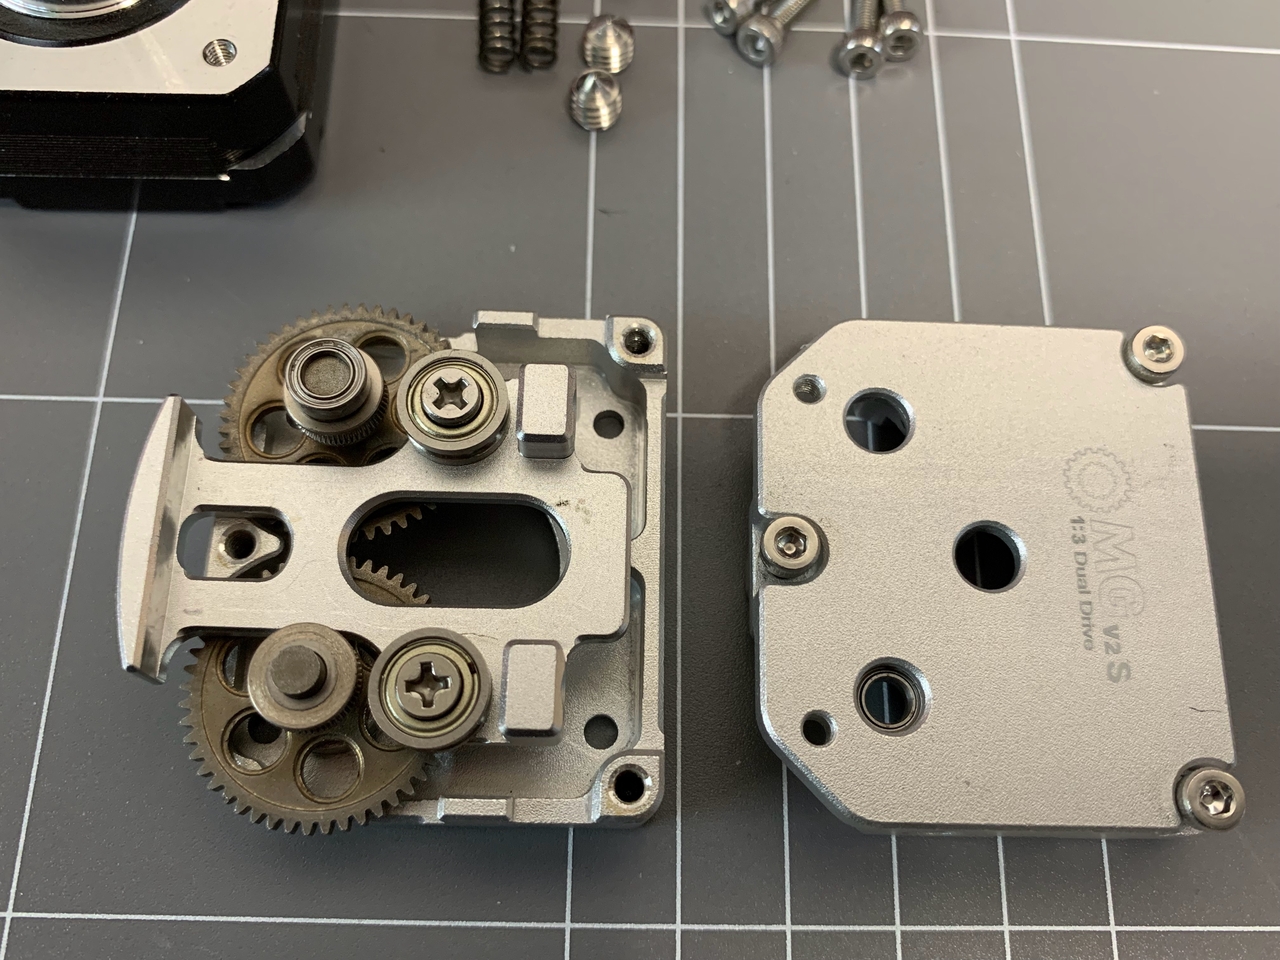
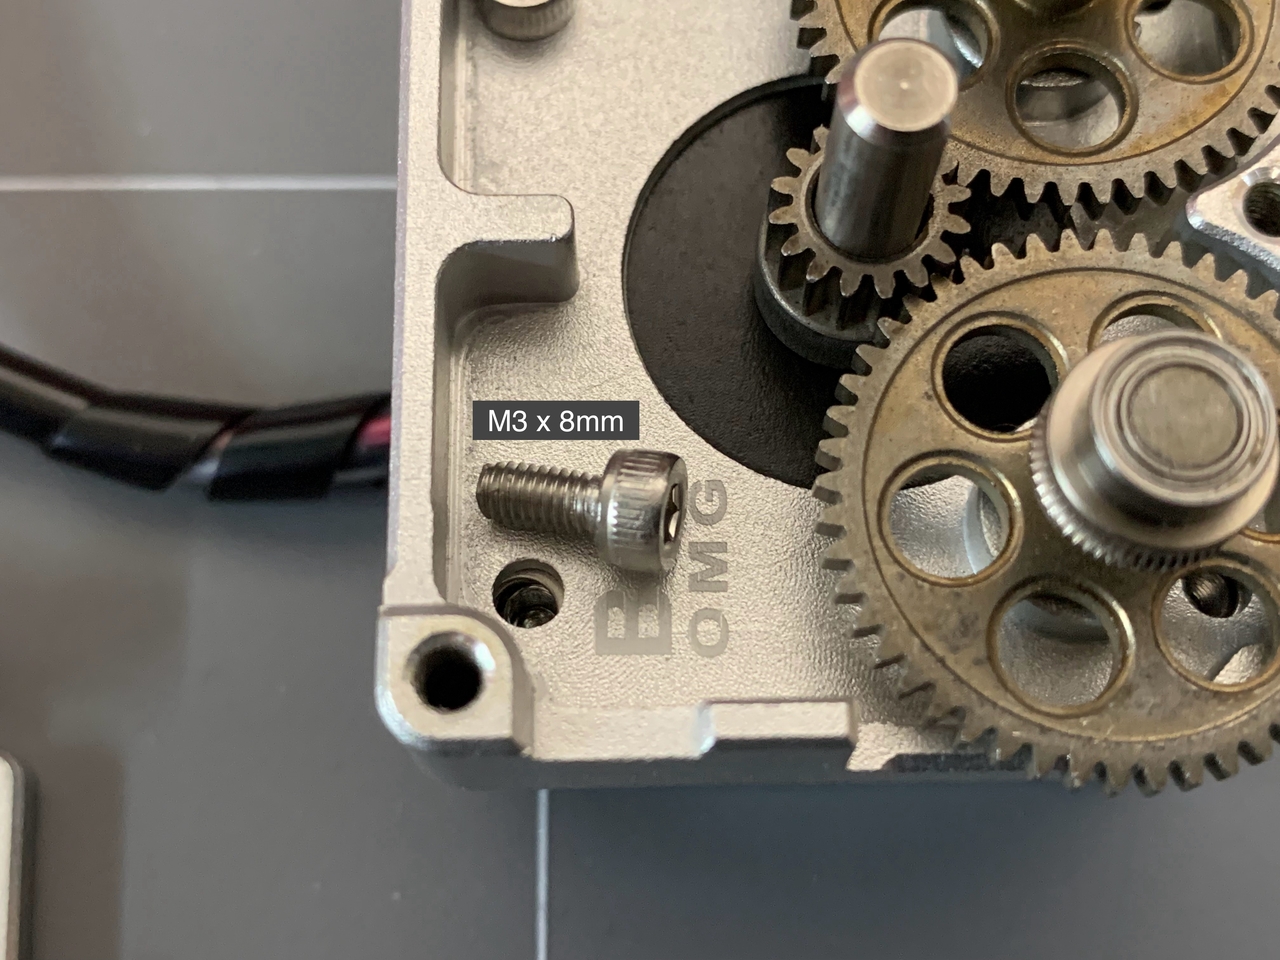
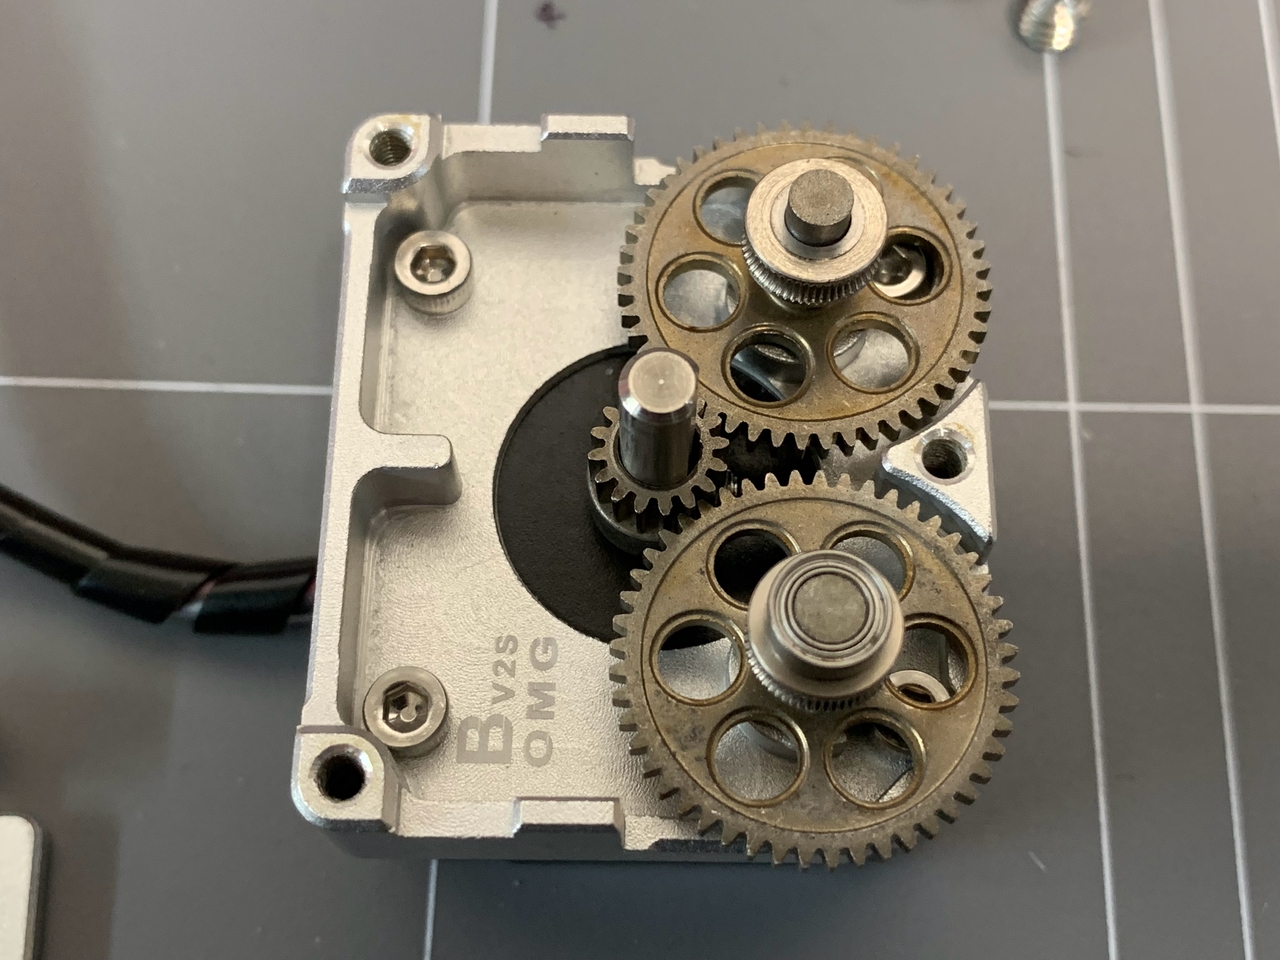
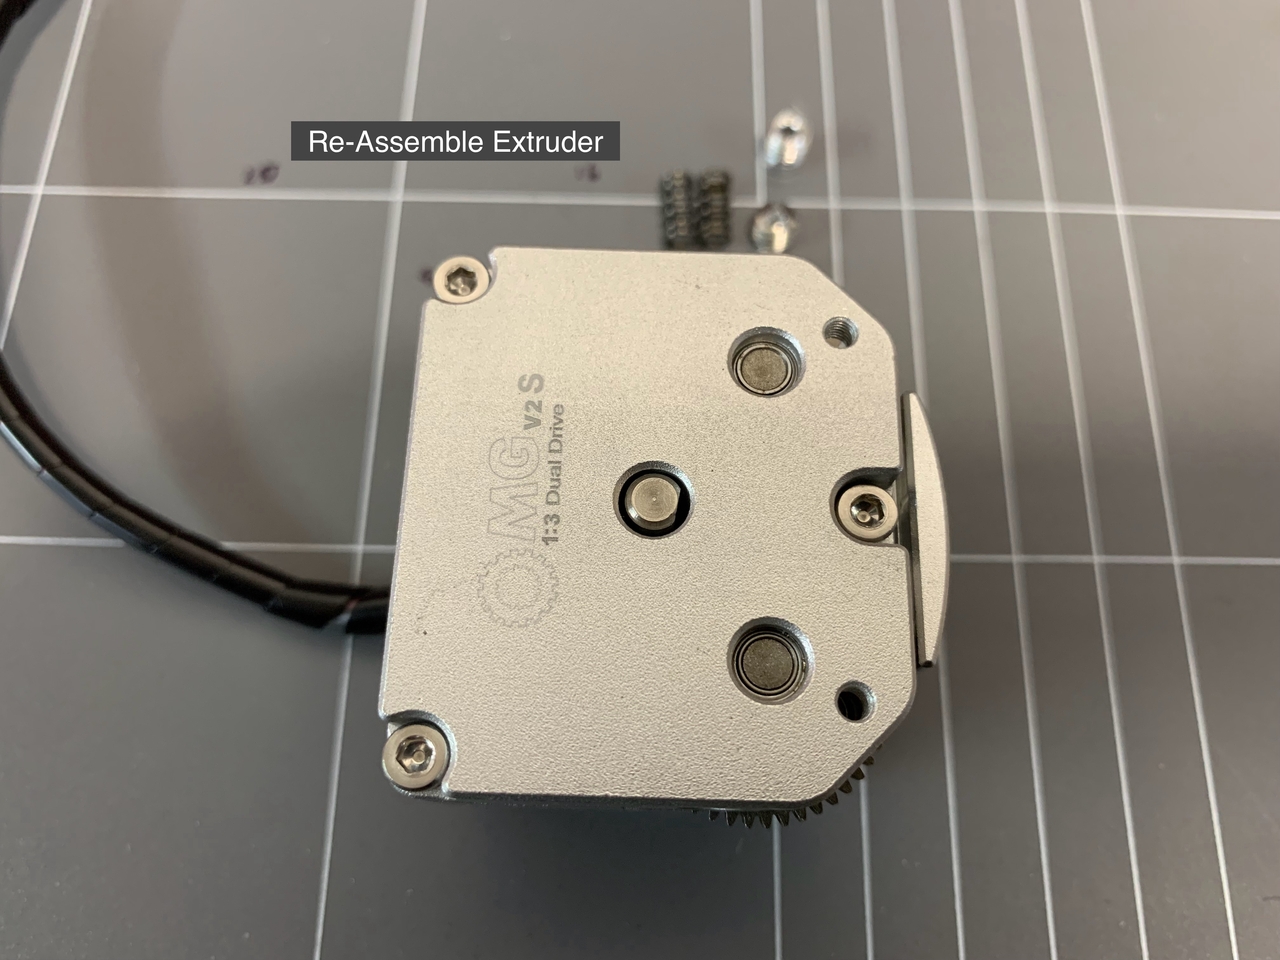
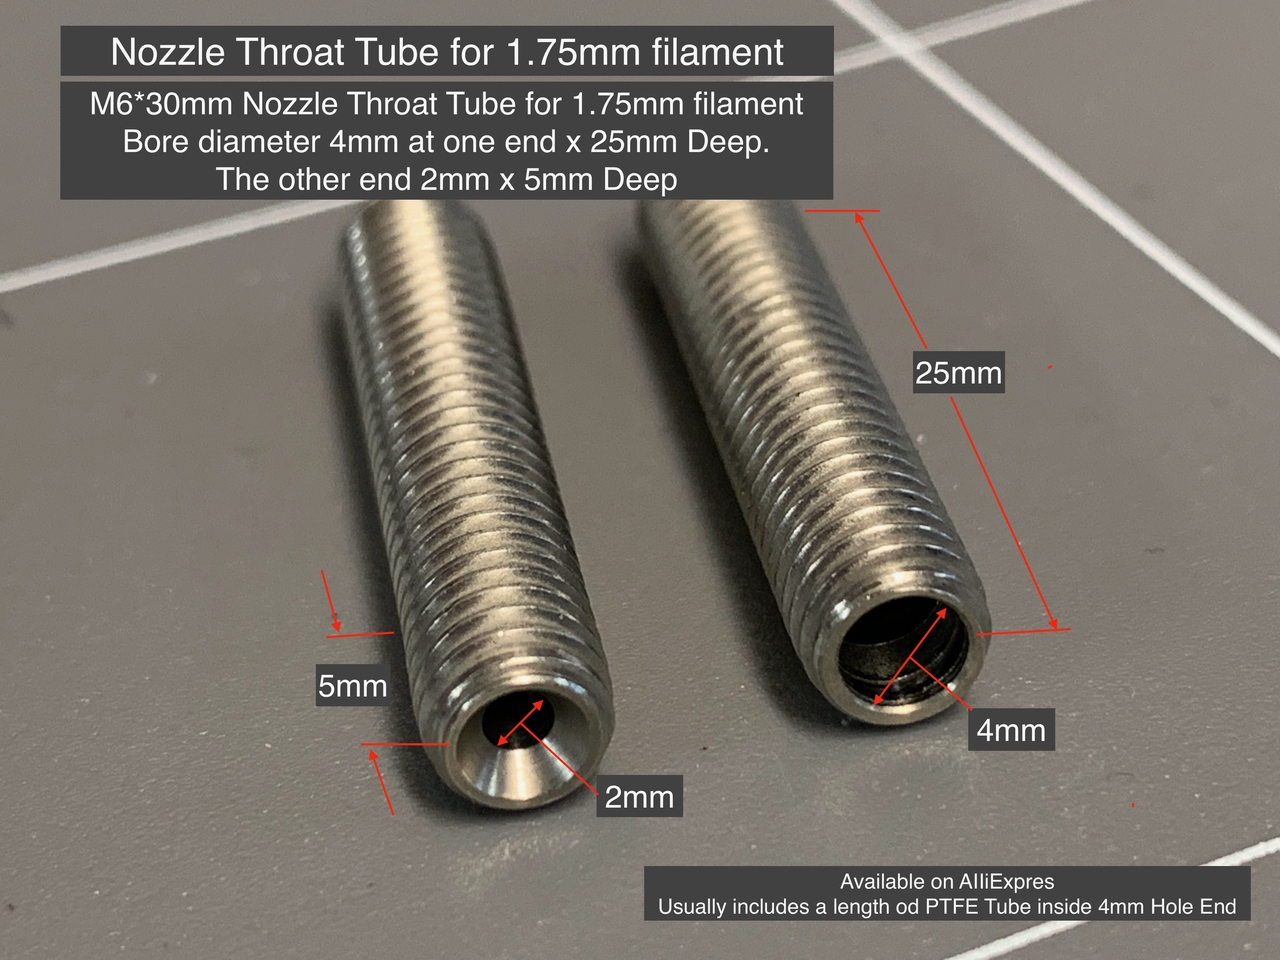
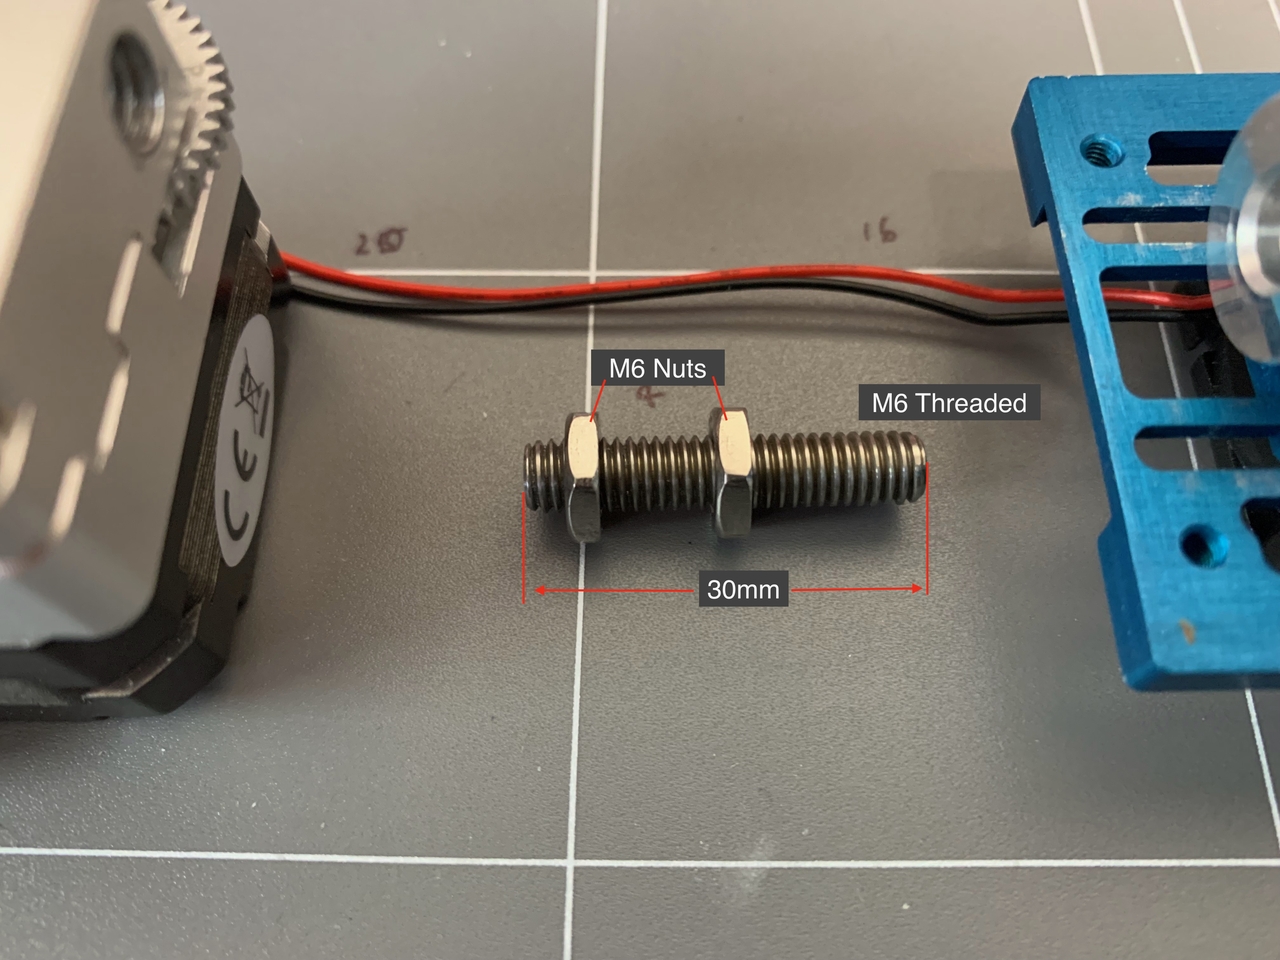
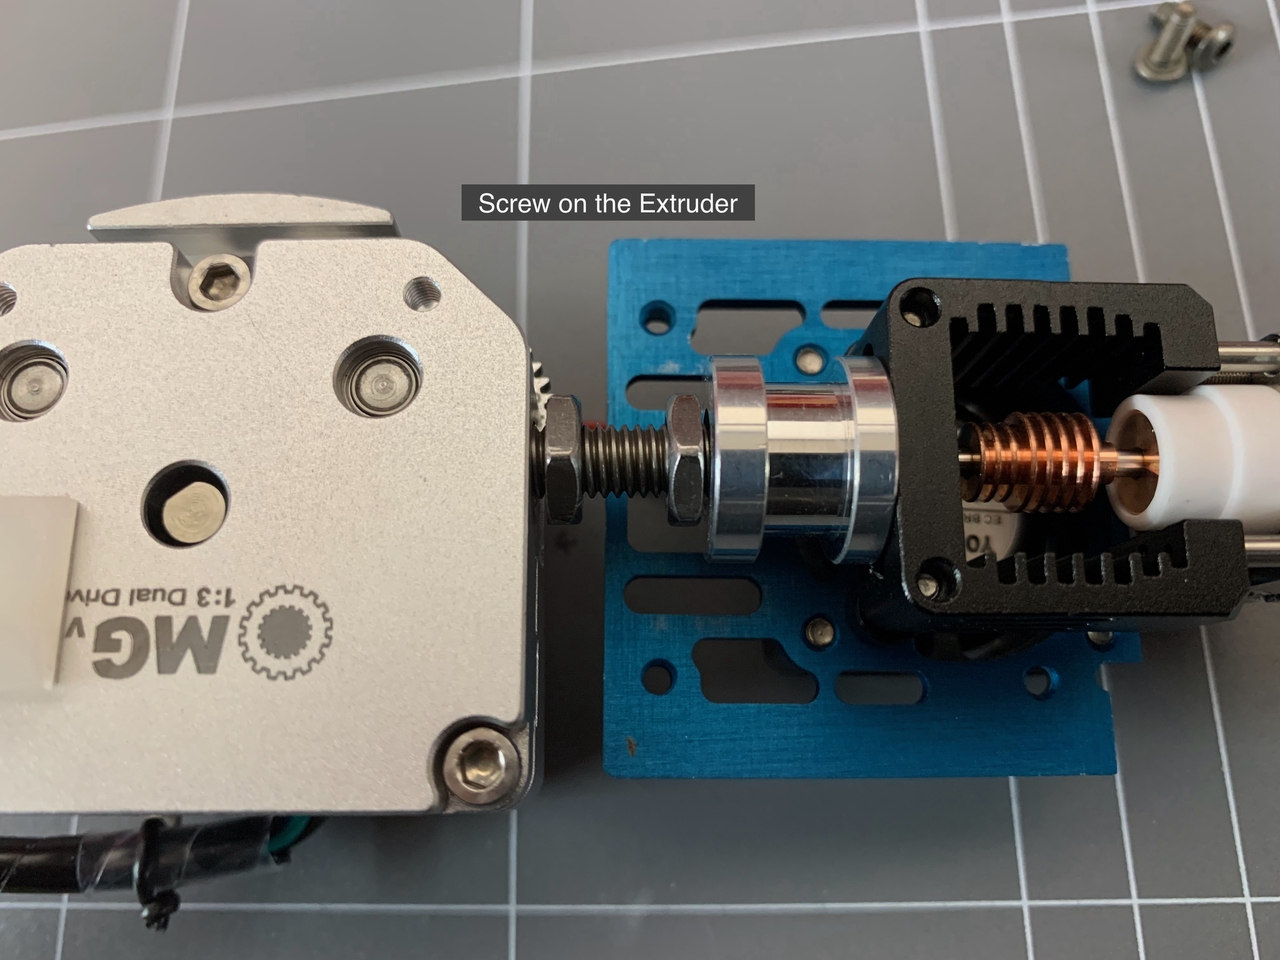
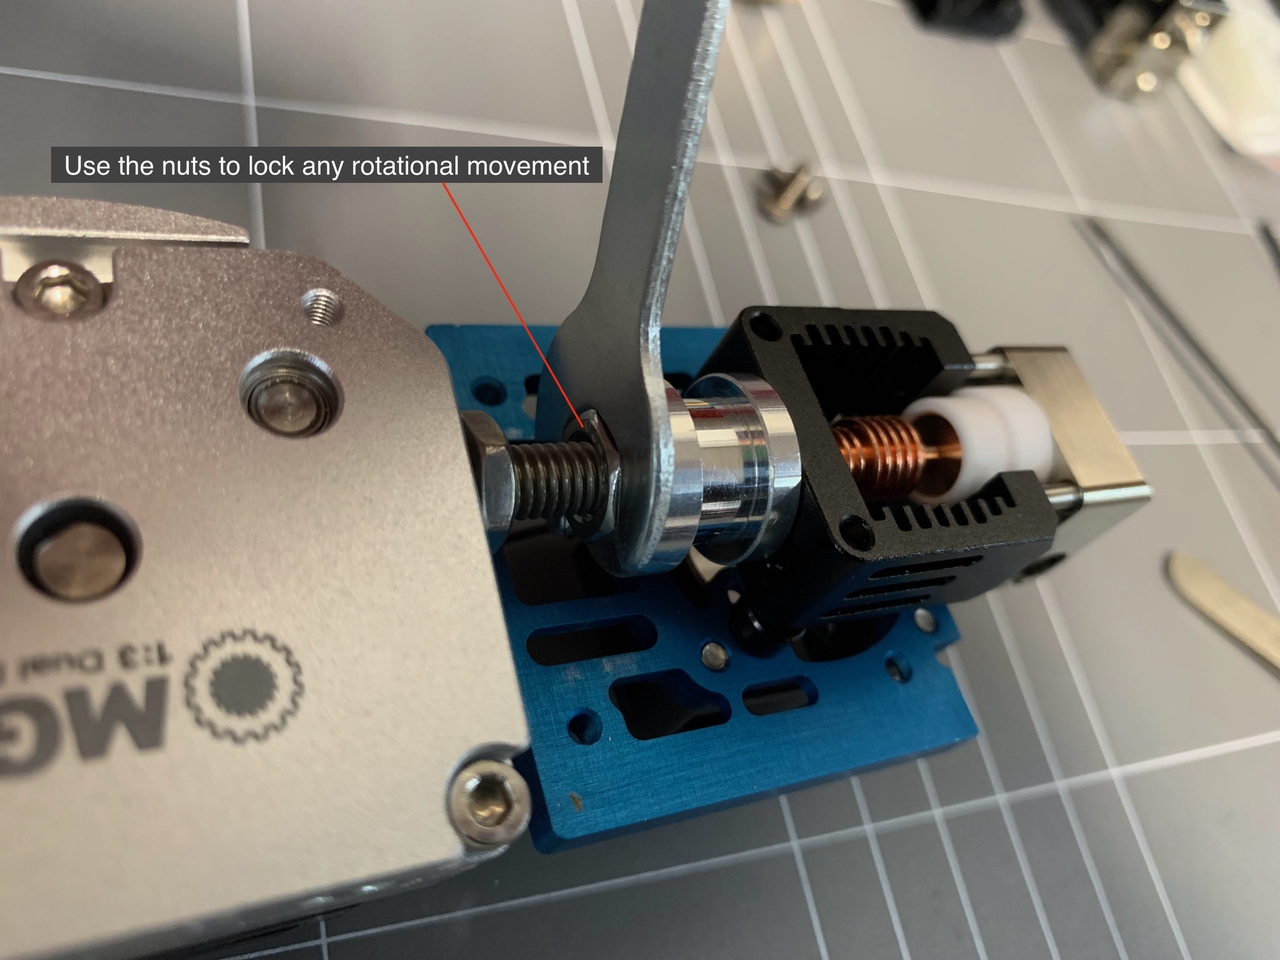
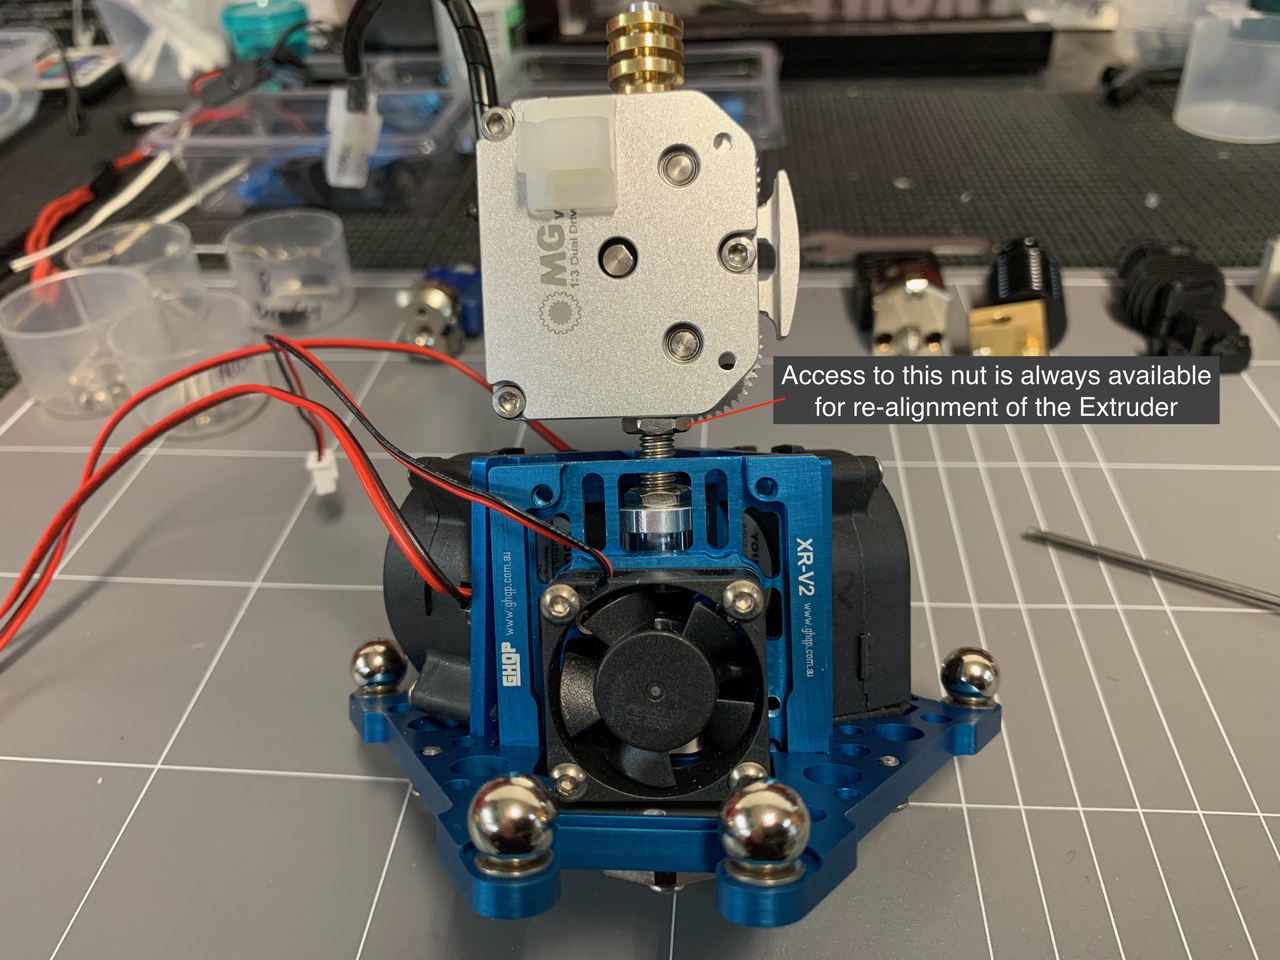
Example Images of Fitting OMG Extruder.
Click an Image for a larger view
Click an Image for a larger view
 |
 |
 |
 |
 |
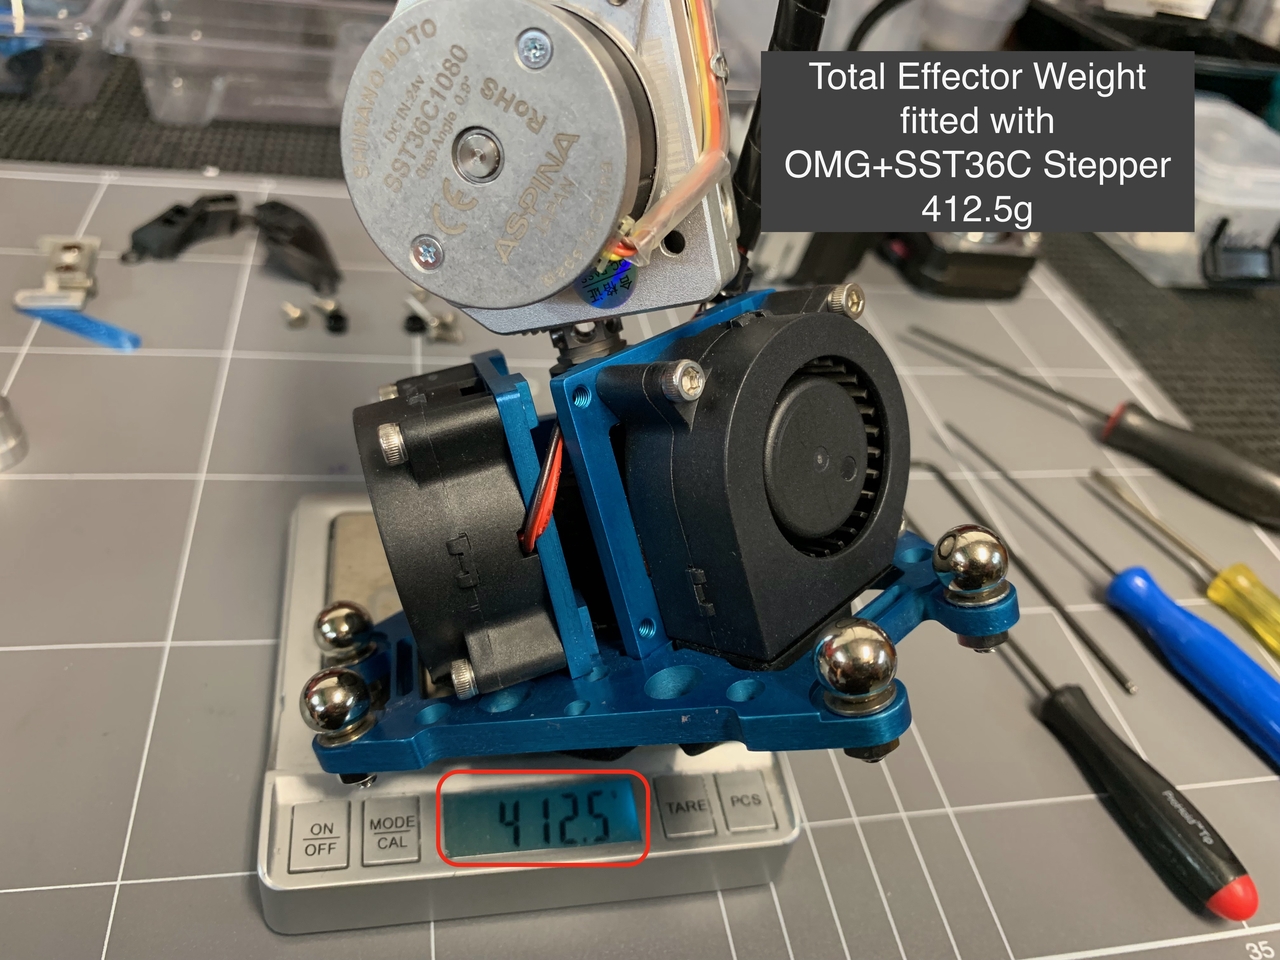 |
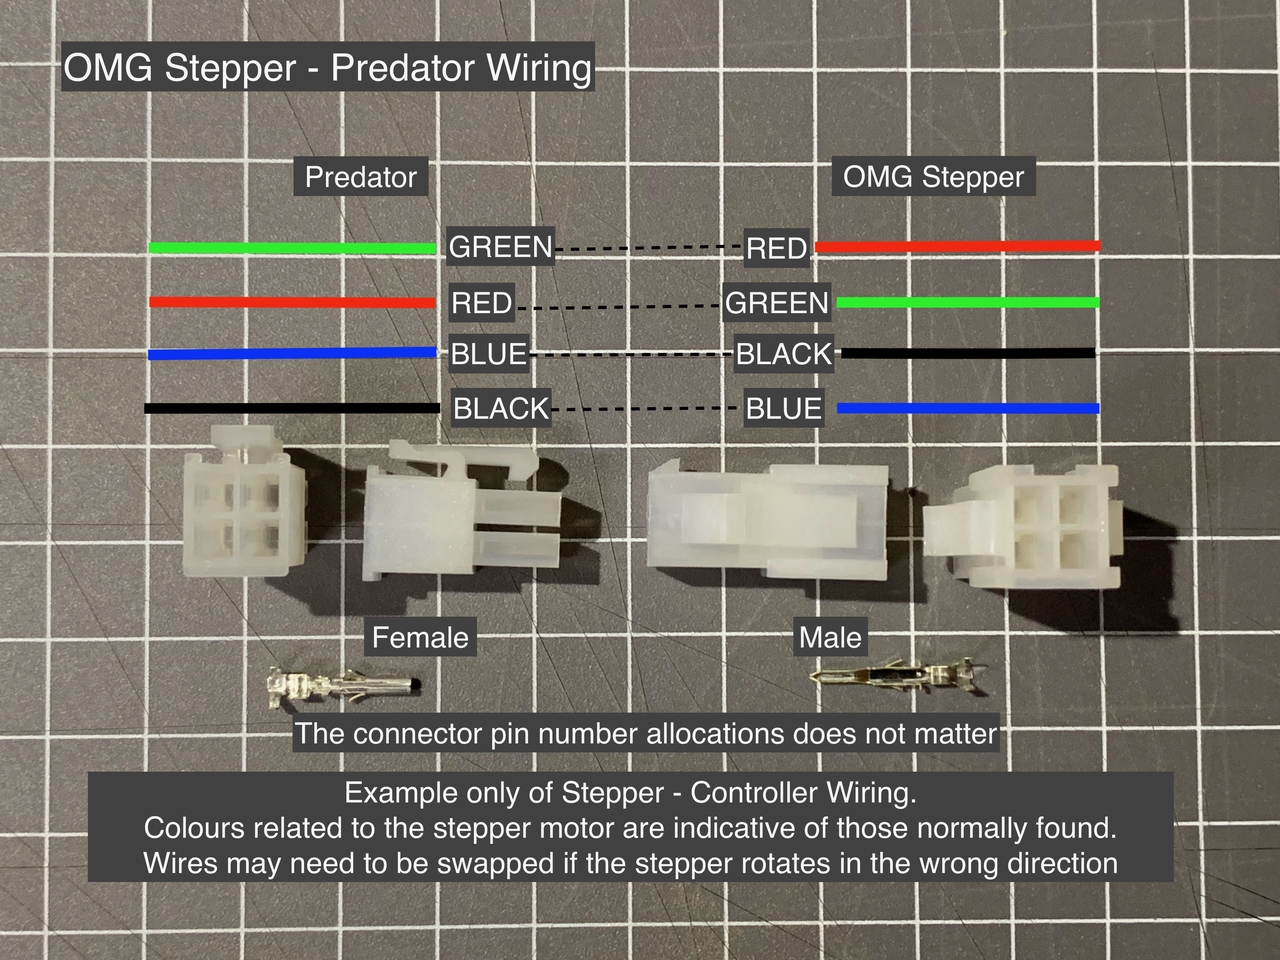
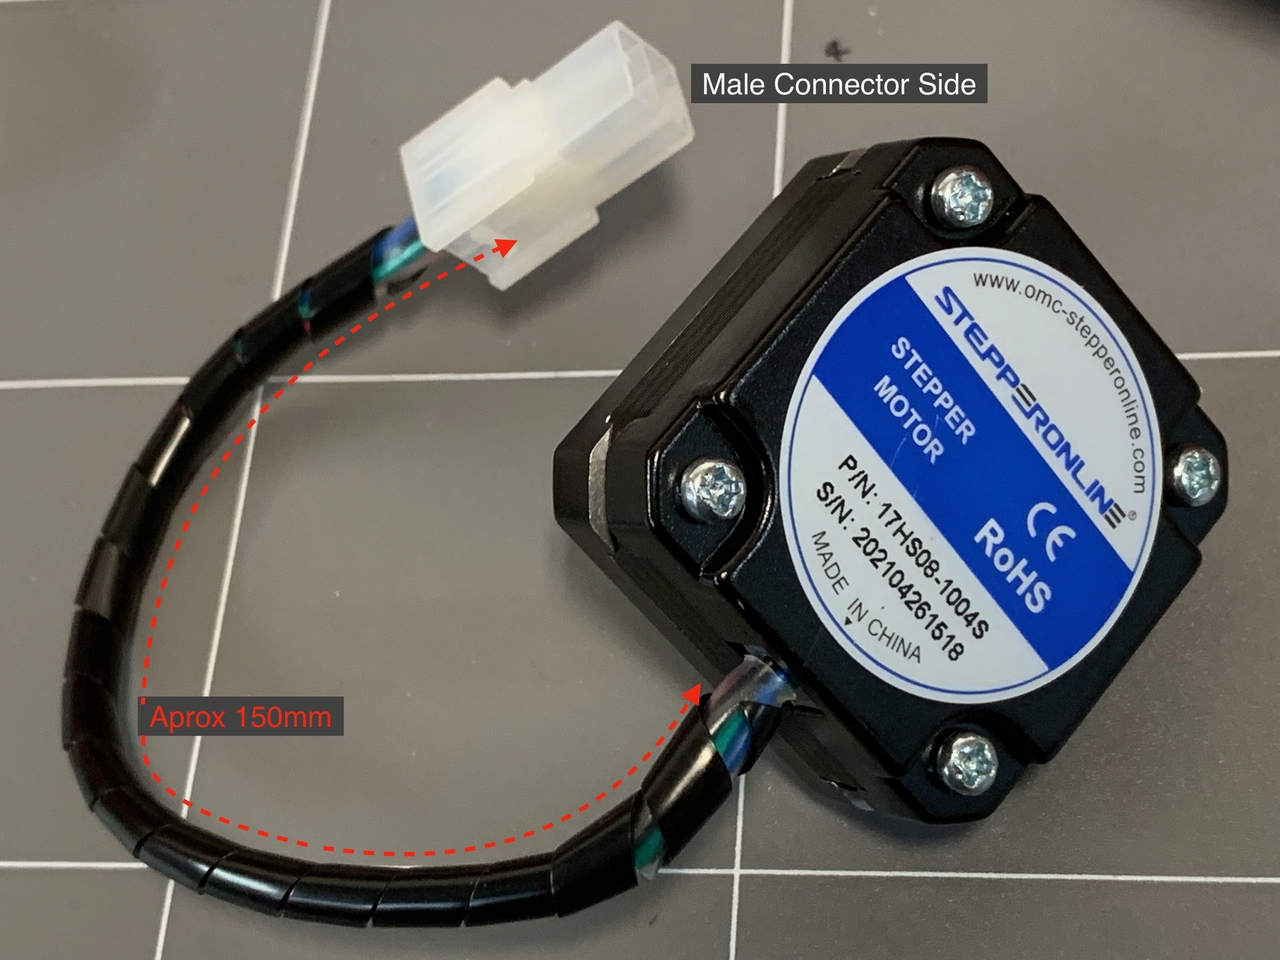
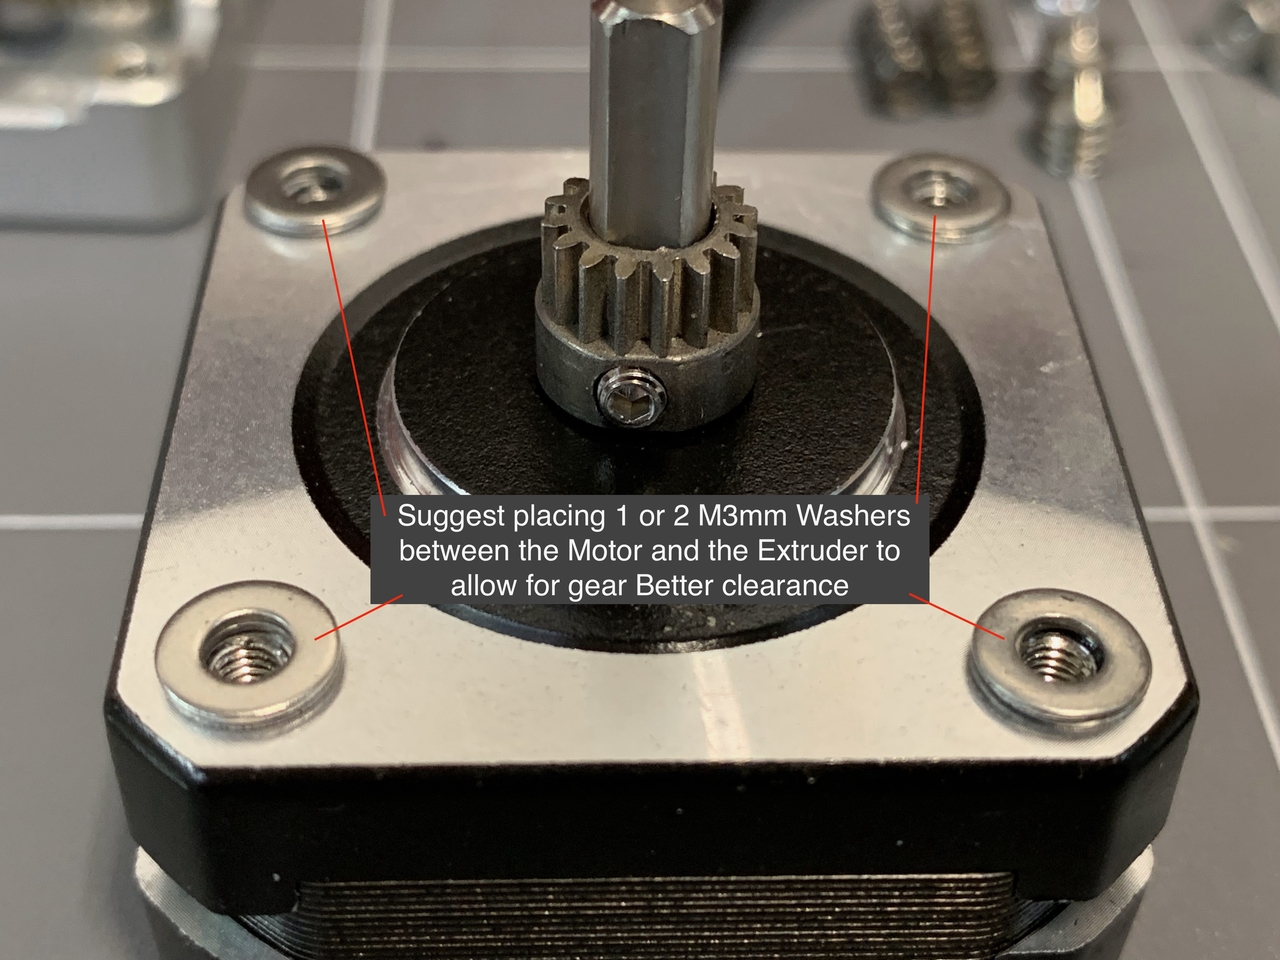
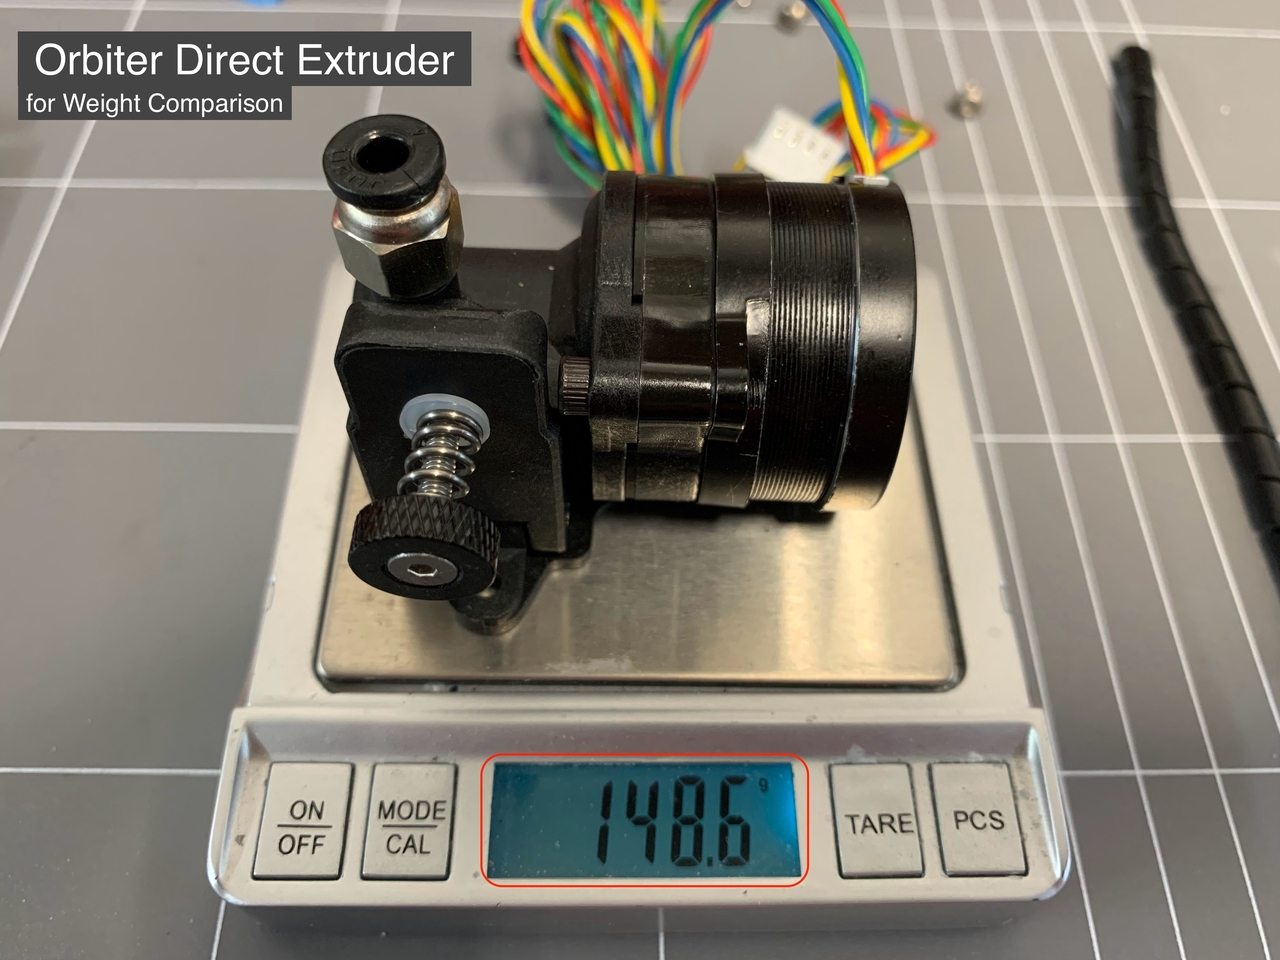
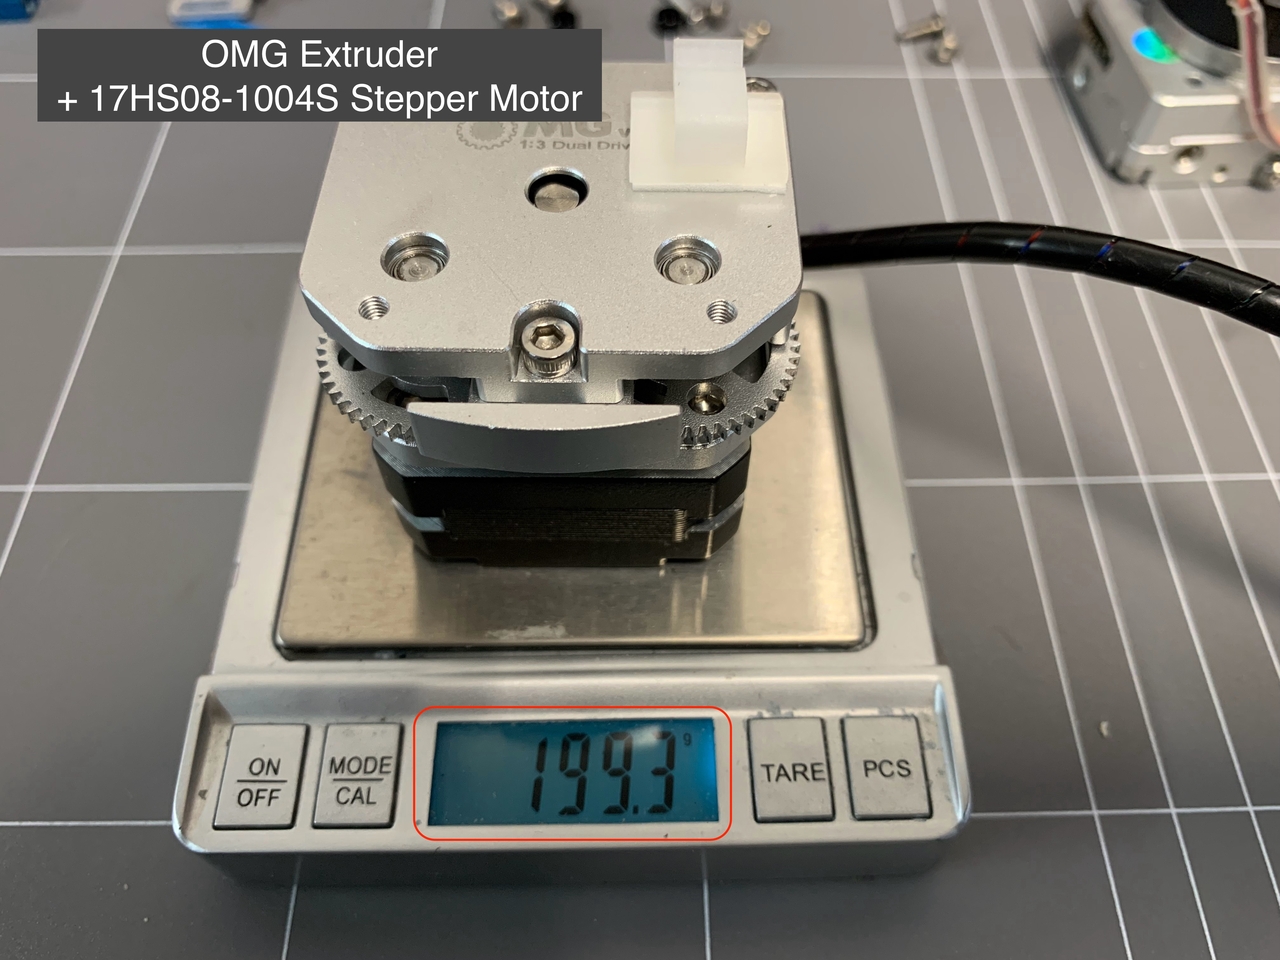
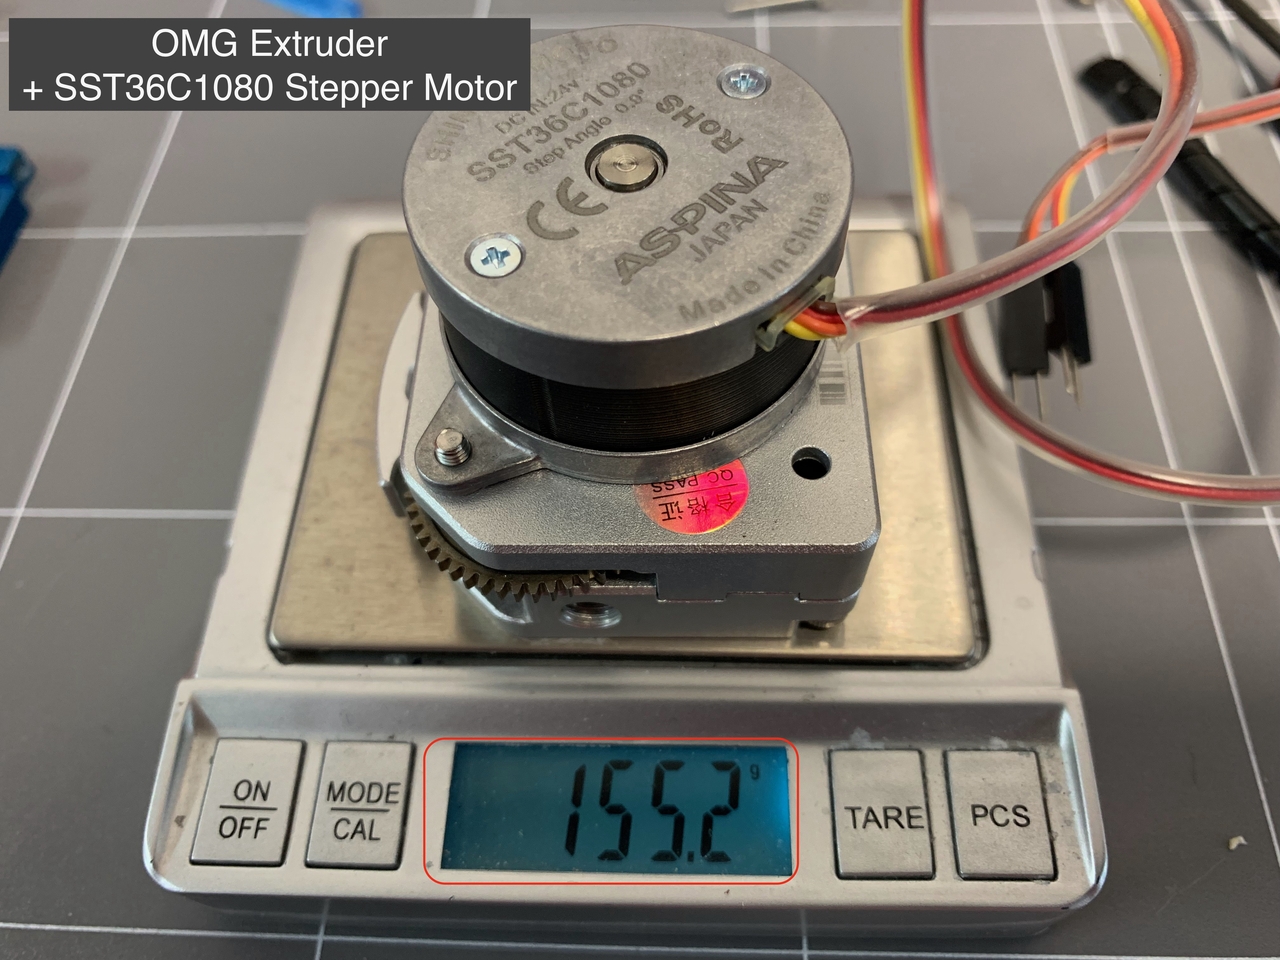
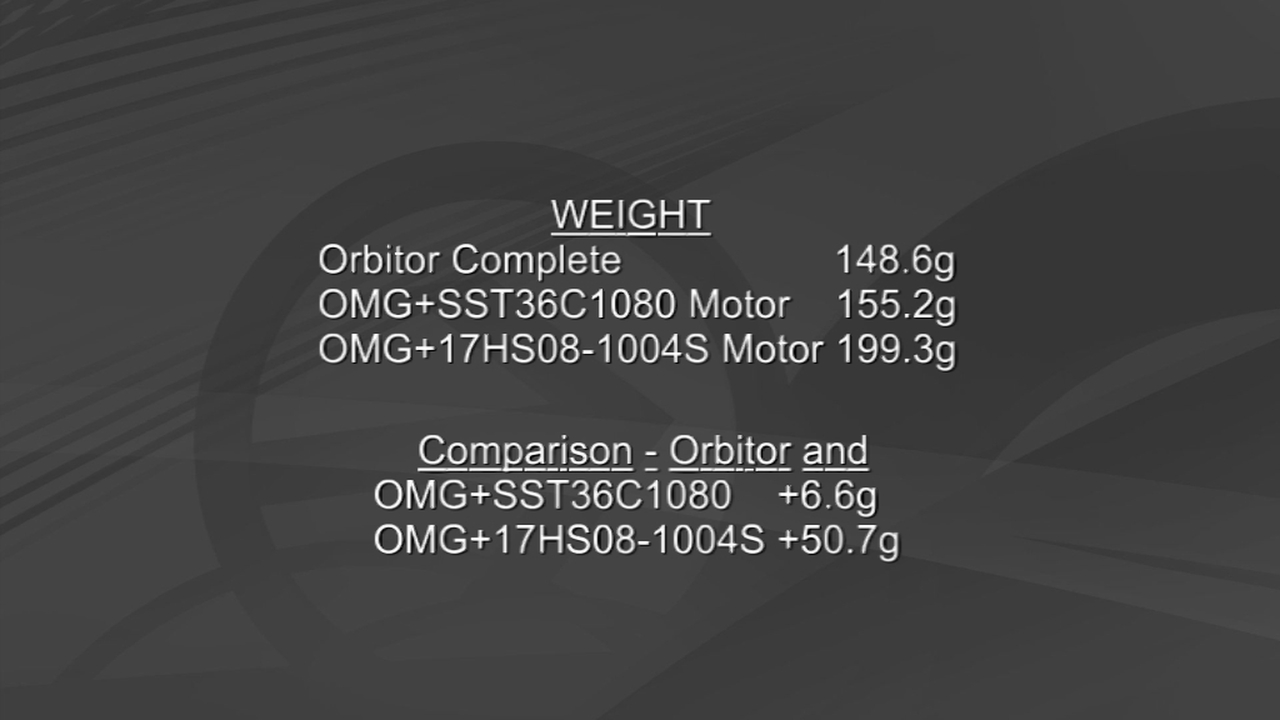
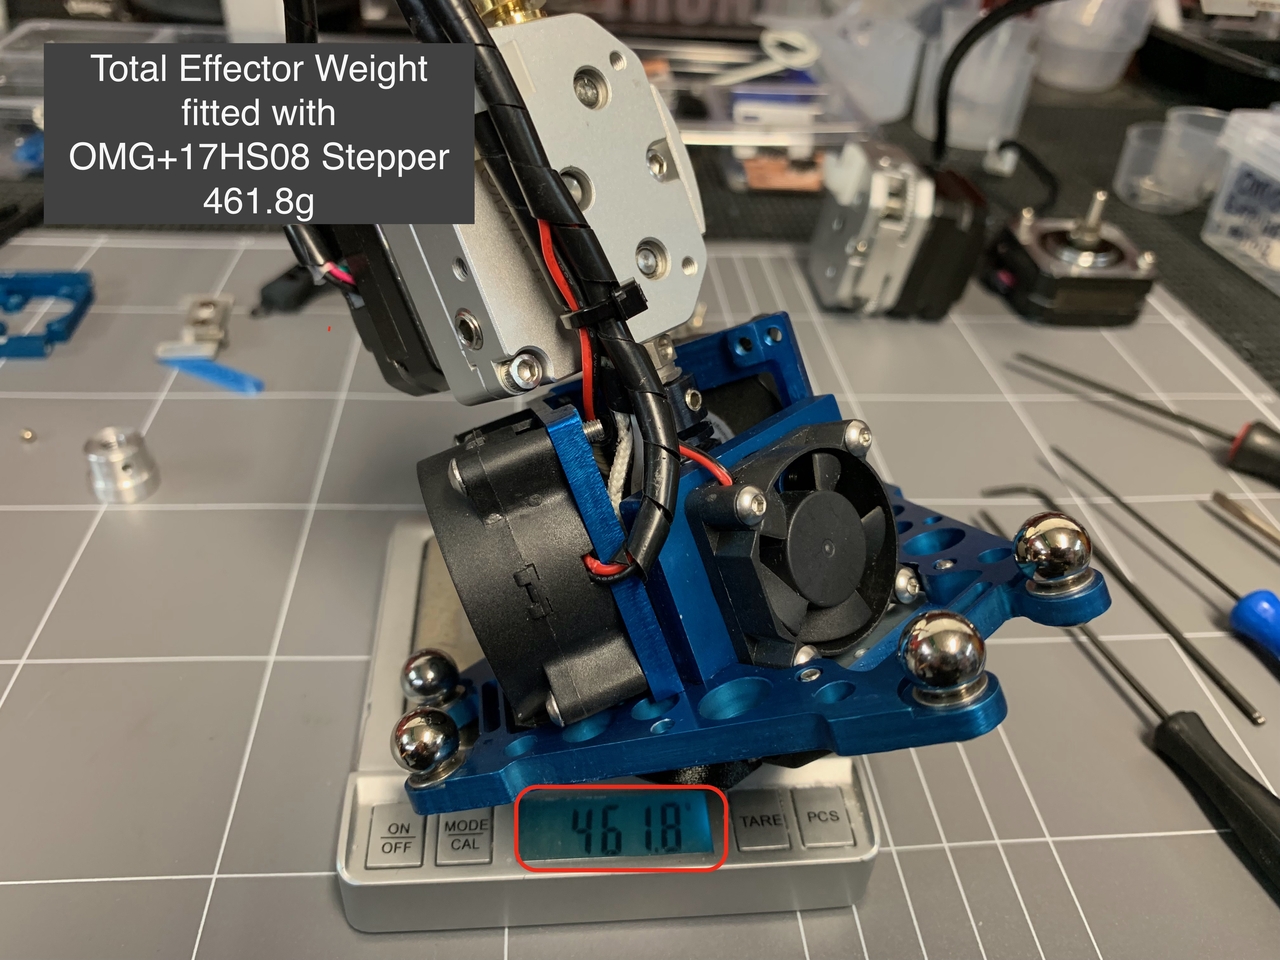
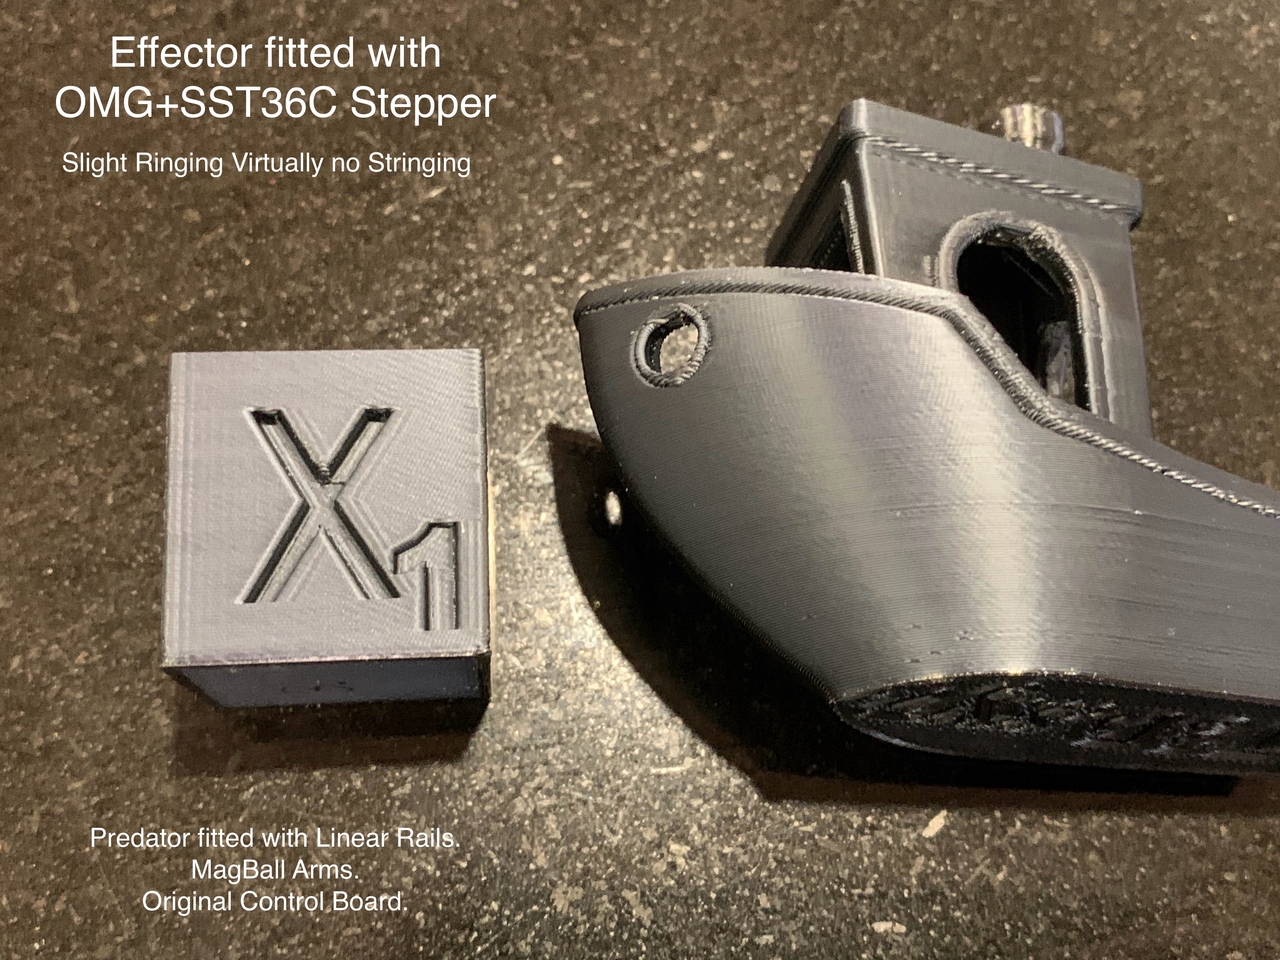
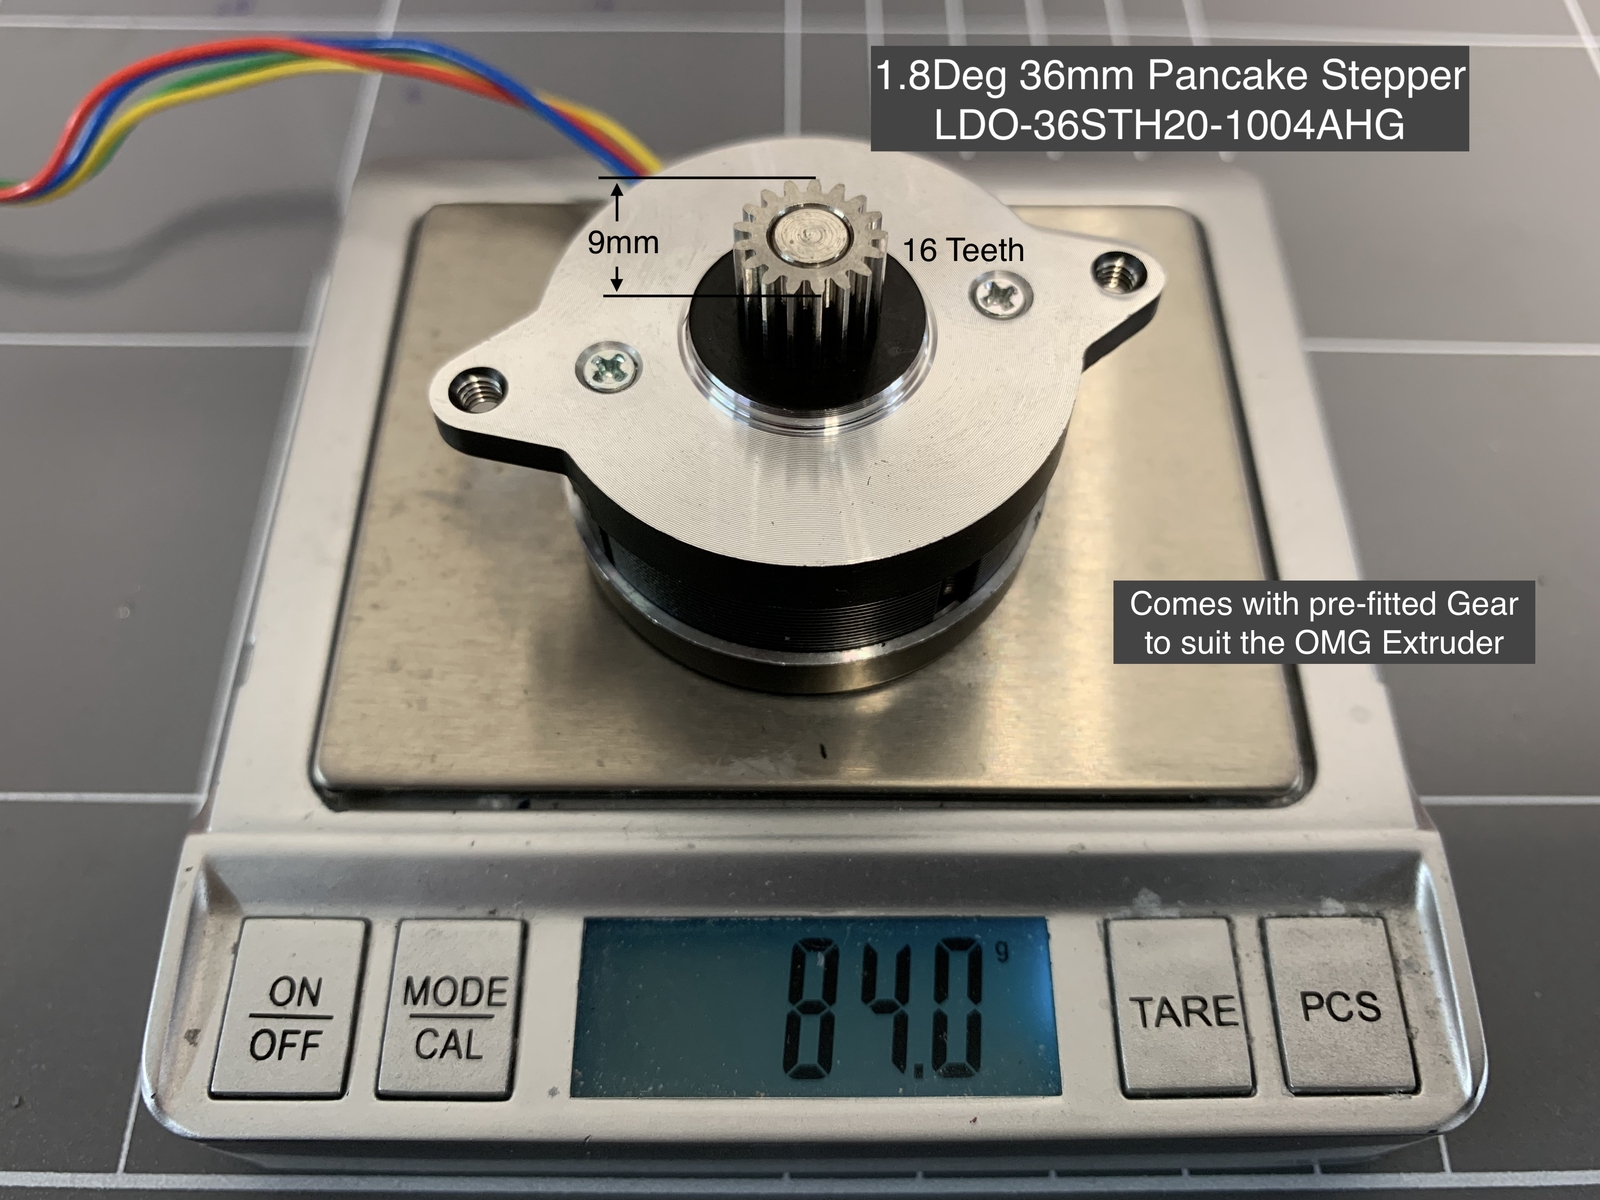
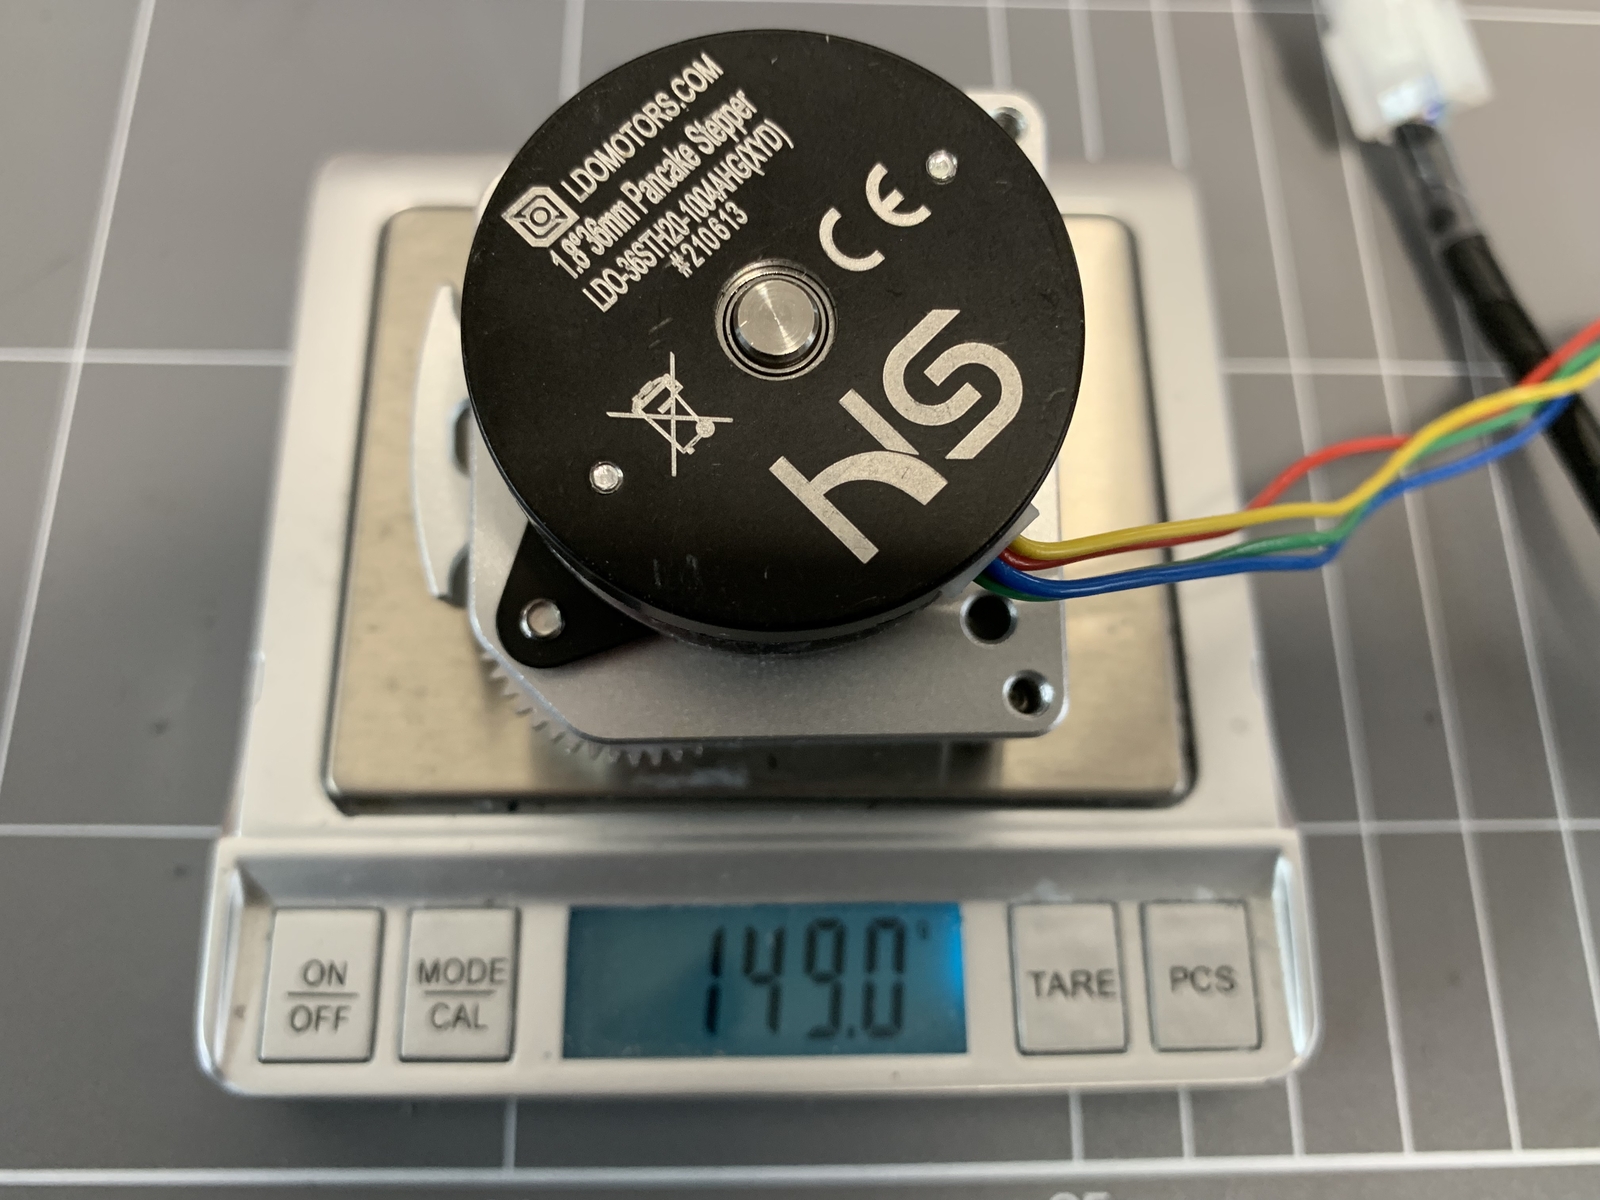
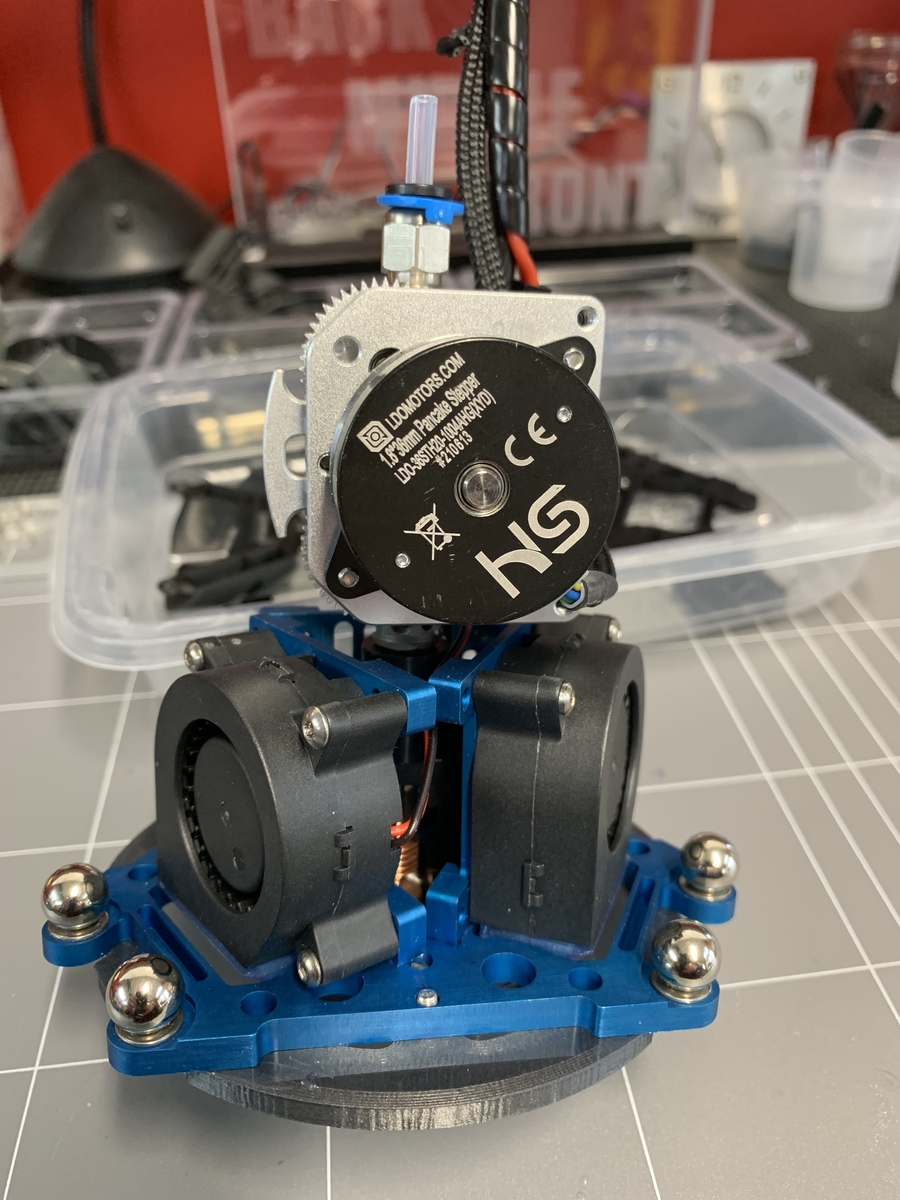
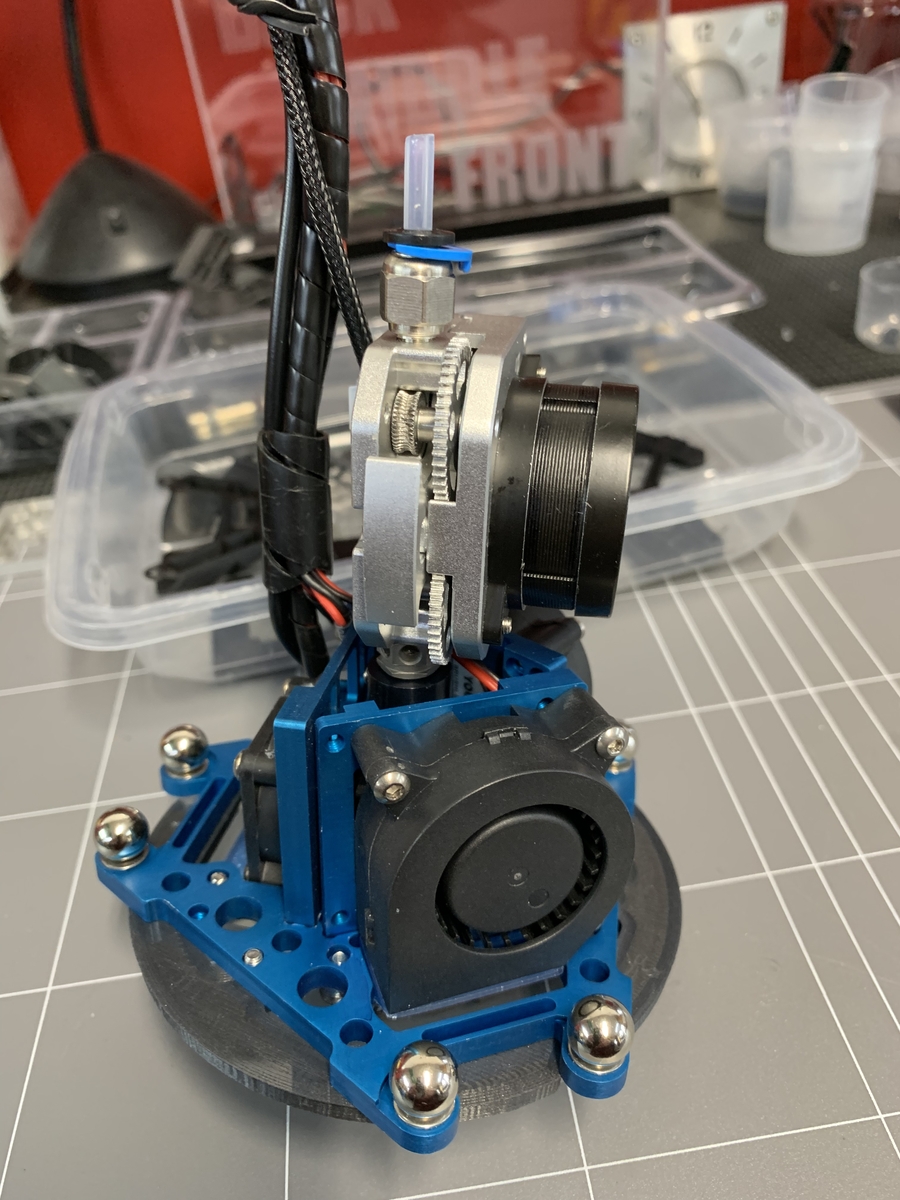
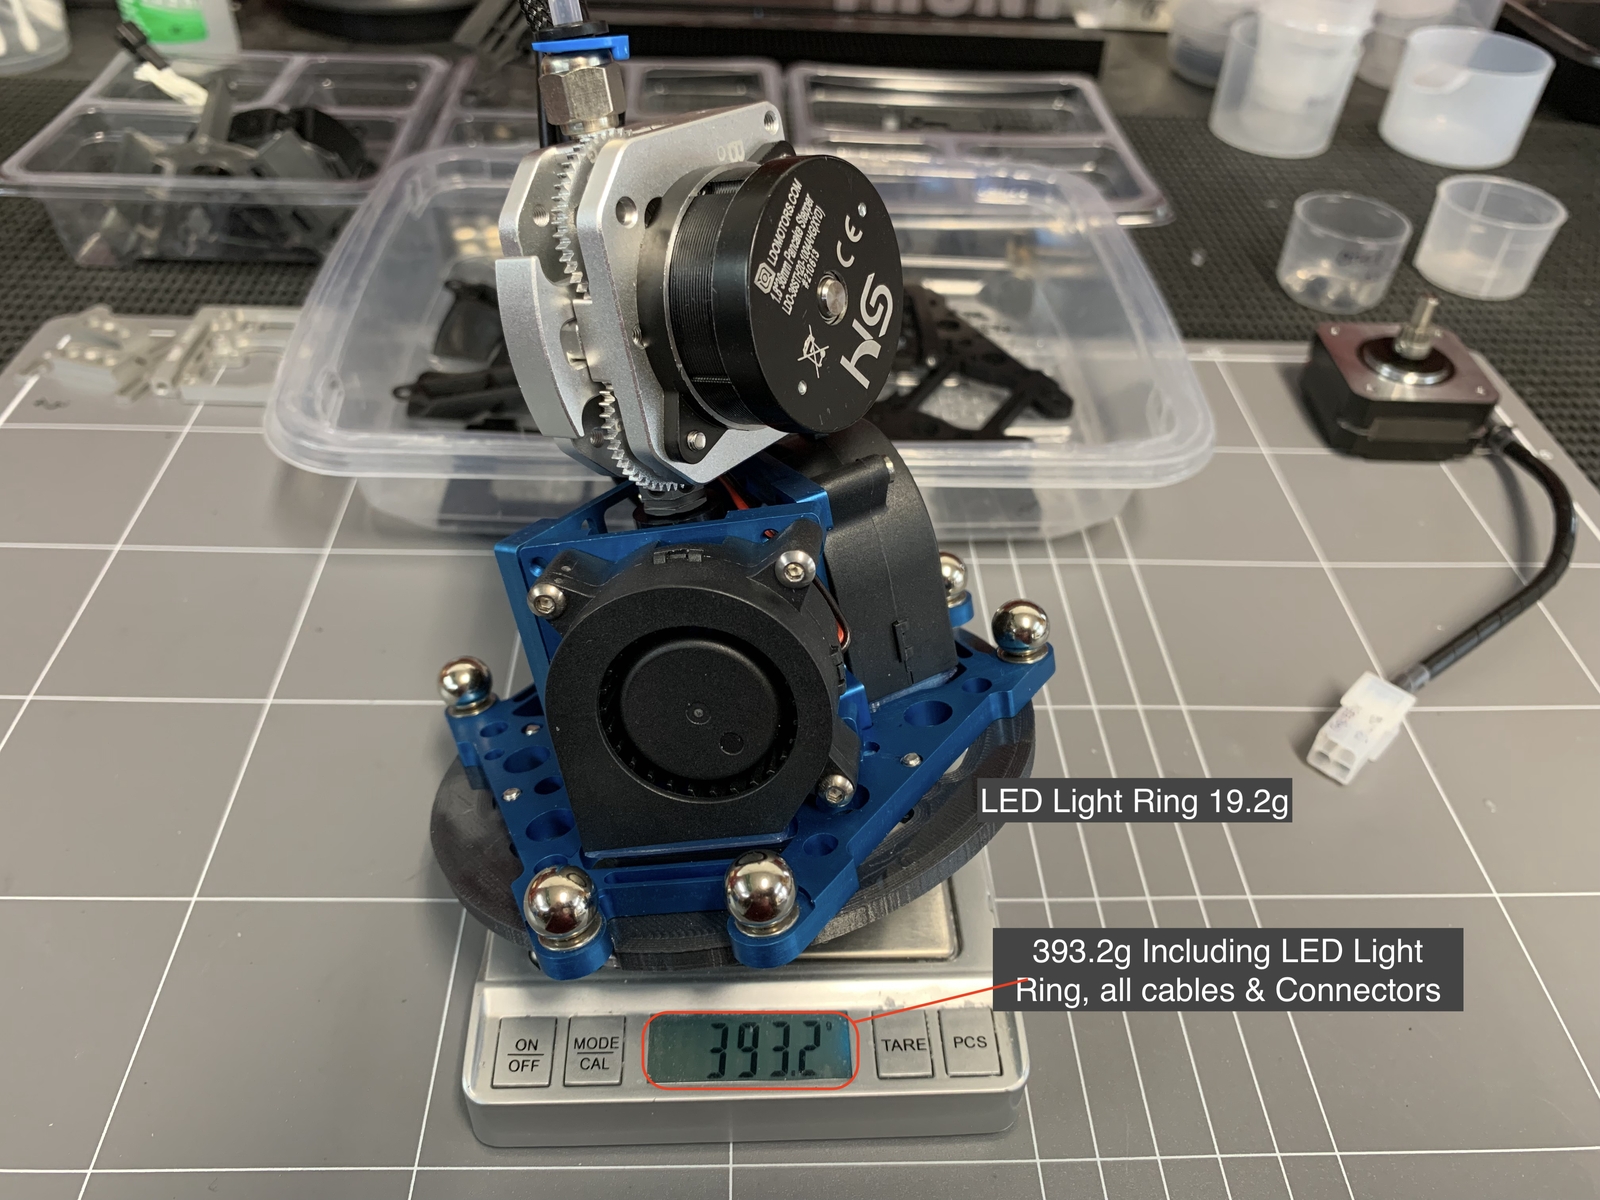
Example Images of OMG Extruder Stepper Motor Options and Weight Comparisons.
Click an Image for a larger view
Click an Image for a larger view
 |
 |
 |
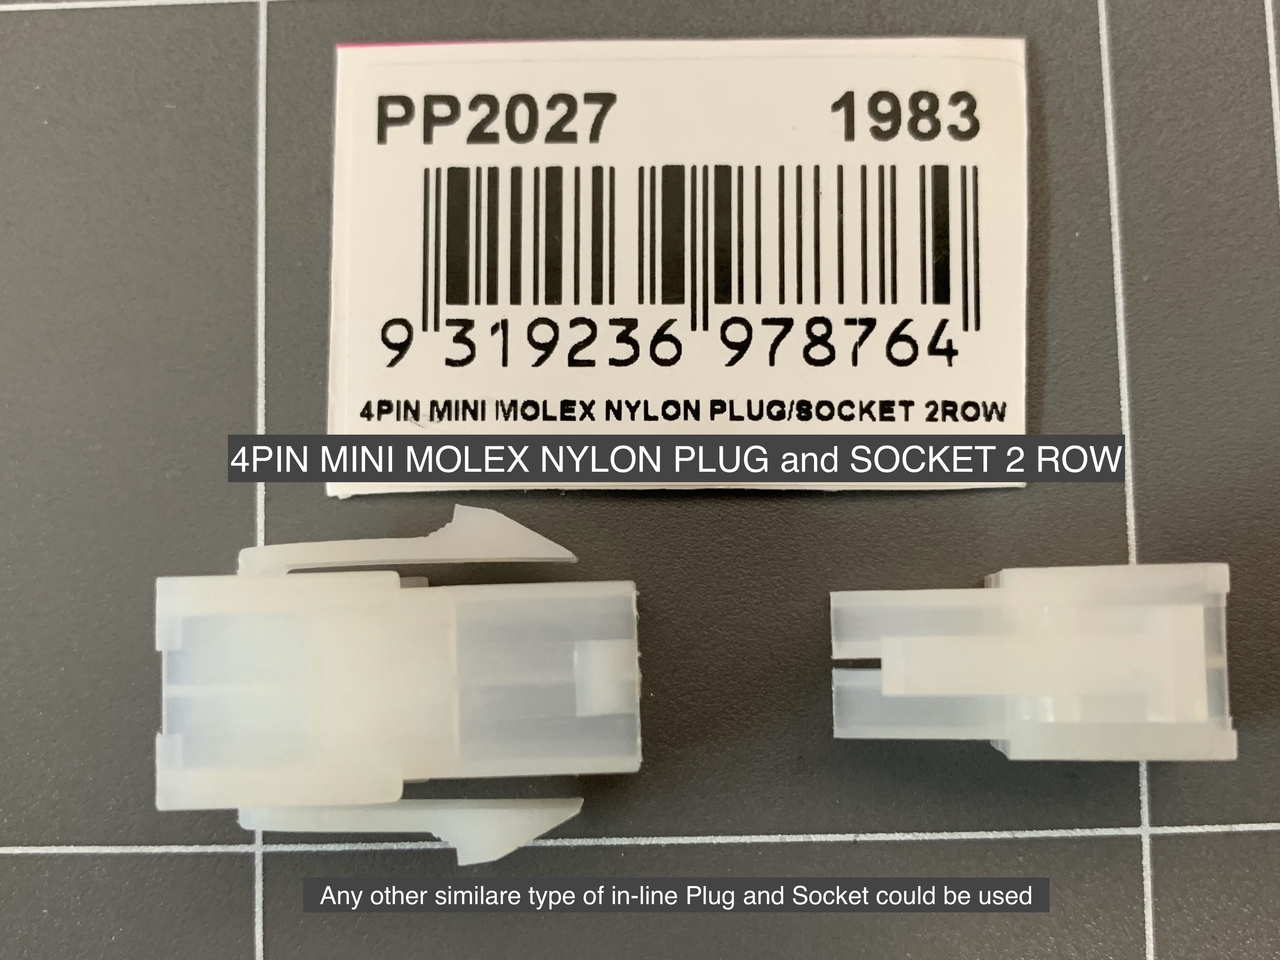
OMG Extruder Fitting Image Set
OMG Extruder Motor Options Image Set
Click Image to Play Video
Along with this page it is important to review the Effector V9 page for additional relevant information and downloads.
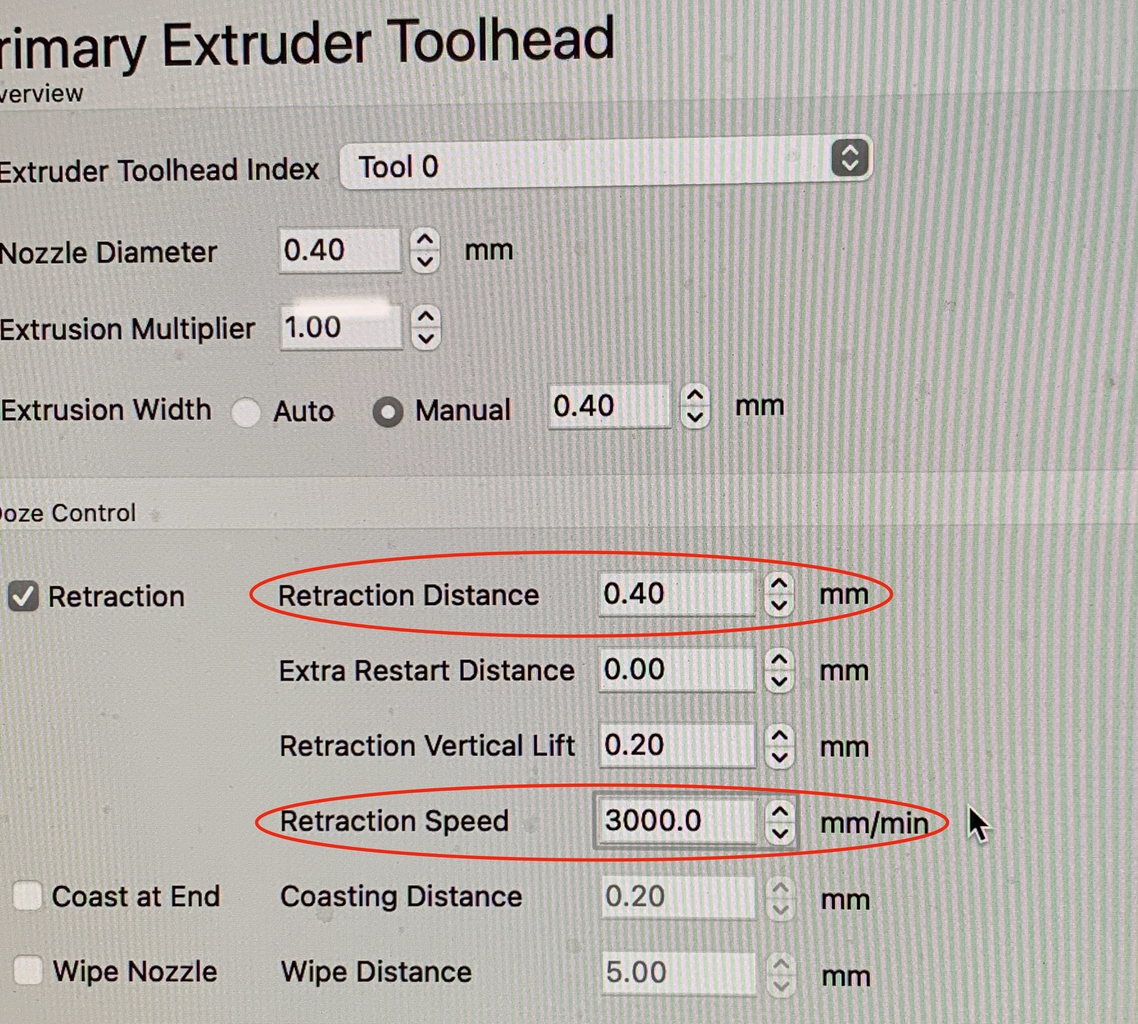
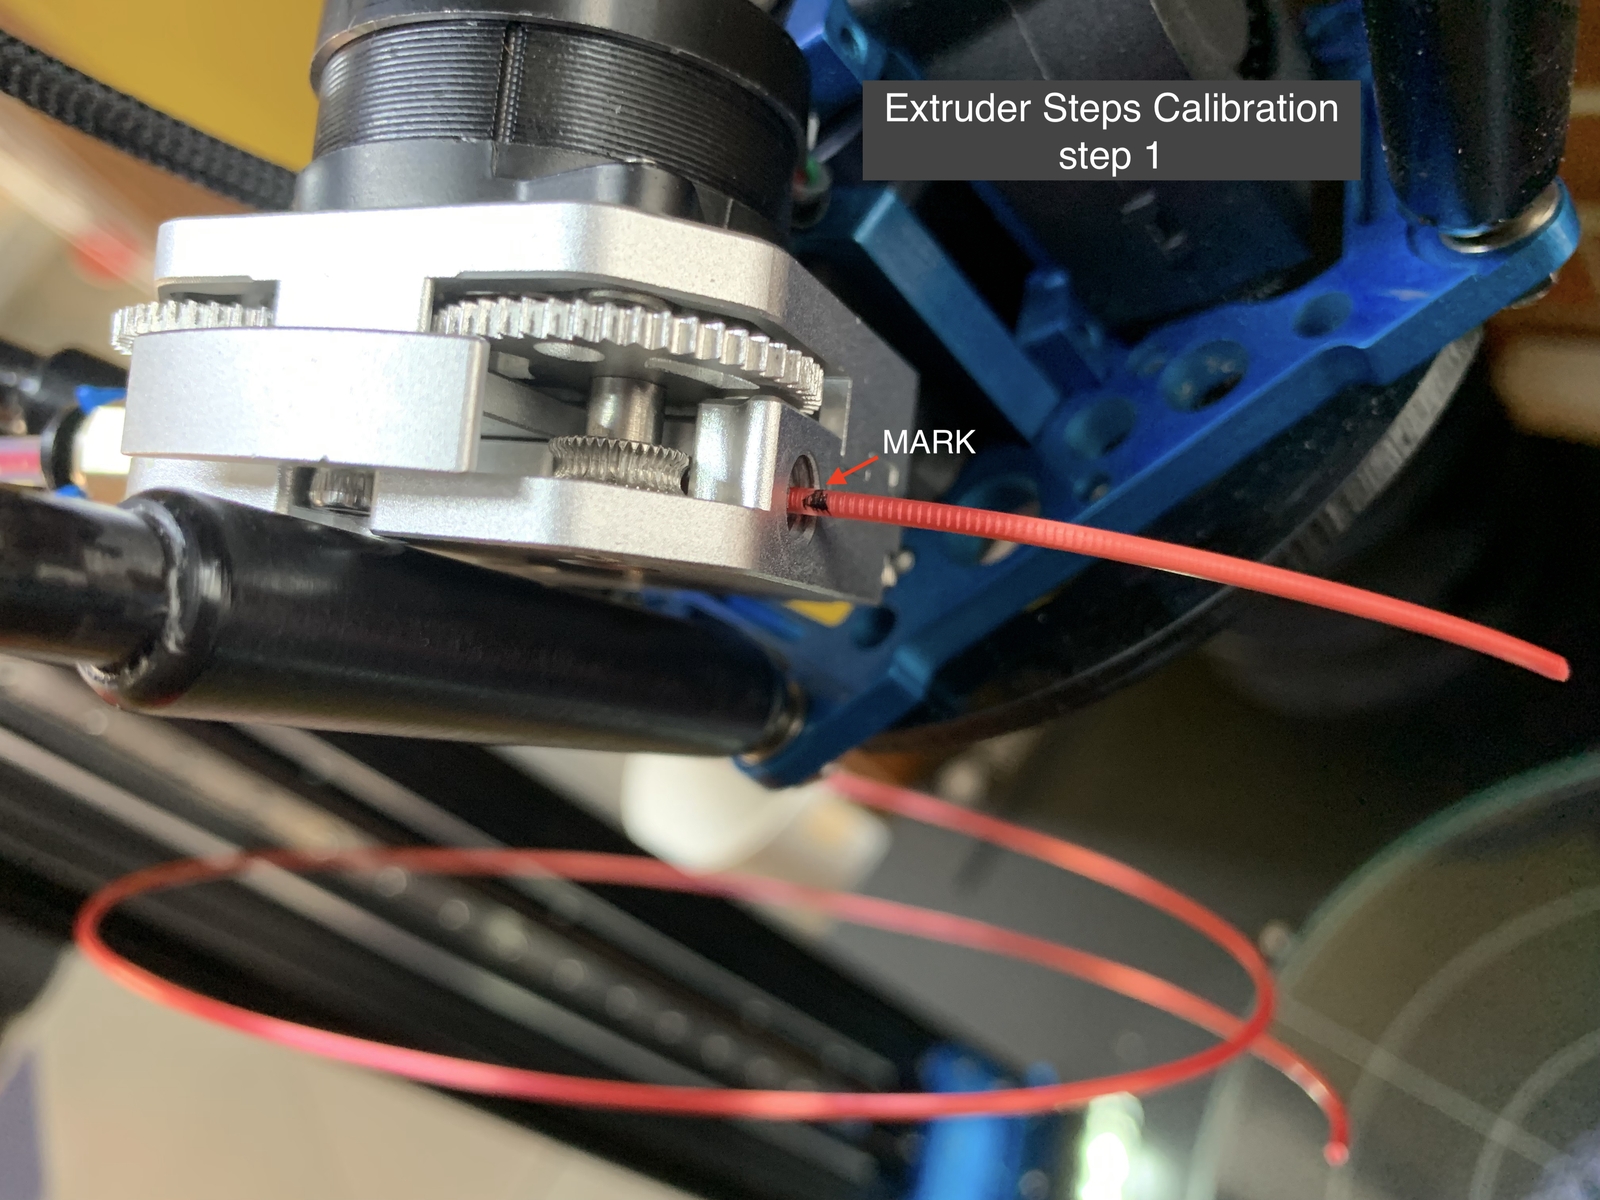
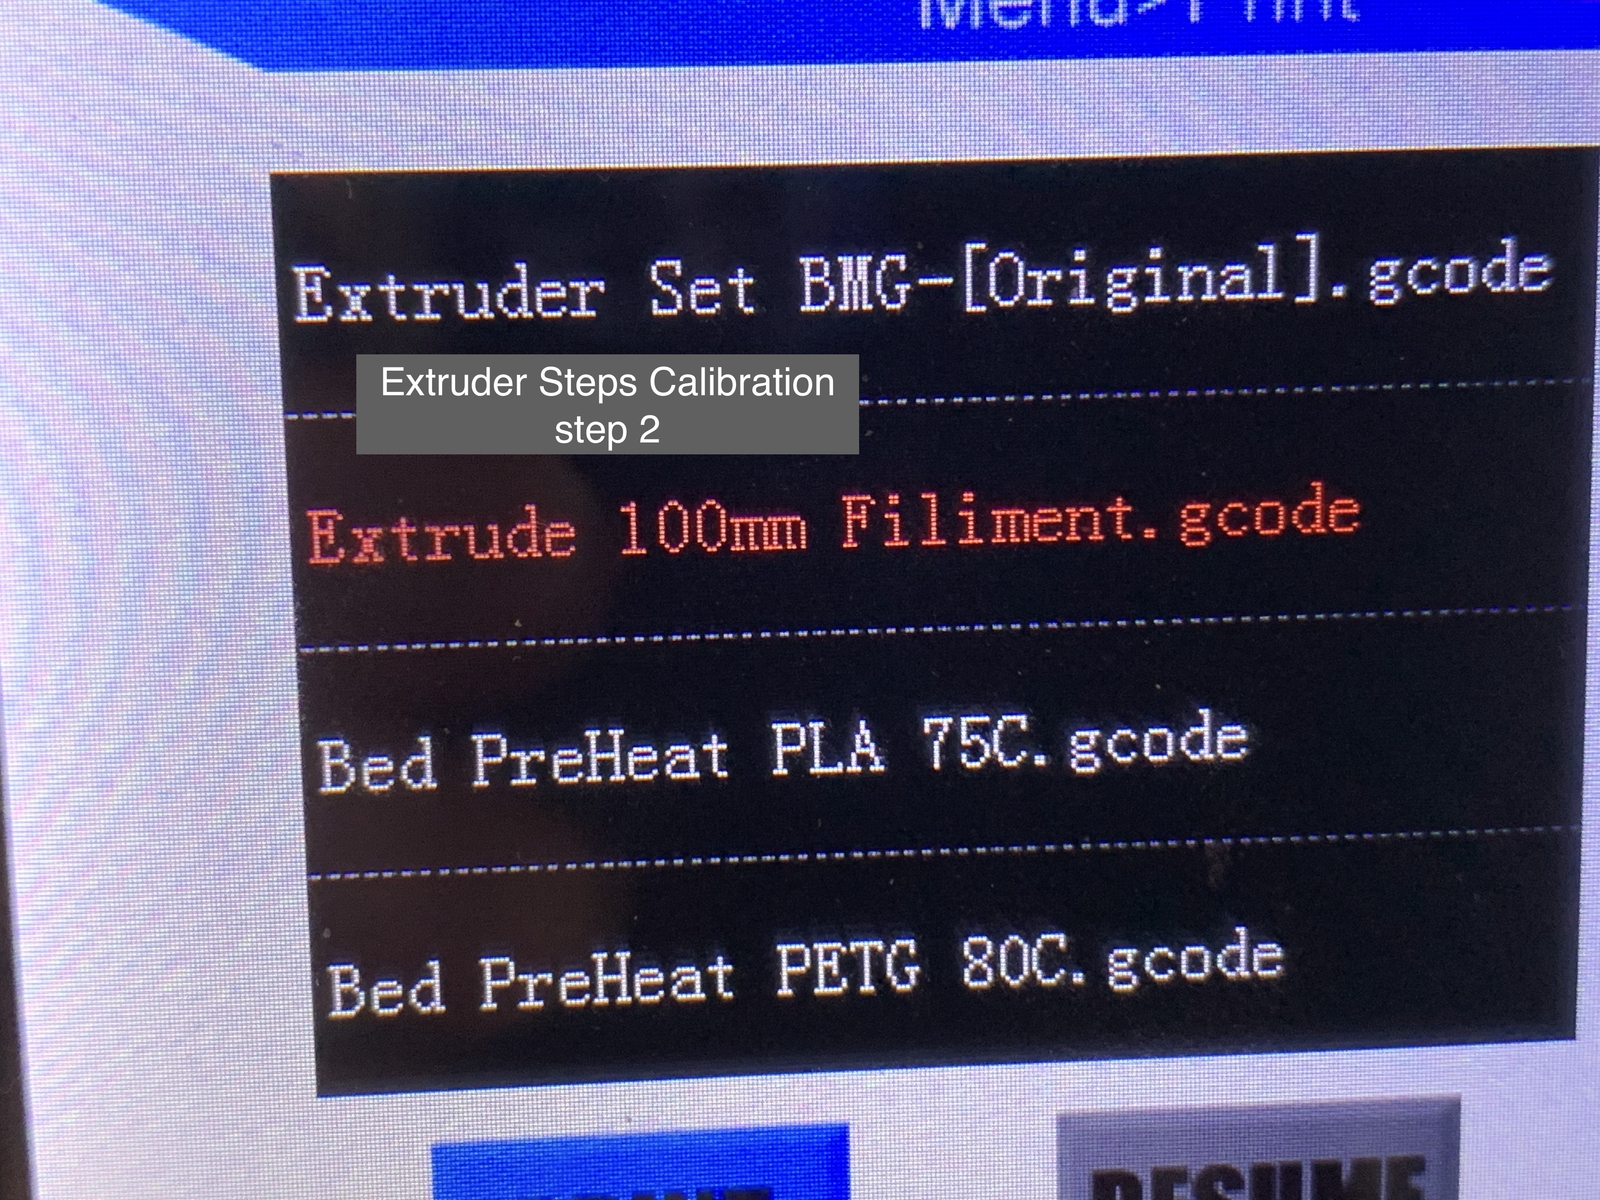
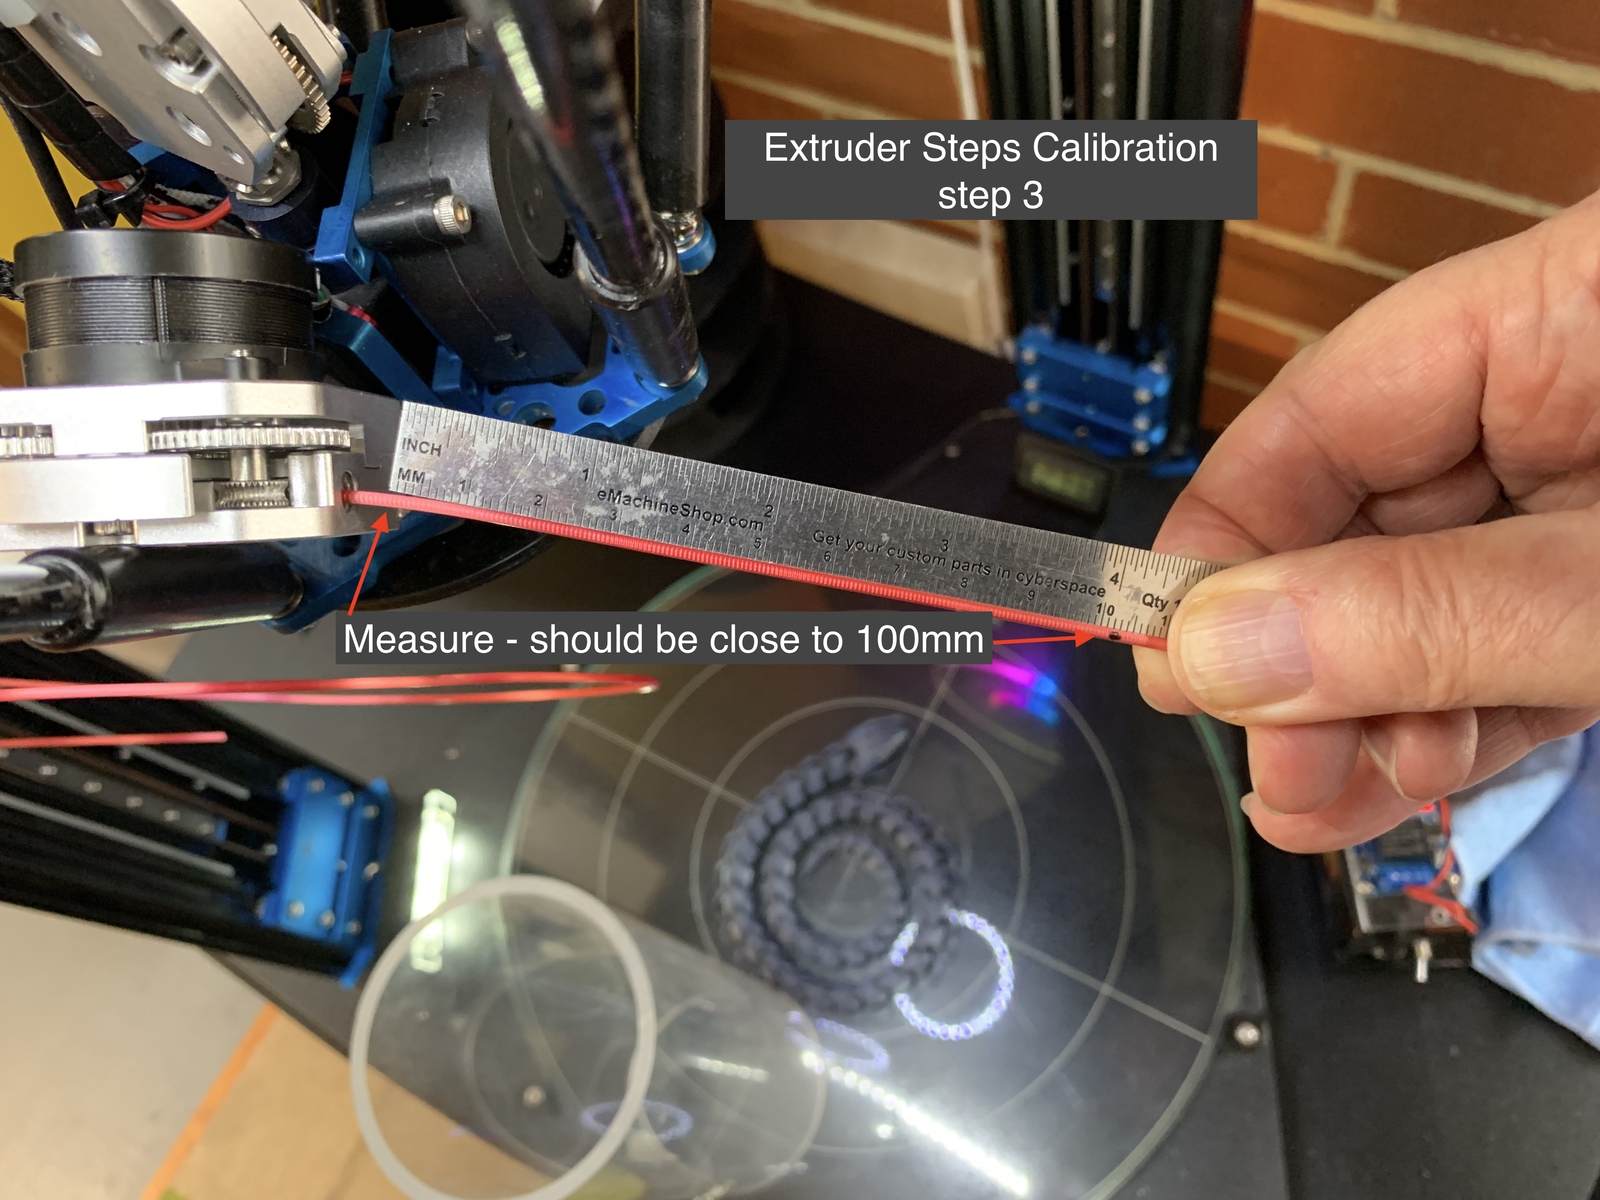
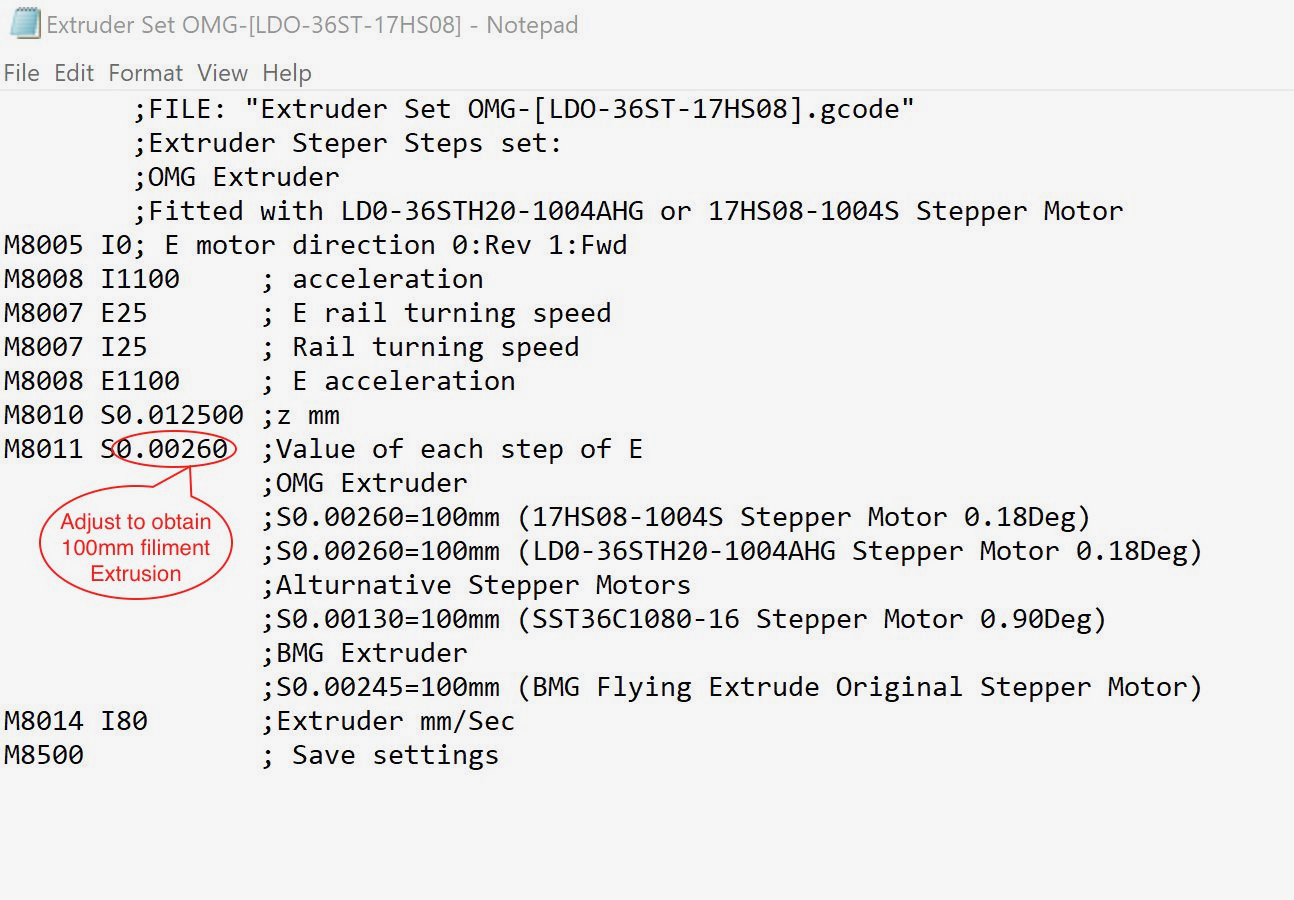
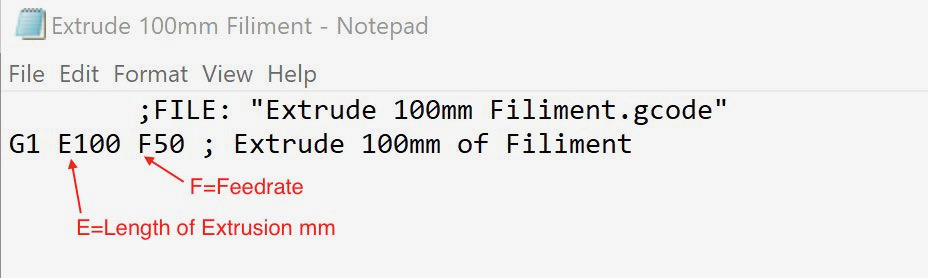
It is important that after installation of the OMG extruder and depending on what stepper motor you have fitted that you re-calibrate the Extruder e-Steps for the correct filament feed rate. The e-step value is set by extruding 100 millimetres through and then make sure it's exact or within a mm or so of that length. I do this before I fit the extruder to the effector so the filament has a clear unrestricted path. I have included my gcode files in the downloads section that I use to do all this along with the calibration files to set my filament e-Steps for both the above two stepper motors. These are normal text files with comments that should be self explanatory. They need the .gcode extension so that the predator will recognize and execute them as a printable file. Note that I have not changed my controller board from the original Predator so I know that these files work with that, however I can not guarantee they will work for any other brand or make of controller board you may have installed. Under that situation you will have to refer to that boards relevant e-Step setup procedure.
Note that the 17HS08-1004S has a Step Angle of 1.8 deg. Where as the SST36C1080 has a Step Angle of 0.9 deg. This difference is very significant and by not re-calibrating the e-Steps within the Predators Firmware it will result in significant under or over extrusion. I like the OMG Extruder because it is all metal Dual Drive, unlike the Orbiter that has many plastic parts. The Orbiter would also be very difficult to fit to my effector design unlike the OMG.
When comparing the two extruders weight, an OMG fitted with a round Pancake stepper the difference is only +6.6g. Definitely a better option in my opinion.
Below is the now current and best motor in my opinion I have installed. This is also a round Pancake Stepper in the same style as the SST36C1080 but with a more common step angle of 1.8 deg. The same as the 17HS08-1004S but with a weight of 84g and a total OMG+Motor weight of 149g. I have now also updated the extrusion steeper calibration download with some additional information as per the following images.
A few extra images of interest.
OMG Extruder .gcode Calibration Files
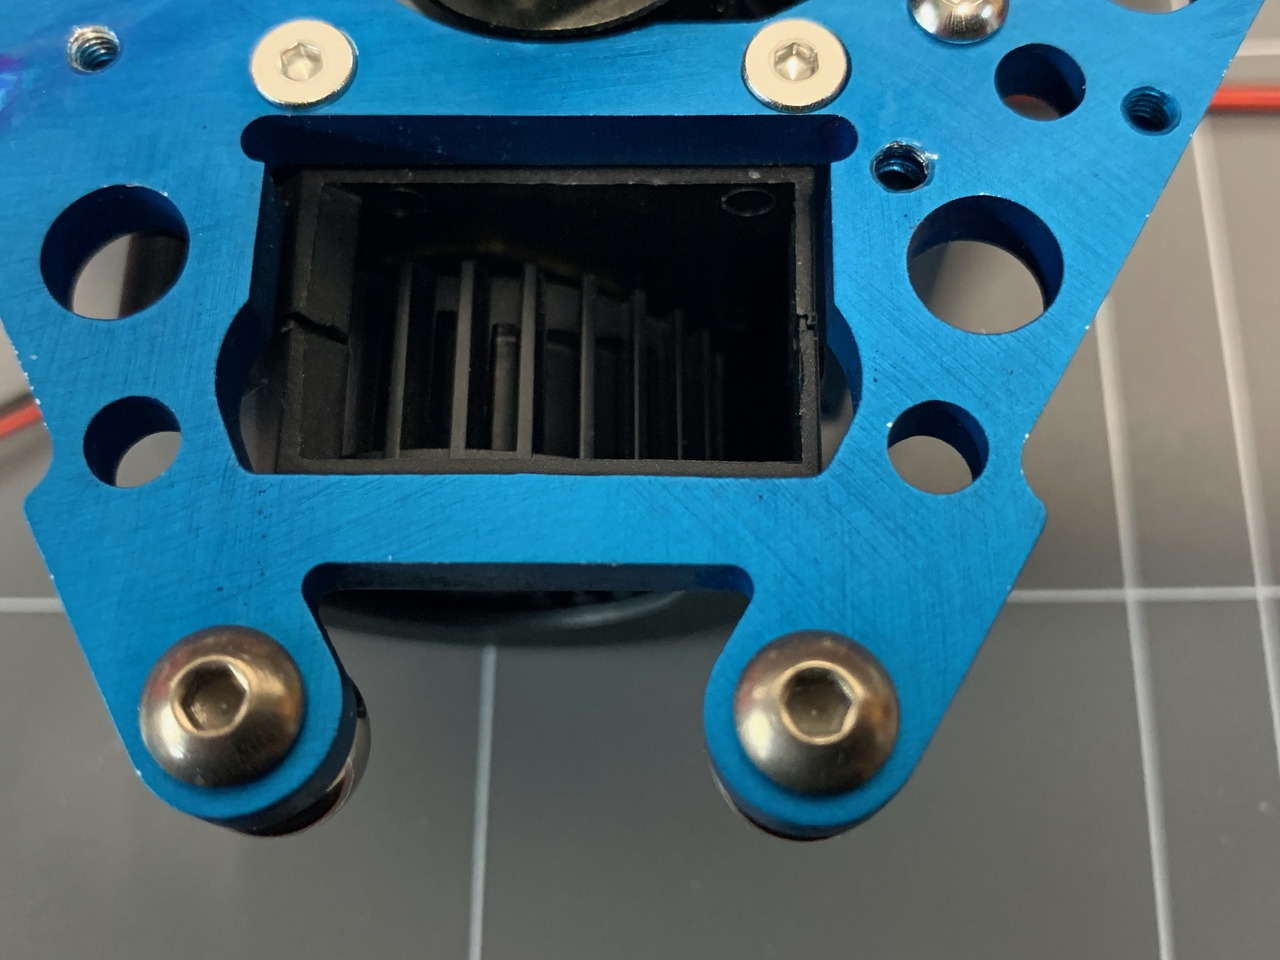
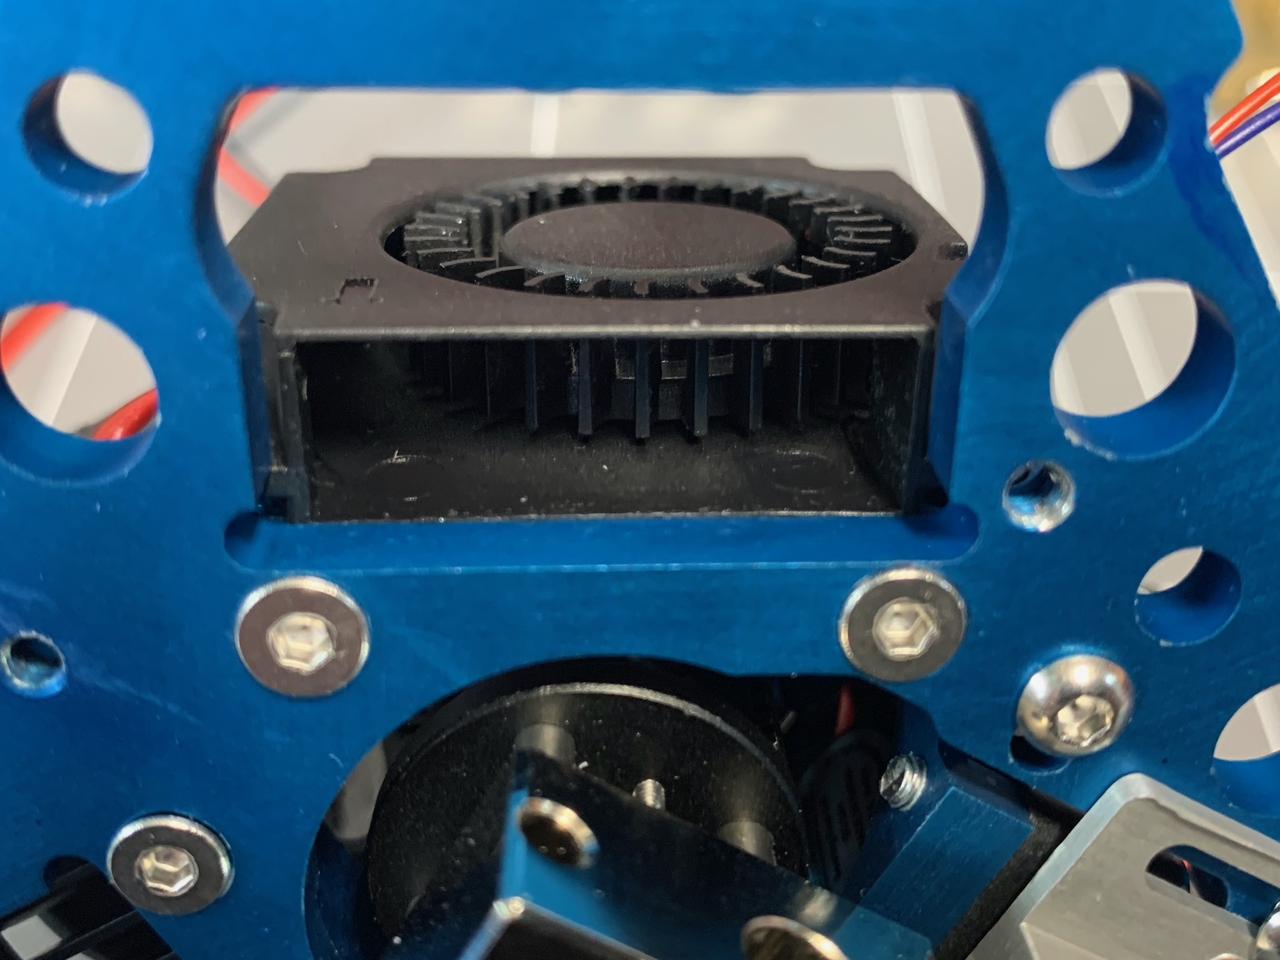
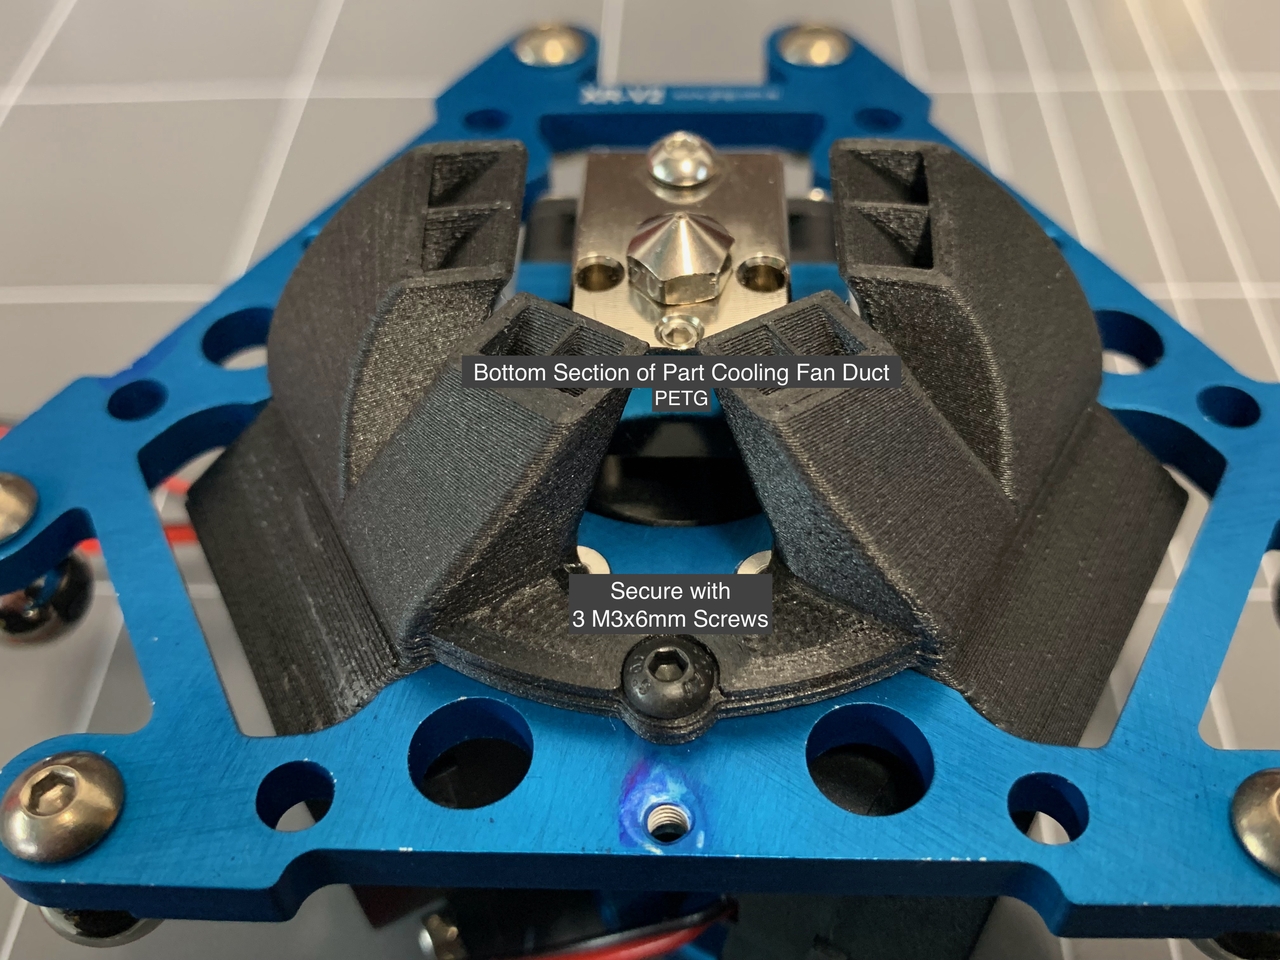
Part Cooling Duct All Files + Spacer

 |
 |
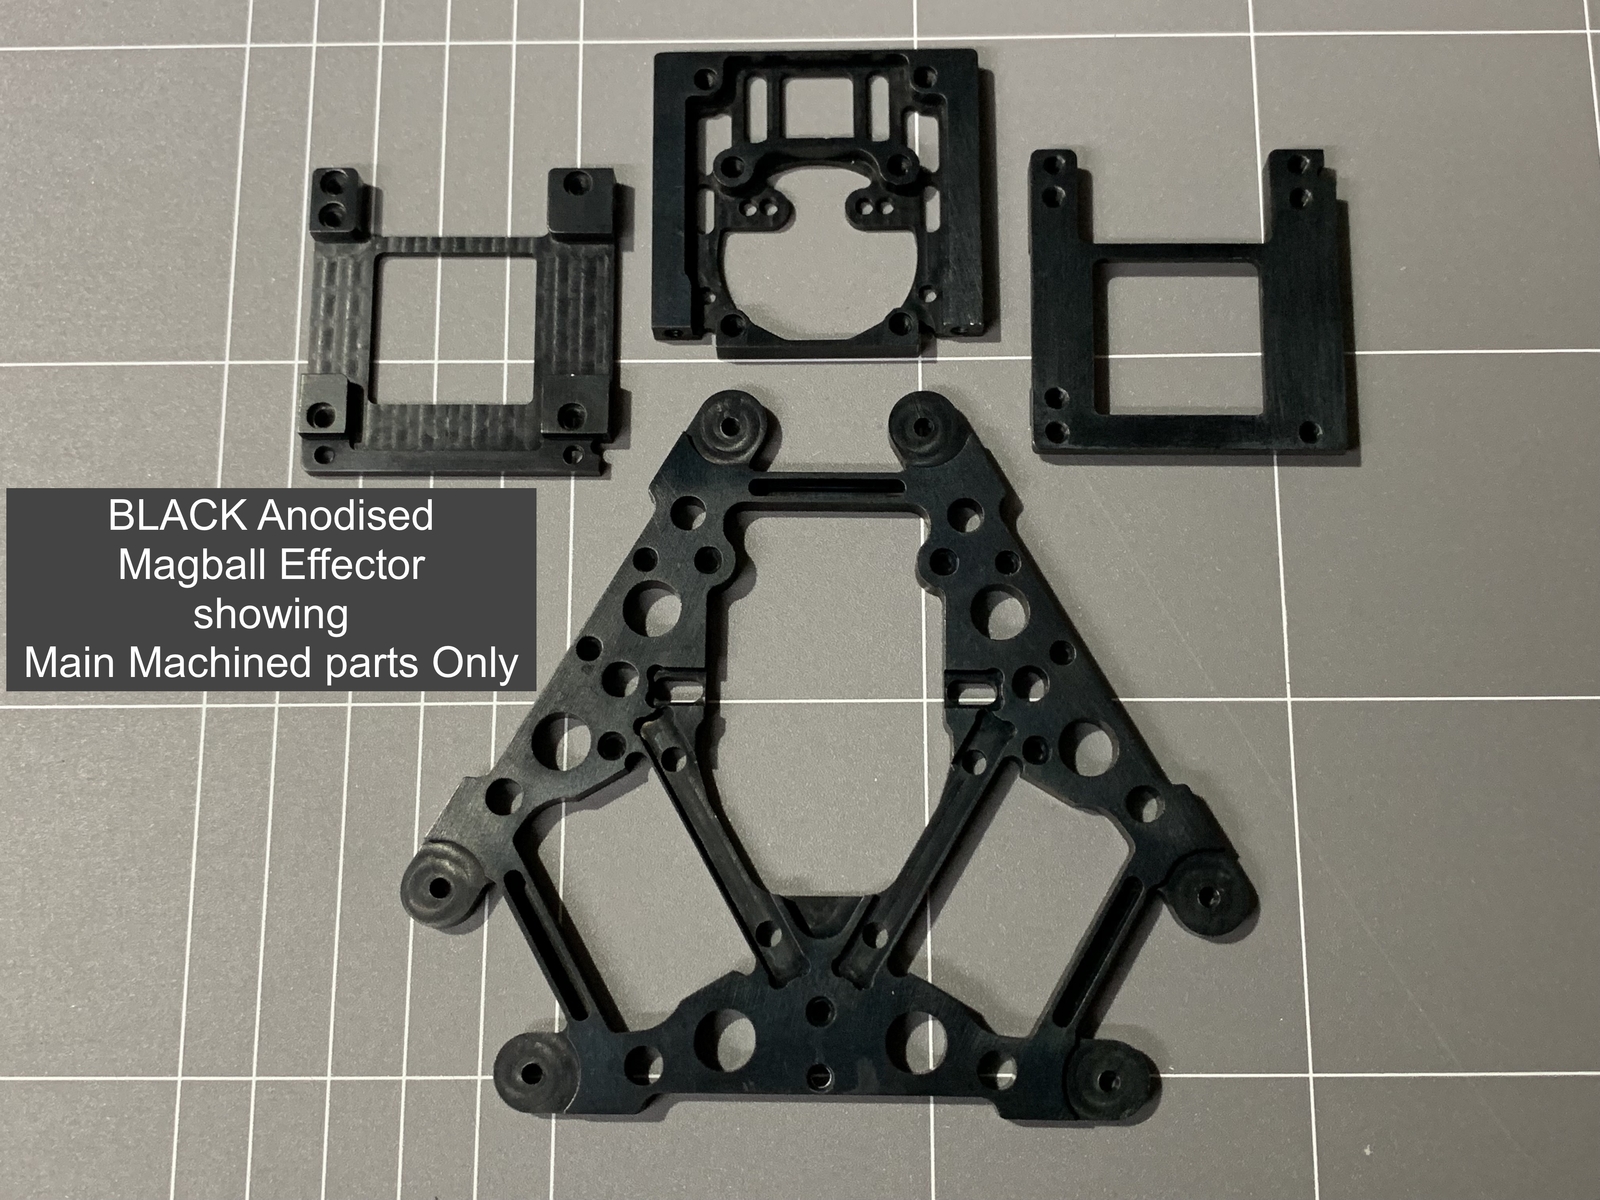 |
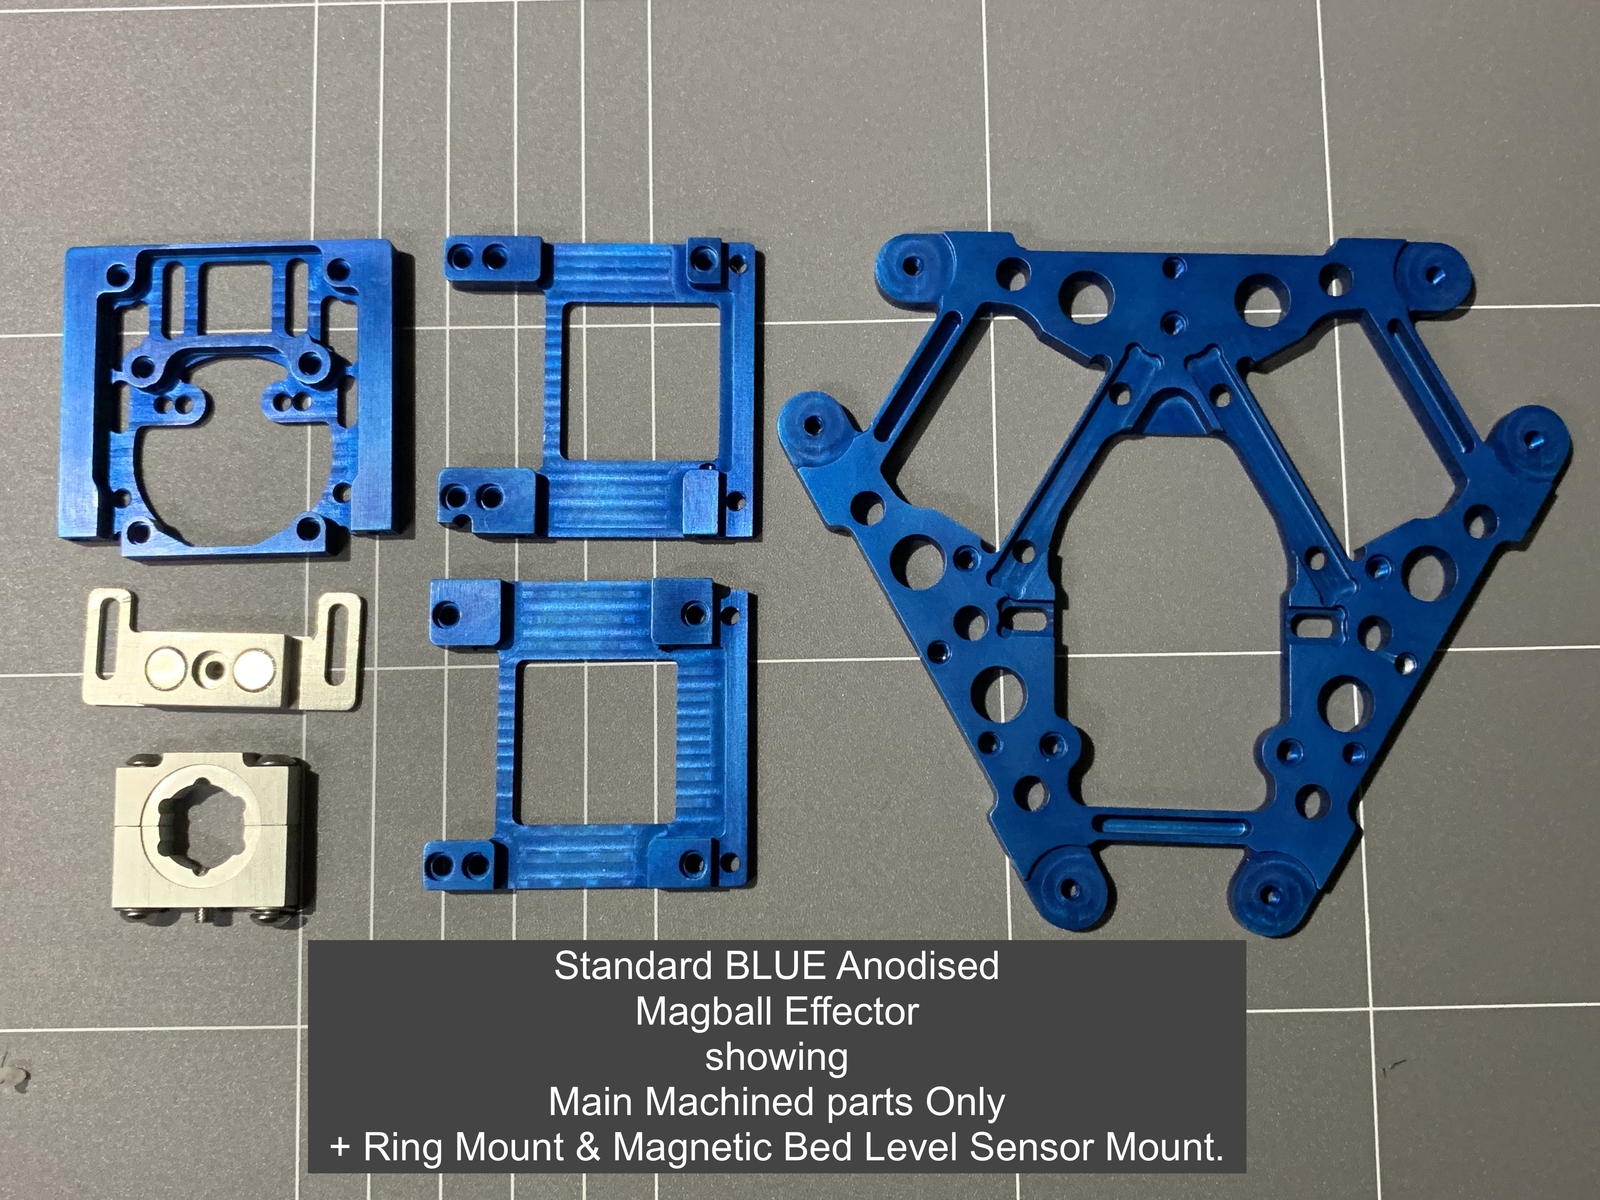
Anodised Colour Choice - BLUE is Standard. (Note colour tone may vary from that shown in the images below)
 |
 |
 |
 |
 |
 |
 |
 |
Extruding 100mm
I am no longer regularly making my Effectors for sale.
However if you do have a special interest please feel free to Contact Me.
However if you do have a special interest please feel free to Contact Me.
Modified Carriage Adapter version created Haydn Huntley to suit the specific 75mm arm spacing of my effectors. The original version by Haydn Huntley for his magball arms downloadable on Thingiverse has an arm spacing of 76mm and even though these do work with my effectors the 75mm Carriage Adapter version included with this note does match exactly my effectors spacing for magball arms. There is no other change except for the hole spacing.
A big thank you to Haydn Huntley for modifying and making this updated Carriage Adapter file for me to be able to make available to my effector customers. Anyone wanting to purchase Haydn's magball arms can visit his website: https://www.magballarms.com/
Or contact him directly via his email: haydn.huntley@gmail.com
Or contact him directly via his email: haydn.huntley@gmail.com
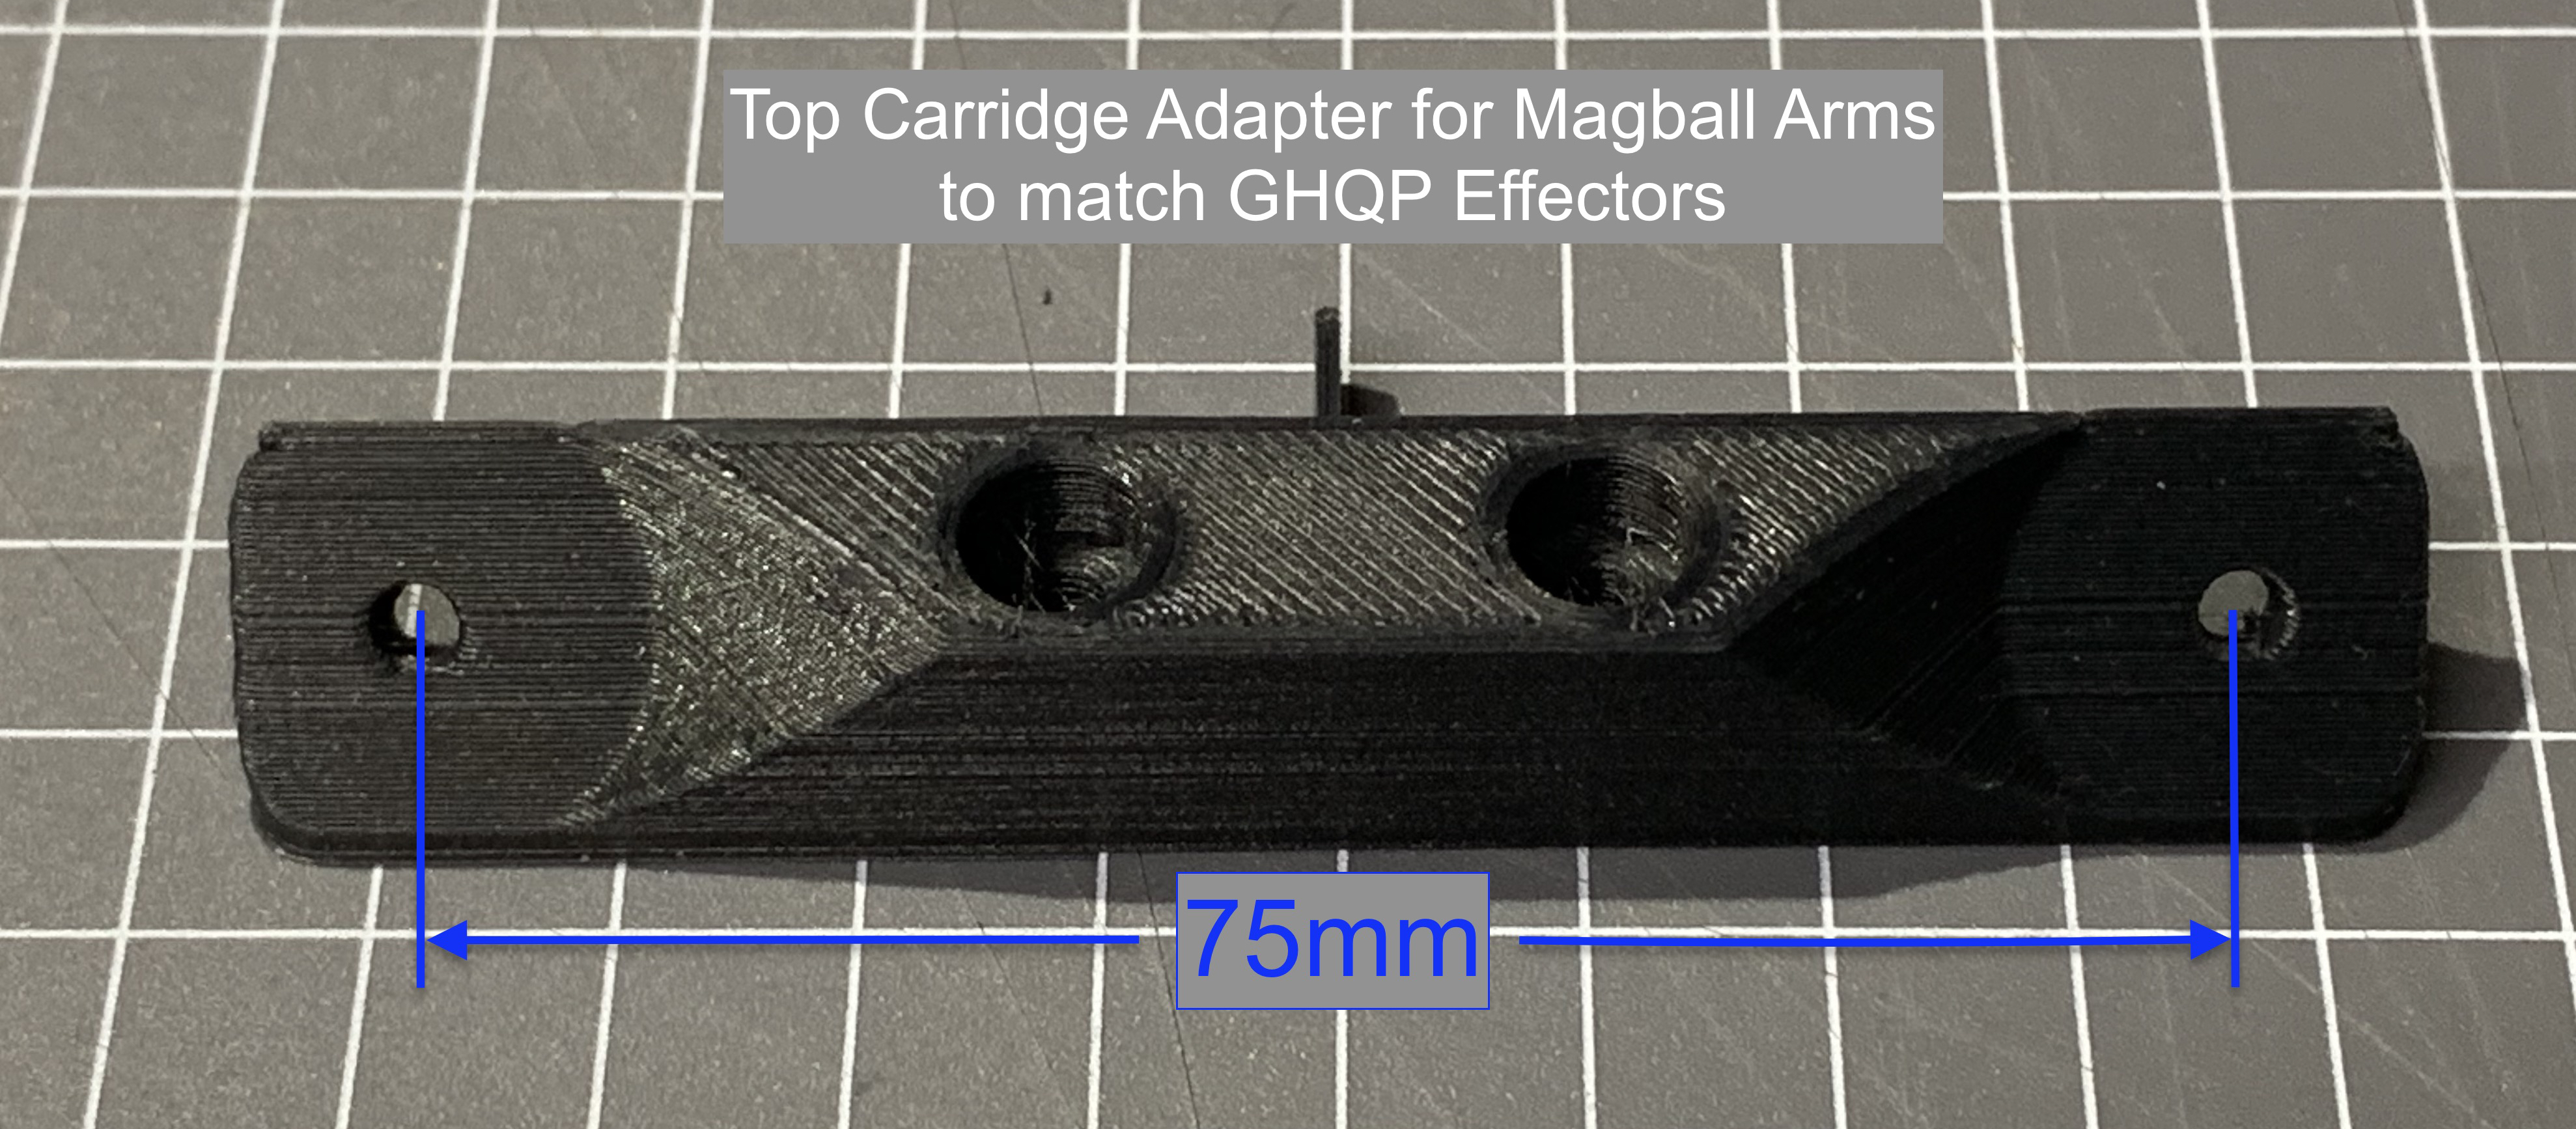
75mm Carriage Adapter .stl file
Important if fitting MagBall Arms to any of these Effectors.
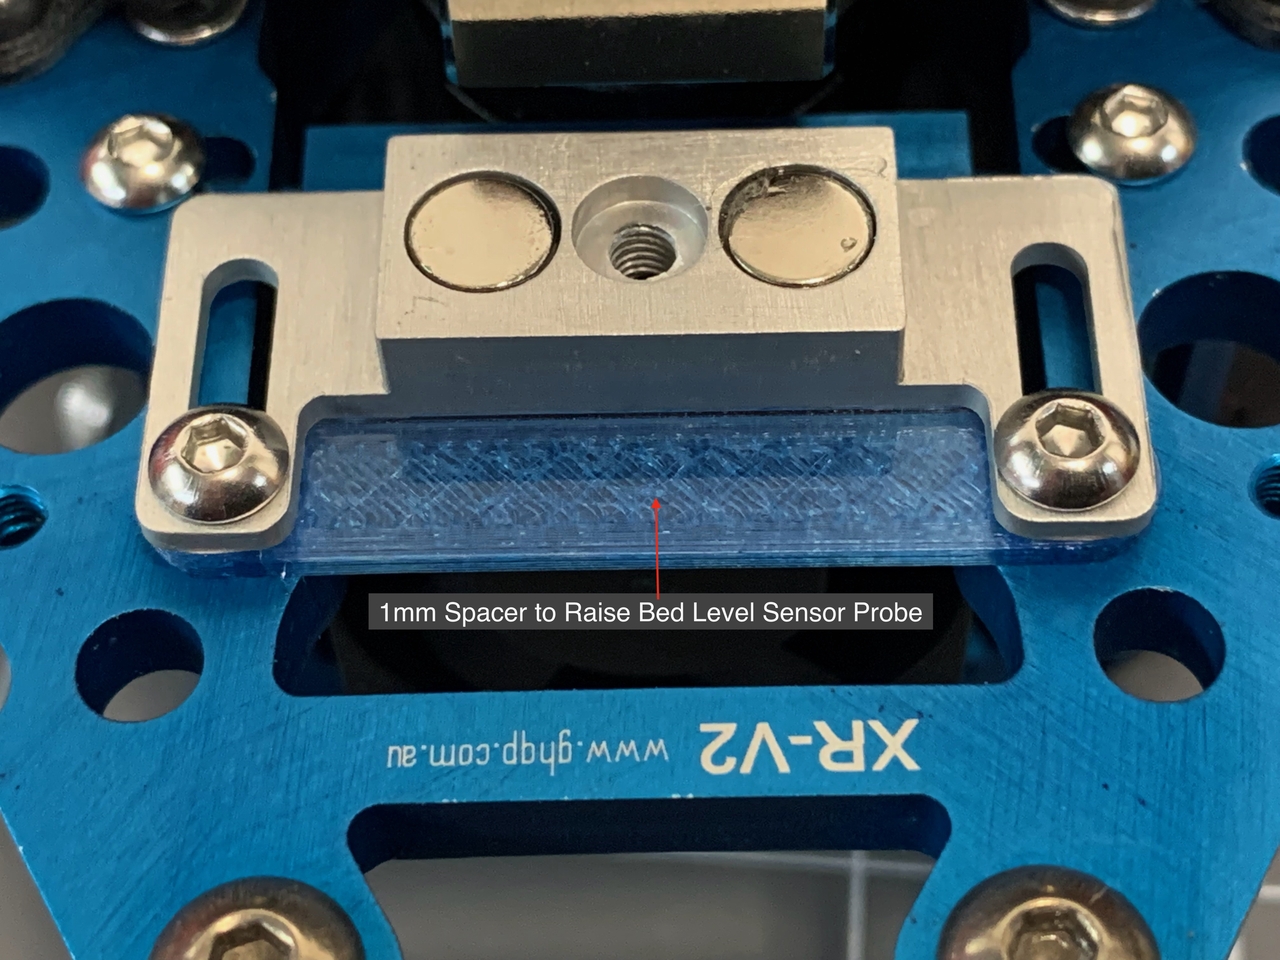
Part Cooling Duct Bottomside W-Spacer
This is a modified Bottomside Duct that has a merged 1mm spacer
Added Part Cooling Duct Spacers stl file
Part Cooling Duct Spacers 1, 5 and 9mm
These can be used to lower the part cooling duct to accommodate longer hotend blocks and extensions.
NEW
.stl Files: